 Written By :

To set up an ESP Eclipse
1) Use a 5/16″ wrench to set the relief to 0.008.” Use feeler gauges to measure
2) Set the action to 5/64″ and 4/64″ at the 12th fret on both E-strings
3) Set the intonation with a 1/4″ screwdriver
4) Set the bass & treble pickup height to 3/32″ and 2/32″ respectively.
And this is the brunt of how you set up an ESP Eclipse, including the E-II model, the new re-branded version of the classic models. There are some extra tips, parameters, and other important things to share which we’ll do in the following sections.
Additionally, I’ll share with you all the equipment and tips I like to use for this because some tools make the job a lot easier. For instance, you always want to loosen the D and G strings to move them out of the way for the truss rod adjustment.
Otherwise, you’ll risk putting the wrench on the nut awkwardly and stripping it. I made this mistake with my 20-year-old Epiphone Les Paul Custom. Oh well, you live and learn, but I digress. Let’s dive into the dedicated and detailed tutorial down below.
Setting Up An ESP Eclipse – A Step-By-Step Guide

You can’t get the original Eclipse unless you buy one used, but the E-IIs are easy to get on both Thomann and zZounds. Some people believe there is enough of a difference between the two models to warrant a comparison. This thread is an example.

Either way, how you set these guitars up – whether it’s the Standard series or E-II – will be practically identical with maybe a few small differences. Anyway, let’s get into a brief guideline of how to set up the ESP Eclipse down below.
A Brief Set-Up Guideline For The ESP Eclipse
Here’s a brief guideline on how to set up an ESP Eclipse, including all of the most common measurements and the factory specifications.
| Set-Up Parameter | Fretting | Custom Measurement | Factory Specification |
| Truss Rod Relief (At 9th Fret) | 1st [capo] 17th Fret [finger] | 0.008” [0.2032mm] | 0.010” – 0.020” [0.254mm] to [0.50mm] |
| String Height (At 12th Fret) | N/A | Low E: 5/64″ [1.98mm] High E: 4/64″ [1.19mm] | Low E: 5/64″ [1.98mm] High E: 4/64″ [1.19mm] |
| Pickup Height | While depressing the 22nd fret | Neck Pickup: Low-E: 3/32″ High-E: 3/32″ [2.38mm] Bridge Pickup: Low-E: 2/32″ High-E: 2/32 [1.58mm] | Neck Pickup: Both Sides: 3/32″ [2.38mm] Bridge Pickup: Both Sides: 2/32″ [1.58mm] |
ESP isn’t too crazy about giving factory specifications in their manual, because a lot of it is up to taste, but they do state a few things.
Some of these are also based on or inspired by the Guitar Player Repair Guide from Dan Erlewine.
On the left-hand side of the chart, we have the set-up parameter which refers to what you’re adjusting.
The “Fretting” column refers to whether you have to fret a note on the guitar to make a proper measurement, including what fret if this is the case.
And then there is “Custom Measurement” which is my preference. Finally, I’ve included the “Factory Specifications” on the right which comes from the manufacturer, particularly from the manual.
As you can see, ESP is fairly broad in terms of its truss rod relief measurement. In the manual which you can find here, they basically say that 0.010″ – 0.020″ is plenty bow and they leave it at that.
The specifications shared above are a great starting point for getting your guitar to play and sound pretty good. You can take things from there if you want to get more particular and tailored to your specific needs.
It’s worth mentioning that I also tune my ESP Eclipse to C# (down one and a half steps from E standard), so for that reason, I like to keep the action a bit higher than I normally would.
This gives the strings enough room to vibrate. We’ll talk more about how strings vibrate and how to make room for that with relief later. Additionally, I use 52 – 10 Ernie Ball cobalt strings sometimes. Ernie Ball often calls them skinny-top/heavy-bottom.
If you intend on using similar strings, you’ll need to file down your nut slot to accommodate for the increased thickness or take it to a luthier who can do it for you. The same thing will probably have to be done for your saddle as well.
According to the manual, non-tremolo guitars like the Eclipse come with 10 to 46-gauge strings, which is pretty close to normal.
Tools You Need for Setting Up An ESP Eclipse
If you’re new to guitar technician stuff, no worries, because there are a lot of bundles and kits you can buy online.
For example, Music Nomad makes a lot of great stuff including the Music Nomad “KISS” Set-Up Kit.
Personally, I don’t own one of these because I’ve just gathered tools here and there over the years, but the reviews of Music Nomad stuff tend to be quite positive.
If you want to buy everything all at once and you don’t want to take the time to go out and buy each individual tool, they’re a great start. Otherwise, I’ll give you the individual links for tools that I own in the next section. The first thing is wire cutters.
1) Wire Cutters
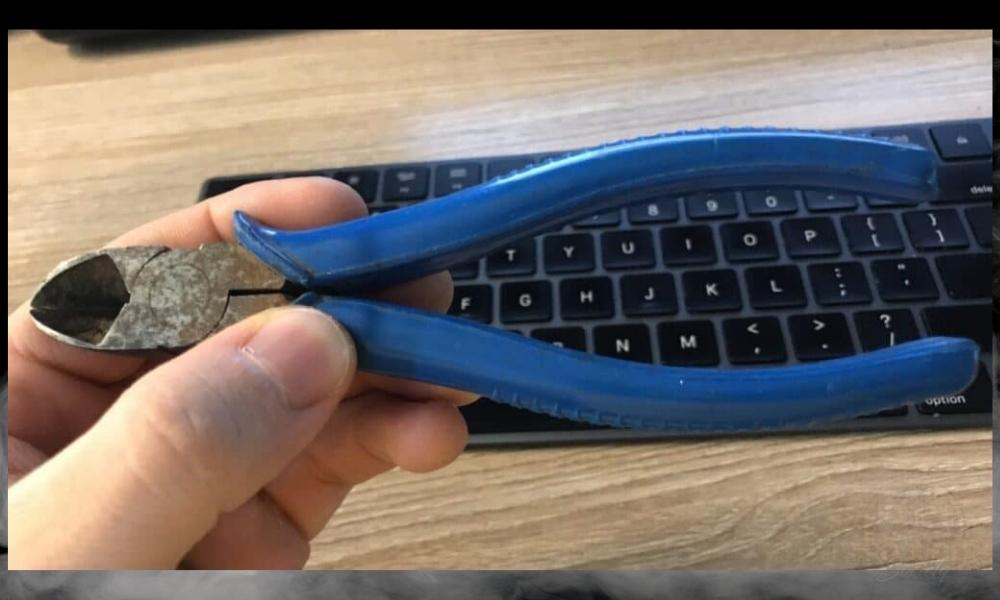
I use these to cut the strings near the pickups or sound holes. It makes changing strings a lot faster, although, with the Gotoh or Sperzel locking tuners, you don’t really need to cut them because you can just unwind the thumb screw and then pull the string out.
That said, you definitely will need some kind of wire cutter to cut the ends of the strings off after you’ve pushed them through the tuning peg holes. I also find them handy for cutting the strings in half before putting them in the garbage.
2) Philips Screwdriver 1/4″ or #2
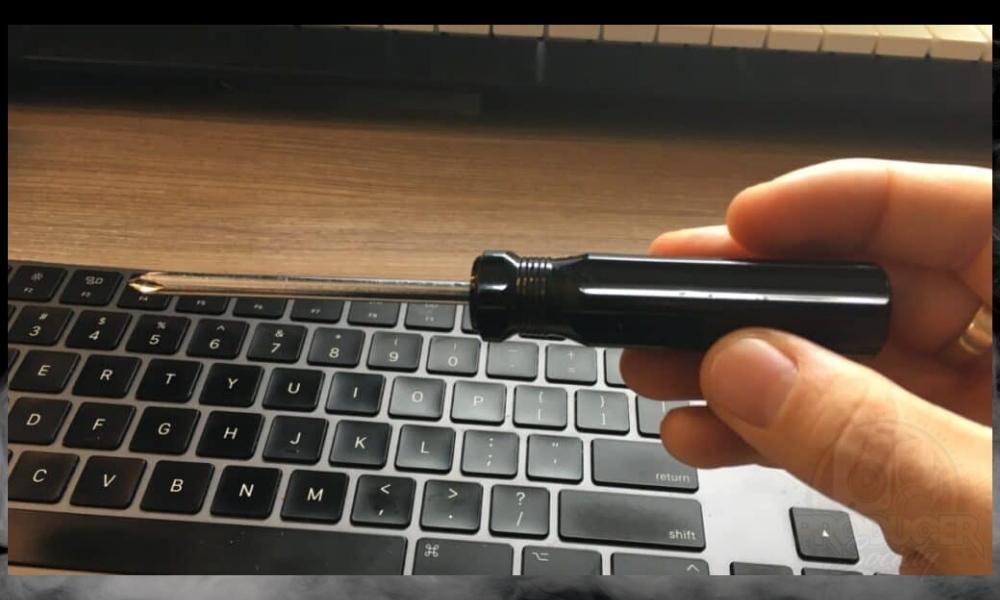
I use this 1/4″ screwdriver probably more than anything else in my entire repair/maintenance kit. For real, every single guitar, accessory, or pedal has a screw at least somewhere that utilizes a 1/4″ screwdriver. It’s definitely a must-have.
3) Flat-Head Screwdriver

I believe this is a 1/8″ flat-head screwdriver but a 1/4″ flat-head screwdriver will work just fine. You could probably even use a dime to adjust your pickups, but if you’re serious about setting up all of your guitars, getting the proper tools is probably a good idea.
4) Truss Rod Wrench [5/16”]

If you bought your ESP Eclipse from a reputable place, you probably got the case, manual, and truss rod wrench with it.
If you didn’t, grab a 5/16″ wrench from Music Nomad. It comes with a pick capo as well as some feeler gauges. The capo pick is pretty cool and a neat invention that I’ve never seen elsewhere except from Music Nomad.
5) Mitutoyo Straight Ruler
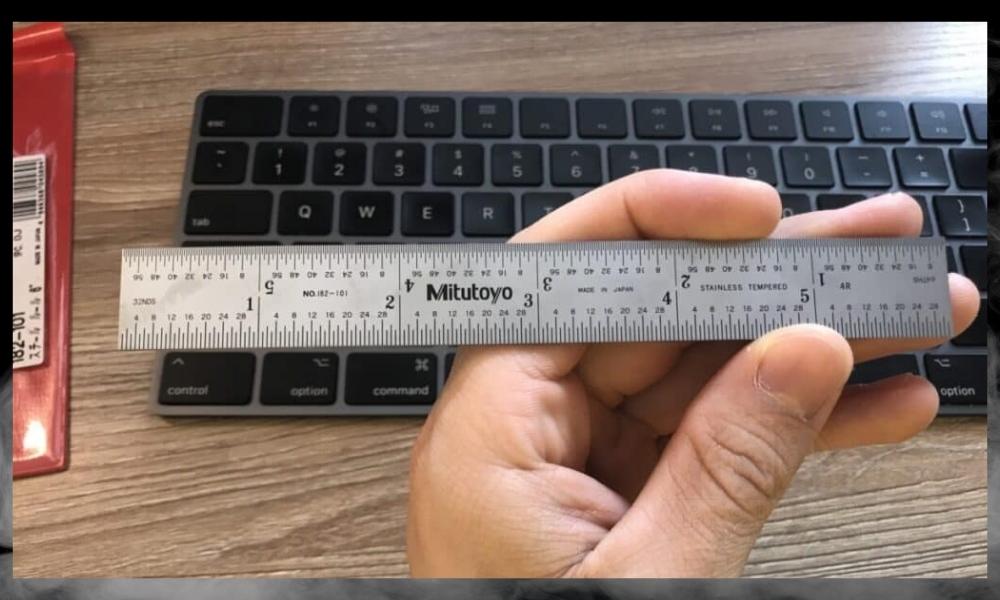
It measures according to inches, half-inches, 1/4,” 1/8,” 1/32,” and 1/64″ as well. The only thing it’s missing is metric, but oh well. It does what it’s supposed to do.
6) Cleaning Cloth
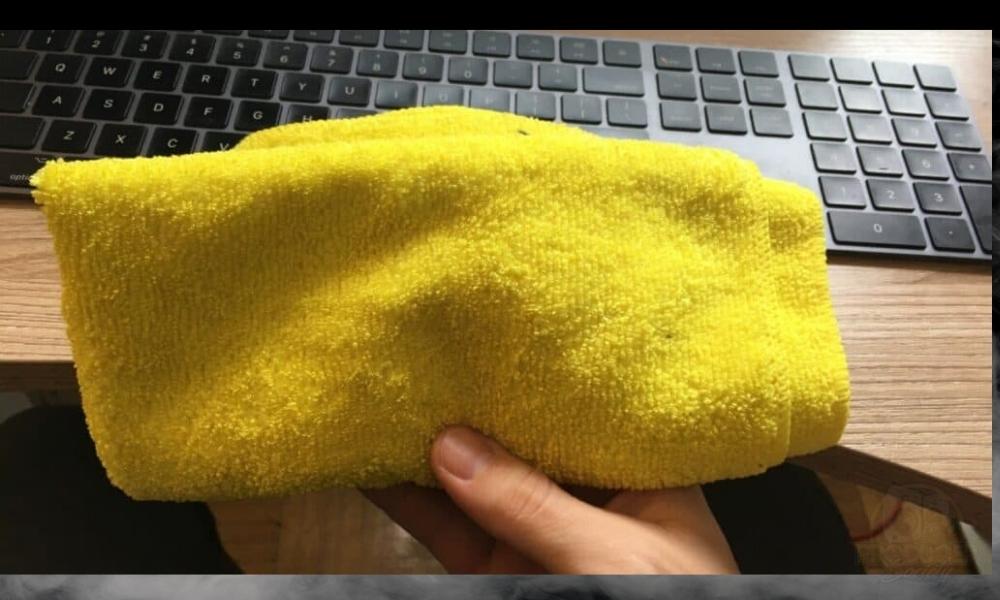
I go through quite a lot of these because I like to clean my guitars with them. They’re great for every aspect of cleaning the instrument, including the body, fingerboard, etc.
7) Guitar Polish/Cleaner
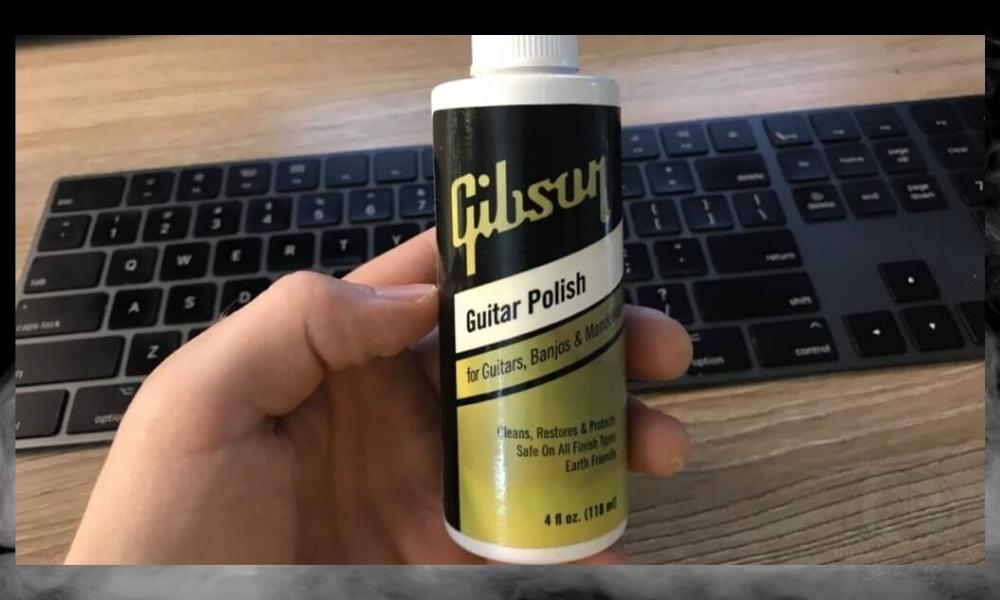
I typically avoid oils and other products like lemon oil because I know there are some wood types that it doesn’t agree with which I’ve talked about before.
8) Fretboard Conditioner
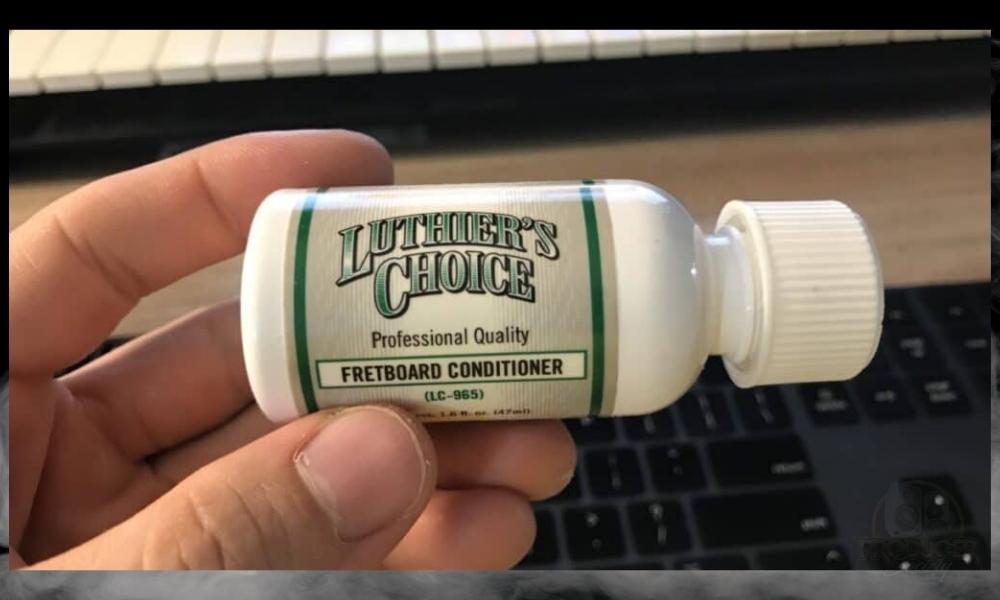
I’ll show you how to apply this stuff sparingly later. Again, the brand probably doesn’t matter too much. I just stick with reputable companies and hope for the best.
9) Snark Tuner
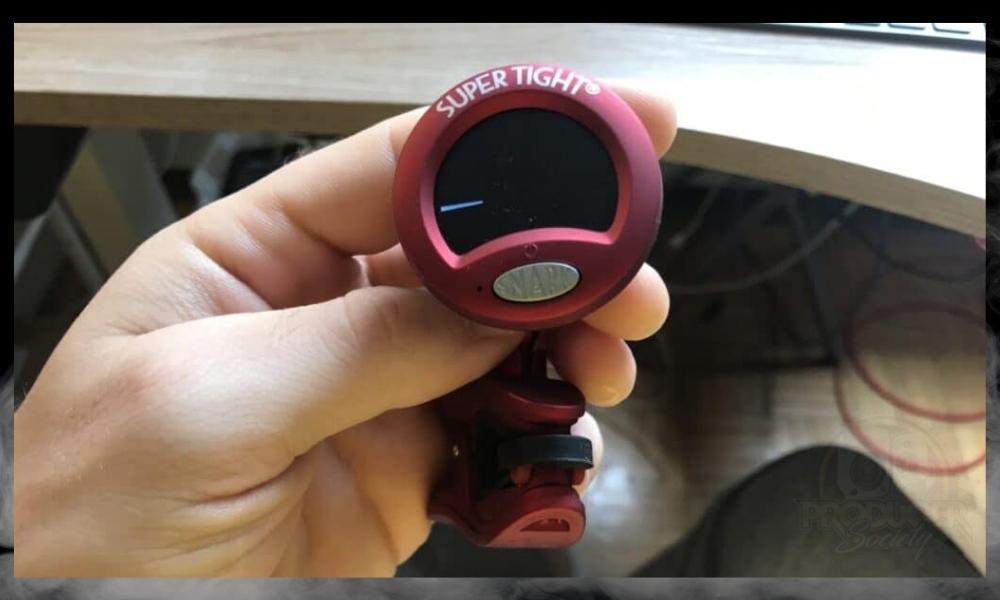
A lot of people talk badly about Snark Tuners and other clip-on devices but I think they work pretty well.
They’re especially useful for set-up and maintenance because you don’t have to continuously plug your guitar in and out of the tuner.
And that’s really the main reason why I like using them for set-ups so much.
10) Capo
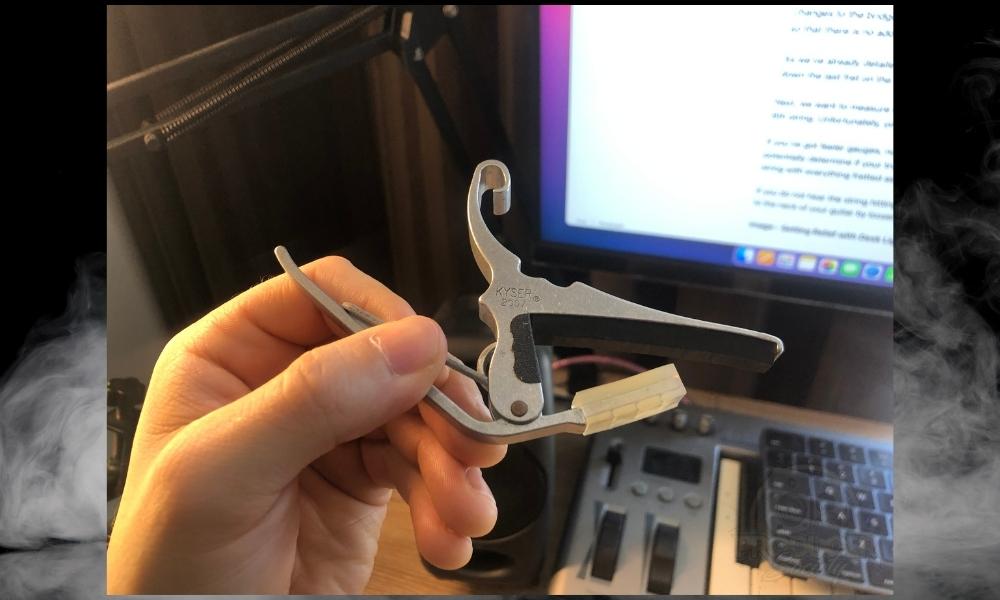
Any old capo will work just fine. The Music Nomad case I mentioned earlier comes with the Capo Pick that I talked about – a cool invention on their part (at least I think it’s their invention).
11) Feeler Gauges
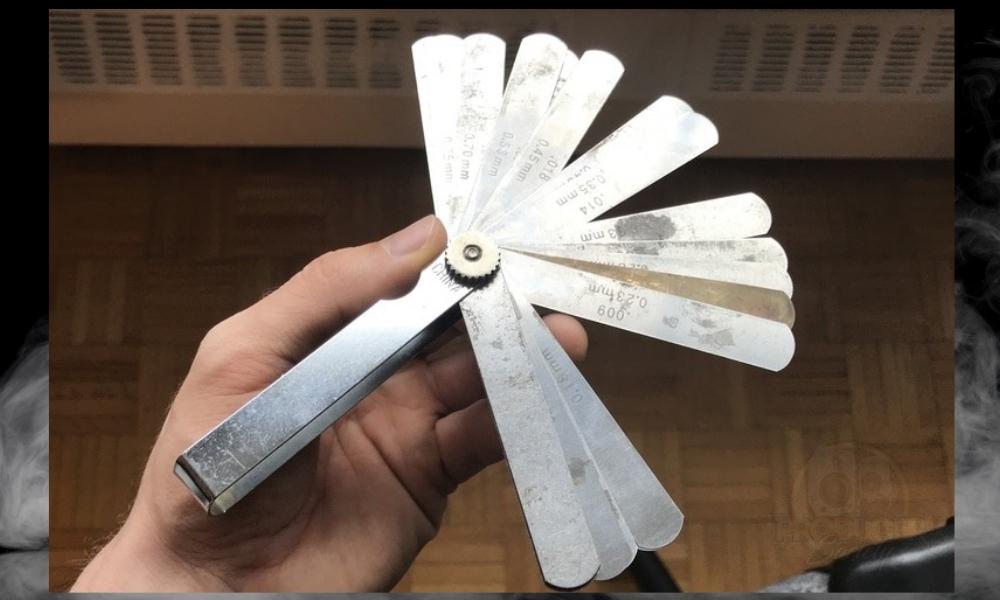
You can find feeler gauges on Amazon as well without an issue, but I prefer brand-named gauges. The Harley Benton ones on Thomann seem to get a lot of praise and they don’t kill you with the price.
You could settle for a pair of gauges where you don’t get every measurement, but personally, I wouldn’t bother with that. Just get the gauges where you get a ton of options, right down to 0.001.”
12) A Desk Light (Optional)
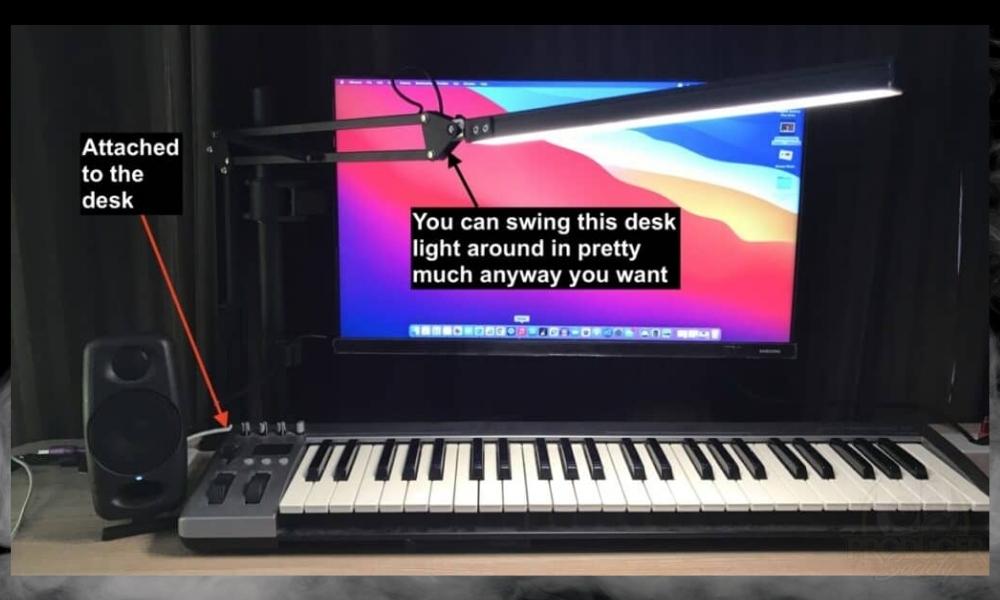
It’s perfect for setting up a guitar or doing any work like that. You can move it in pretty much any position that you want to.
13) Adjustable Desk (Optional)

At some point though, I’ll probably upgrade to a super-fancy desk with lots of compartments, drawers, and additional sections that way I can hold ALL of my MIDI controllers and whatnot. Anyway, let’s get into the actual process.
How to Set Up The ESP Eclipse

The first thing I do is adjust my desk so I can stand at it and work on the guitar. I grab a towel from my bathroom – two of them, in fact – and one of them goes underneath the body and the other one is used to support and raise the neck so I can get at the tuners.
There are custom accessories you can buy online to do this stuff, but any old towel will work just fine. It’s also useful to have the desk light because I can shine it wherever I want to for visibility’s sake.
1) Take the Strings Off

Because the ESP Eclipse uses Sperzel locking tuners (I believe the modern E-II’s use Gotoh instead), you don’t even need wire cutters to pull this off.
You just unscrew the thumbscrews on the bottom to loosen the locking bar. Then you pull the strings out of the peg hole. Easy-peasy.
2) Clean the Guitar Before Setting It Up
While you’re at it, you could use this time to make several measurements. For instance, you could measure how high your action is, where the saddles are for intonation’s sake, as well as the truss rod relief (with feeler gauges) before you take the strings off.
This is so you can set everything up in the same way that you had before. Personally, I don’t do this though because I like to set everything up again from scratch.

It’s probably a better idea to just spray the towel or cloth directly and then wipe the guitar down like that, but I kind of like spraying the guitar directly. I just watch out for the pickups and try not to get them overly wet.
After you’ve really wiped everything down, you could probably apply some fretboard conditioner to your cloth. Do this sparingly because it doesn’t need a lot. This is especially the case if you change your strings as much as ESP recommends (once every 2 weeks).

Fretboard conditioner only needs to be applied around twice a year, I would say, although, maybe it could be a little more or a little less.
I live in a super cold and dry climate so twice a year probably makes sense for me, but if you live in Miami, Florida, you may not have to do it often at all.

You’ll know your guitar needs the conditioner because the moment you apply it, it’ll soak in. For my Eclipse, it rarely needs it because I change the strings and set it up enough.
But for my nylon string which I set up recently, it soaked it right up because probably no one has ever given it oil before up until that point.

Cleaning the hardware is a little more difficult because there are many nooks and crannies that are hard to get to. This is especially the case if you’re wiping down the saddle where the strings sit.

It doesn’t hurt to use your fingernail underneath the microfibre cloth so you can really clean everything. Flip the guitar around and clean the backup nicely. Get it shiny and beautiful.
If you’ve got really dirty frets, you could use some 0000 steel wool to gently scrape down the frets. But I would make sure to put painter’s tape on the fretboard first because you don’t want to wreck anything.
I’ll say it again, painter’s tape is a must for your fingerboard if you intend on using steel wool. While you’re at it, cover the electronics so you don’t risk getting any steel wool near your electrical components (like the magnets in the pickups).
While you’re at it, you could also take the truss rod cover off because it’s easier to take off when you don’t have any strings on it.
3) String the Guitar Back Up

It isn’t impossible at all to do this either, even though it may seem to be the case. The screwdriver will have enough room to get in there.

I find this just makes putting new strings on a lot easier, and it’s something I’ll do on any guitar, including a Les Paul. I first talked about doing this in my Les Paul set-up guide.

Locking tuners save a lot of time, and I really do mean a lot. You just have to stick the string through and then tighten the thumbscrew on the bottom of the headstock.
This saves you from having to wind the strings around the tuning peg three times. And you won’t have to ensure you have enough string to actually pull that off nor will you need to worry about kinks or really anything else of that nature.
Just stick the strings through and then tighten it so the bar wedges the string against the inside of the tuning peg. Don’t go crazy with tightening it by the way, because it really won’t be necessary.
ESP says this in their manual as well. Don’t get freaky and start going crazy on the thumbscrews with a pair of vibe grips or pliers, but I digress.
In some cases, you could also put some lubricating oil on the nut which supposedly helps with tuning stability. Big Bend’s Nut Sauce is a popular one.
This is something I’ve never actually done but I’ve noticed a lot of people recommend it including Ben Eller. The fact they call it “nut sauce” is kind of funny, I have to admit.

This is how you wind the strings around any headstock with 3 pegs on the left and 3 pegs on the right. The strings should always be on the inside, and never the outside.
4) Tune The Guitar

As I’ve mentioned before, a lot of people hate the tuners and state they’re not very accurate, but I’ve never had a serious problem with any of them. I say the same thing about the apps too. They work just fine.
Sure, a guitar tuner pedal will probably be better (I have a guide on how to use one by the way), but let’s get real. Convenience is everything.
Put your clip-on tuner on the headstock and then tune the guitar up to where you want it to be, approximately. At this point, it doesn’t have to be perfect.
You just want a reasonable amount of tension for adjusting the truss rod. It’s worth stating that it’s always easier to tune up to a note and not down to a note. You can thank me for that one later.
5) Adjust the Truss Rod

Take your truss rod cover off with your 1/4″ screwdriver because we’re going to adjust the neck now. Don’t worry about it at all because it’s not as big of a deal as people say it is.
Simply put, you need a bit of relief in the neck to accommodate the way the strings vibrate which the image above illustrates.
Every time you strike a string, they move up and down super fast. So you need space for it to vibrate. A totally straight neck doesn’t allow for this elliptical pattern.

Your guitar neck should be neither of these. It should fall somewhere in the center. It’s important to note that the lines in the image above are also exaggerated to explain the concepts.

You’ll probably have to try a few different gauges because you never quite get it on the first try. If you were that much of an expert, you probably wouldn’t be reading this blog post.
A good rule of thumb – and I mentioned this in my Epiphone Les Paul guide – is to get the truss rod relief somewhere between 0.008″ and 0.012.” But ESP says 0.010″ – 0.020″ is good to aim for.
Tip:
if you want to be even more accurate in how you do this, put the guitar in the playing position, ie, on your lap as if you were sitting down to play the guitar. You’ll get the most accurate measurement this way.

You can tell by the image above that there is quite a bit of relief so we need to tighten the truss rod by about 1/8th of a turn.

As a matter of fact, this is very important because if you don’t do it, you’ll find yourself putting the truss rod wrench on the nut awkwardly and potentially stripping the nut. I’ve done this before, so don’t do it!
Just take the time to loosen the two strings, move them out of the way, and then you can get your wrench on the nut perfectly.
If the distance between the string and the fret is substantial, tighten the truss rod. If there is no gap at all or a very small gap, loosen the truss rod. Tightening the truss rod will straighten the neck (concave) and loosening it will create more relief (convex).
A lot of people say you shouldn’t make drastic adjustments, but I think they greatly exaggerate the importance of this. As long you’re not doing 1/2 turns or more, you should be ok.
I usually keep the turns of the truss rod nut to around 1/8 of a turn. See how things look once you’re done with that. If you’ve never done a truss rod adjustment before and you’ve had your guitar for a while, there’s a good chance it might be a little stiff.
If this is the case, don’t worry if there is a small creaking sound. Just keep your turning increments small and you’ll have nothing to worry about. It could also help you to slightly loosen the truss rod and then begin tightening it.
If you’ve never adjusted the truss rod before on your instrument and it’s very old, it might even sound like it’s cracking. But trust me, it’s all good.
Besides, this will mostly be a problem with much older guitars and not an Eclipse. Wait 10 to 15 minutes and then measure the truss rod relief again before moving on to set the action.
6) Set the Action

How you set your action is up to you, but I find there is definitely a limit to how low you can go. On a guitar with unbelievable fretwork, you might be able to get down to 3/64″ and 2/64″ on the Low and High-E strings, respectively.
But most guitars, including the ESP Eclipse, are going to work best if the action is set to 5/64″ (0.078″) and 4/64″ (0.062″) on the low and high e-strings.
Some people may get it even lower to around 4/64″ and 3/64″ respectively. Measuring the action isn’t terribly difficult either. It takes the least effort because you don’t have to fret any strings or use a capo.
Tip:
It’s also best to make this measurement in the playing position, ie, when the guitar is sitting in your lap as if you were about to play it.
Just measure the distance between the top of the fret to the bottom of the string. Have a look at the string from a few different angles while you’re at it. It’s important to do this after you’ve set the truss rod relief, by the way.

I use a swiss-army knife to raise and lower the action because the slots on the bridge are massive. You could also twist the thumb screws with your hands too.
Do yourself a favour and loosen the strings by a good amount before you try and raise your action. If you’re lowering the action, it’ll be much easier because you’re relieving tension instead of increasing it.
But either way, it’s best to de-tune a bit. And the same thing goes for setting the intonation as well. If you want the saddles to actually move, you’ll want to loosen the string a bit to relieve some of that tension. Let’s get into the intonation now.
One thing I will say before we move on though is that it’s normal to have at least a bit of fret buzz on your guitar because that’s just the nature of all fretted instruments.
Most people, including myself, are just too vigilant when it comes to buzzing, and we want to assume our playing sounds bad because of a bad set-up when really we just need to practice more. Anyway.
7) Set the Intonation

For the intonation, it’s probably best to have the most accurate tuner you can get, but I always use the snark clip-on and I find it serves great results. I don’t want to beat a dead horse on this one because we already discussed this earlier.
In simple terms, the intonation is how in-tune the guitar is with itself. By comparing the low-E with the E at the 12th fret, you get an idea of the guitar’s intonation.
If the guitar is intonated near perfectly, the open string should be the same tuning as the same note at the 12th fret – just one octave higher. If there is a 0.1 or 0.2 cent difference, it’s not a huge deal.

Make sure you de-tune the guitar first a little bit so you can actually move the saddle back and forth without much resistance.
Here’s another tip for you:
Stop the string from vibrating and stop the tuner from measuring between the measurements. This gives it a chance to reset.
1) pluck the string to get the tuning
2) press your finger against the string to stop the vibration
3) wait for the tuner to forget or clear the last note
4) measure that same note but with a 12th fret harmonic
And finally, we’re left with the pickup height. This is pretty easy to do as well.
8) Set the Pickup Height

I usually put the steel ruler in the center of the pickup to make the measurement. The string will be on an angle because of the way you’re depressing it and the nature of the instrument’s shape. A measurement from the center of the pickup accommodates this.
In general, the pickup height on an ESP Eclipse should be around 3/32″ and 2/32″ on the bass and treble sides respectively of the treble pickup. The neck pickup can be around 3/32″ on both sides or just a bit further.


The pickup height is easily adjustable. When you turn the screw either clockwise or counterclockwise, the pickup will move accordingly. So be sparing in your turns because every time you turn it even just a bit, there will be a significant difference.
Also, ensure you’re adjusting the proper screws which are the single screws in the center of the outside. Don’t adjust the 4 in the corners.
9) Change The 9V Battery In The Back

In some cases, you may find yourself with a guitar with active pickups that aren’t working, or maybe the guitar sounds super soft and quiet. Usually, the problem is just that you forgot to turn your pickups up, but the 9V battery will run out from time to time.
It takes a long time for the battery to run out. According to the ESP Manual, for example, active electronics can last anywhere between 625 and 3000 playing hours.
One thing that’s important to mention is that having the cable connected to the guitar will engage the battery, so make sure you don’t leave your cable plugged in.
Other Articles You May Be Interested In
- How to Set up An Epiphone Les Paul [An Illustrated Guide]
- How To Set Up A PRS Guitar (Step-By-Step)
- How to Set Up a Squier Telecaster (Step-By-Step)
- How to Adjust the Action on a PRS Guitar (With Pictures)
- How to Adjust the Action on a Squier Telecaster [ANSWERED]
- How Much Does The ESP Eclipse Weigh?

Important Things to Mention About the Eclipse Set Up
1) Don’t Be Afraid To Take It To A Guitar Tech
There are many things I don’t know how to do on a guitar. Most of these things are custom work like putting on a new nut, fret levelling, fret dressing, putting on a new neck, installing new pickups, and stuff like that.
So I understand that some things may seem intimidating. If you feel that way, don’t worry, just take it to a tech. It won’t cost you that much money anyway, especially if you supply them with the parts you need – if you even need them.
2) This Process Applies To Many ESP Guitars
With the exception of a guitar with a Floyd Rose Tremolo system, most ESP guitars will be set up in a similar fashion. So If you know how to set up an Eclipse, you probably know how to set up other similar models.
3) Start With the Truss Rod and End With The Pickup Height
A guitar set-up should follow this order:
1) put new strings on
2) adjust the truss rod
3) set the action
4) set the pickup height
5) repeat the next day
This brings me to my next point.
4) You’ll Probably Need To Set It Up Again The Next Day
It’s rare that a guitar will stay set up perfectly the first time you adjust everything. The reason is that it takes a day or two for the truss rod adjustment to really take effect.
That said, the second time you do it, it’ll take way less time because everything will be at least closer to where it should be. The 2nd day gives you the opportunity to really fine-tune everything to your liking.
5) Measurements Are Just Guidelines & Common Practices
Try not to take the measurements given here too seriously. There is a reason why ESP doesn’t have a huge list of recommendations for how to set up their instruments. The reason is that it’s variable and up to the player.
Start with the measurements I’ve given and work from there. If you need to change something because you don’t like it, go for it.
6) Always Make Measurements From the Bottom of Strings
In most cases, the measurements will almost always be taken from the bottom of the strings and not the top, so keep that in mind. It’s a bit of an odd thing to include, but I’ve actually asked myself this question earlier in life (top of the string, or bottom?).
