 Written By :

Is your guitar slowly getting more challenging to play? Over time, your Telecaster’s strings may seem to drift further from the guitar’s neck, moving you out of your comfort zone and getting a lot harder to play in the process.
Luckily, we can correct this inevitable nuisance by adjusting the instrument’s action settings. Keeping your Telecaster’s strings set at the right distance from the fretboard helps you sustain a personalized and reliable playing experience.
To set a Telecaster’s action
1) Set the truss rod relief to ~0.008″ by turning the truss rod nut with a 5/32″ (4mm) Allen wrench
2) Use a 0.050″ Allen wrench to raise or lower the bridge saddles so the string height is 3/64″ to 4/64″ when measured at the 17th fret
3) Ensure the saddles are parallel
While all of these steps may sound complicated on their own, every guitar owner can and should learn how to make these necessary calibrations. By following the in-depth tutorial below, you’ll have your guitar feeling like an extension of your body in no time.
Tools You Need to Adjust the Action on a Squier Telecaster

To be prepared for every possible constructional variation, you’ll need a #1 and a #2 Phillips-head screwdriver and one 4mm, and .050″ Allen wrench. Additionally, make sure you at least have a ruler, a capo, and a tuner.
Your Telecaster likely came with a few specifically-sized tools needed to set the action if you purchased it new. However, make sure you’ve got everything on this checklist before beginning work on your instrument.
If you are missing any necessary equipment, don’t worry. You can easily find everything you need online and I’ve included links to find all of this stuff in the article and at the very end in a consolidated list.
Additionally, keep a magic marker or a pen and paper close by to record the alterations you have made to the truss rod and the bridge saddles.
If you ever find what you consider to be a perfect set-up, it’s nice to have a good frame of reference for next time. That said, I’ve come up with some baseline measurements that you can use to start out with.
Without further ado, I’m going to walk you through a shortlist of what you need to set up your Telecaster’s action.
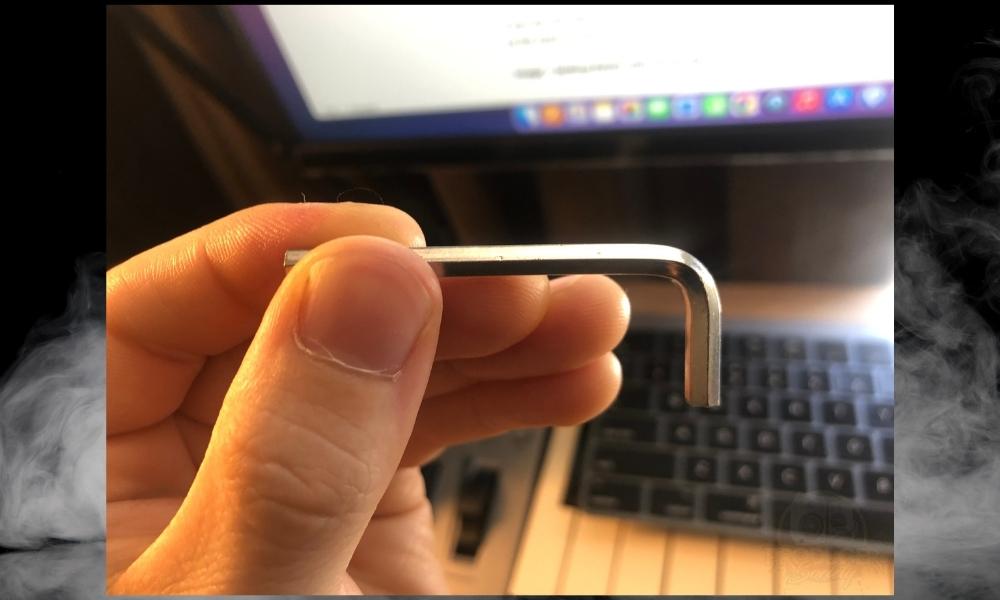
1) 0.050″ Allen Wrench
Naturally, one of the most important tools we will be using to adjust our Telecaster’s action is the .050″ Allen wrench, which is actually the same one I recommended in my guide on how to set up the PRS SE Custom 24 as well.
Just like when you adjust the action on an SE Custom 24 (also my guide), each saddle features two hex screws that serve to raise, lower, and balance the saddles.
Do not use any wrench or screwdriver that does not fit the saddle screws, as this could strip them. For obvious reasons, damaging your guitar’s components will make setting up your guitar more difficult and may result in harm to the instrument itself.
Should your Telecaster feature a truss rod nut at the head of the guitar like mine does, you’ll need an Allen wrench to adjust this as well. We’ll talk more about that in a second, but first, let’s talk a bit about the screwdriver you’ll need for the intonation.
2) Screwdriver (1/4″)
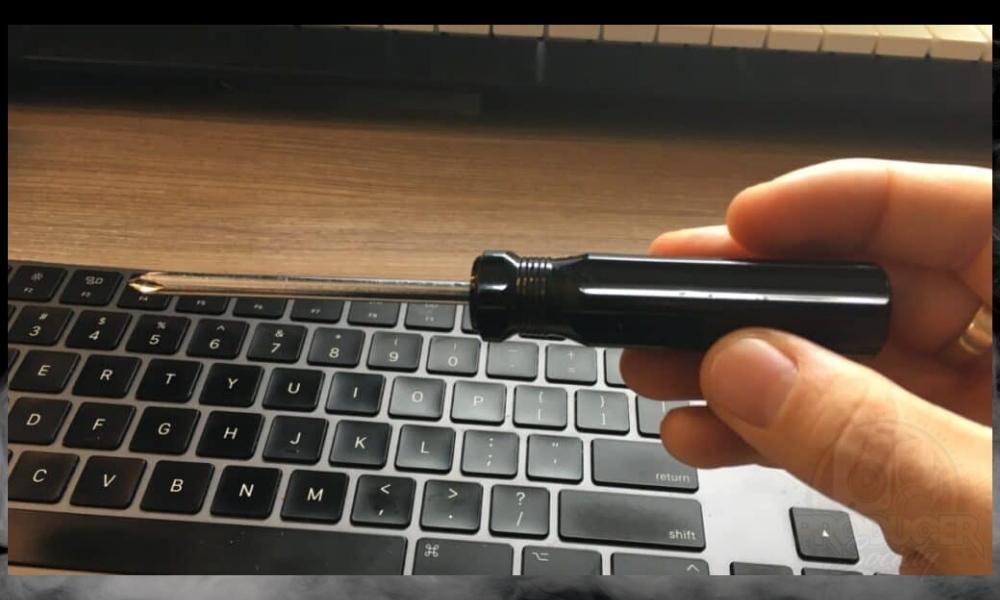
Contemporary Telecaster models come standard with a string-through-body bridge design as seen on the Affinity Series. In this case, we’ll use a 1/4″ Phillips screwdriver to move the saddles forward or backward.
This process will be the means by which we’ll dial in our Telecaster’s intonation once we set our action. Some Telecaster models have truss rods that are only accessible at the heel of the guitar where the neck meets the body.
In this case, you’ll need a #2 Phillips screwdriver to remove the pickguard and potentially the neck of the guitar. The Telecaster I own though, you can just adjust the truss rod right at the headstock as is the case with many other guitars.
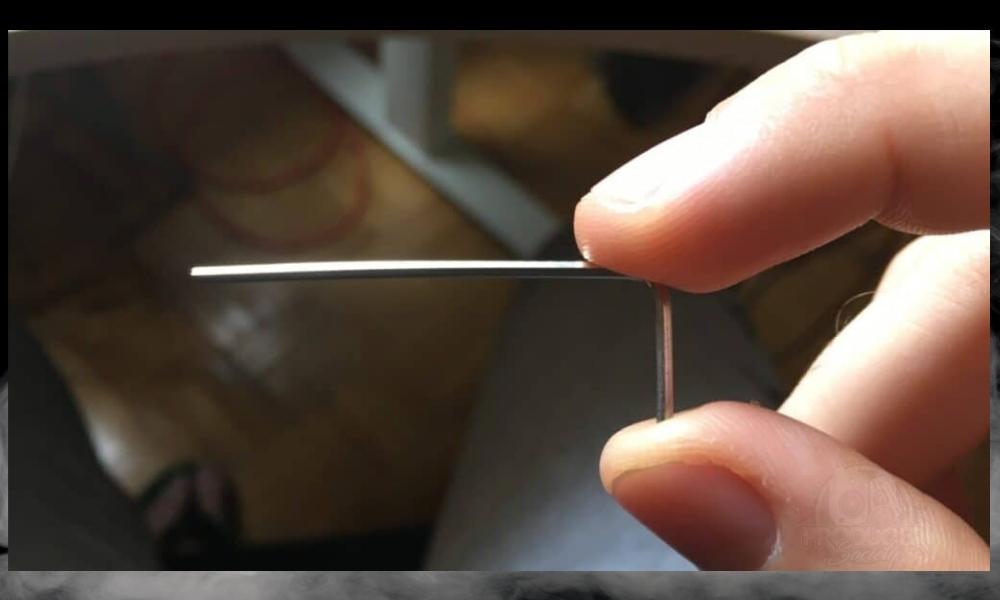
3) Mitutoyo Ruler
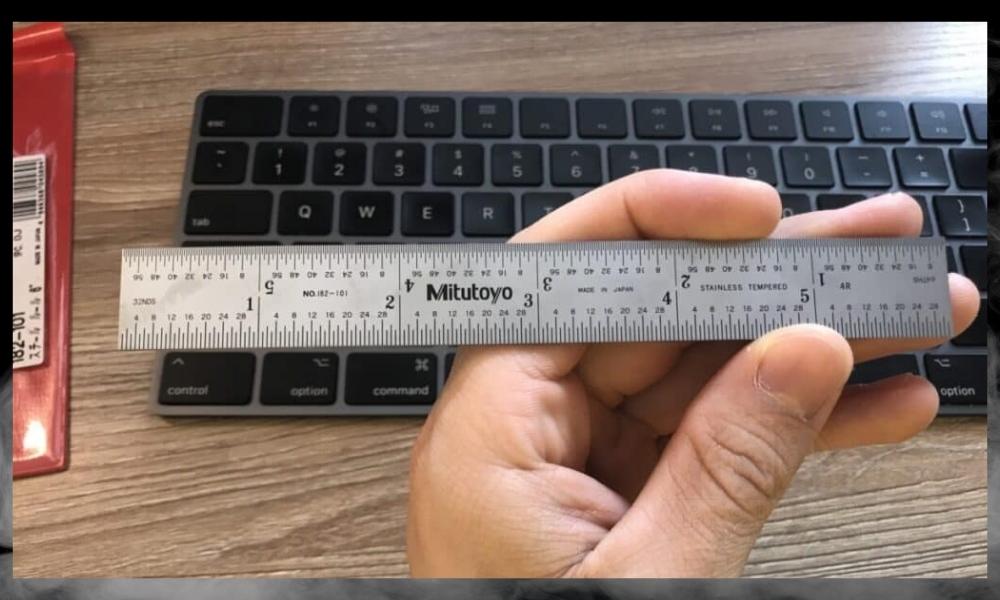
Precision is the name of the game when we’re measuring our string heights. Therefore, we need a ruler featuring small enough increments to help us get our action exactly where we want it.
As you’ll see, we will be taking measurements at a 1/64″ scale. A well-crafted ruler like those by Mitutoyo could help you quickly get a reading on the height of your strings. This is a very decent ruler for the price and I use it for everything now.
4) 5/32″ Truss Rod Wrench (4mm)
Depending on its manufacturing origin, the Squier Telecaster’s truss rod takes a 4mm (5/32″) or 5mm Allen wrench. If you’re looking to buy the correctly sized wrench for your guitar, check what tool you need here.
Since most Telecaster models feature an exposed truss rod nut at the head of the guitar, making adjustments is a fast and intuitive procedure.
For example, on my Telecaster, I just slide the 5/32″ Allen Wrench into the truss rod nut and turn it. One thing I will say though is that I think it may actually be a 4mm wrench that it requires. While 5/32″ works fine, there seems to be just a tiny bit of play.
If your truss rod access resides at the neck joint of the guitar, all you need is a slot-head screwdriver. Specialized tools do exist that can prevent you from having to take off your guitar’s neck.
While these tools are helpful, removing the neck is the safest way to make adjustments in this case. That said, most telecasters, if I’m not mistaken, just have the truss rod nut at the top of the neck like I’ll show you in a minute.
5) Capo
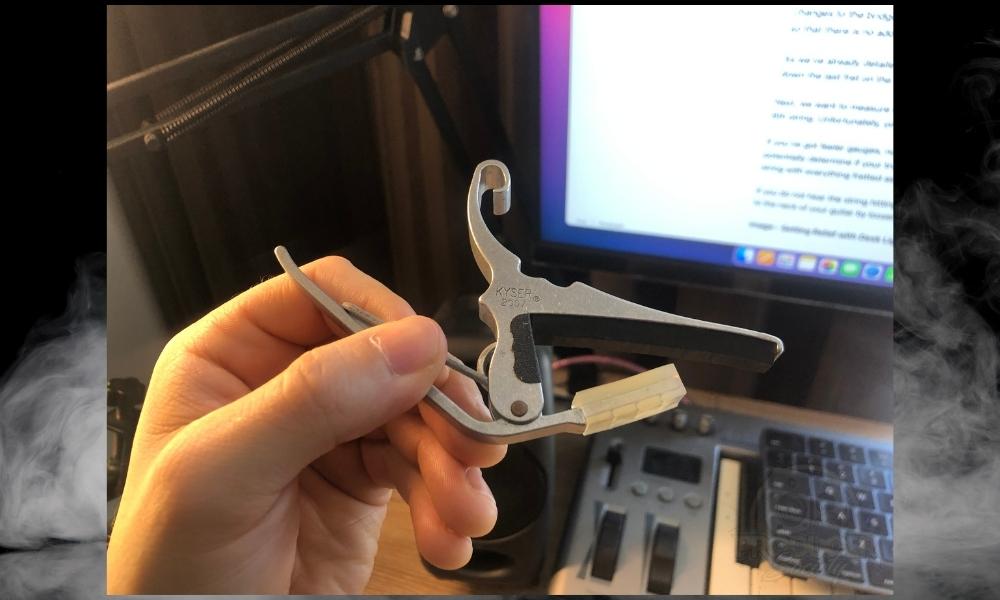
Save the strain and save time by utilizing a capo during your setup process. At the head of your Telecaster, the strings rest wedged in what’s called a nut. The nut adds height to your strings, which can be annoying to compensate for.
We’ll want to hold down all the strings at the first fret to mitigate this issue. As you can imagine, barring the first fret while taking measurements can get strenuous and may lead to you making inconsistent height readings.
Any style of capo will work. Additionally, you could even use something like a hair tie to barre the strings if you’re operating on a tight budget. A capo is going to be your best bet though, even a spider capo will work fine just fine as I’ve shown before in my other article.
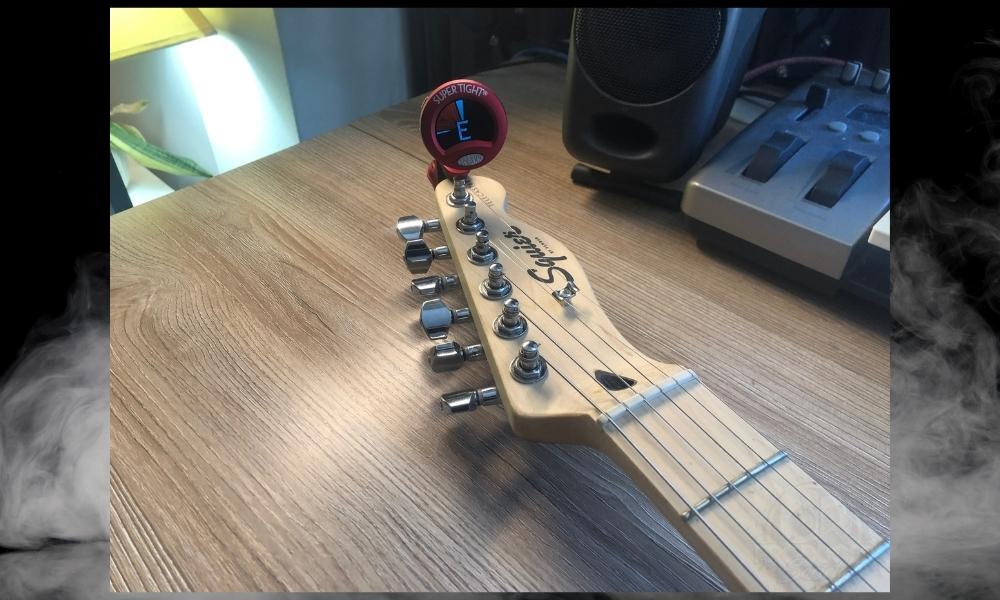
6) Snark Clip-On Tuner
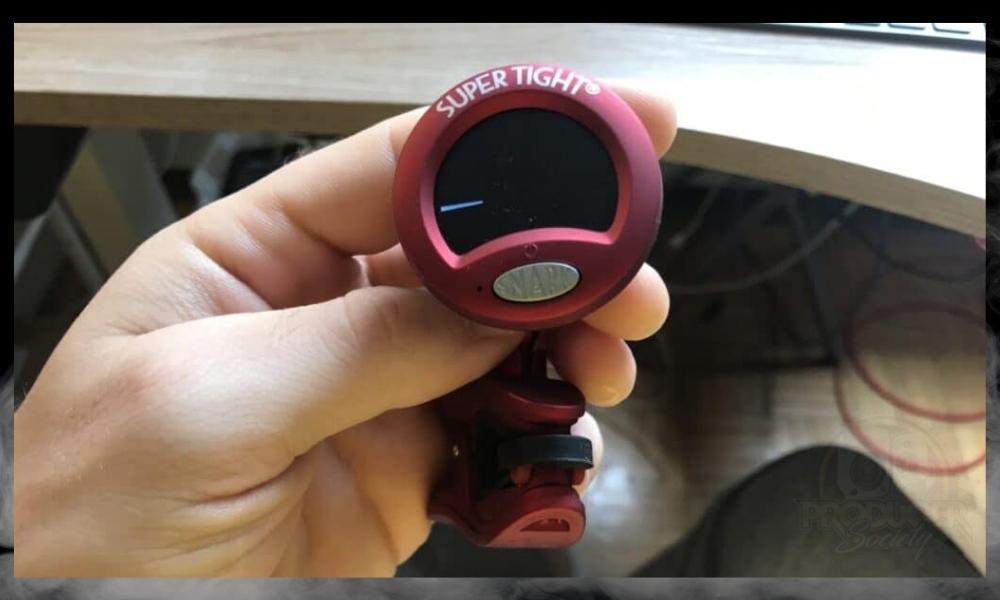
Adjusting your action makes playing your Telecaster easier. Likewise, a Snark clip-on tuner makes constantly tuning and retuning your guitar simple. The Snark clip-on tuner is a life-saving device and I love mine to death.
The Snark tuner clamps directly onto your guitar’s head, keeping it out of the way while still providing you with a reliable, precise pitch reading. While other kinds of tuners will suit your needs, most alternate options require you to plug your guitar into them directly.
Adding unnecessary clutter to your workspace only serves to put another obstacle between you and efficiency.
What makes the Snark tuner so nice for set-ups is that you have a way of tuning your guitar conveniently without needing to plug anything in or change anything around.
When you’re making changes to the action, truss rod relief, and intonation, there’s always a process whereby you have to re-tune strings.
Even changing strings will require you to bend and pull at them a bit before they’re finally settled. Get yourself a clip-on tuner of some kind and your set-ups will be a lot easier to do.
7) Feeler Gauges
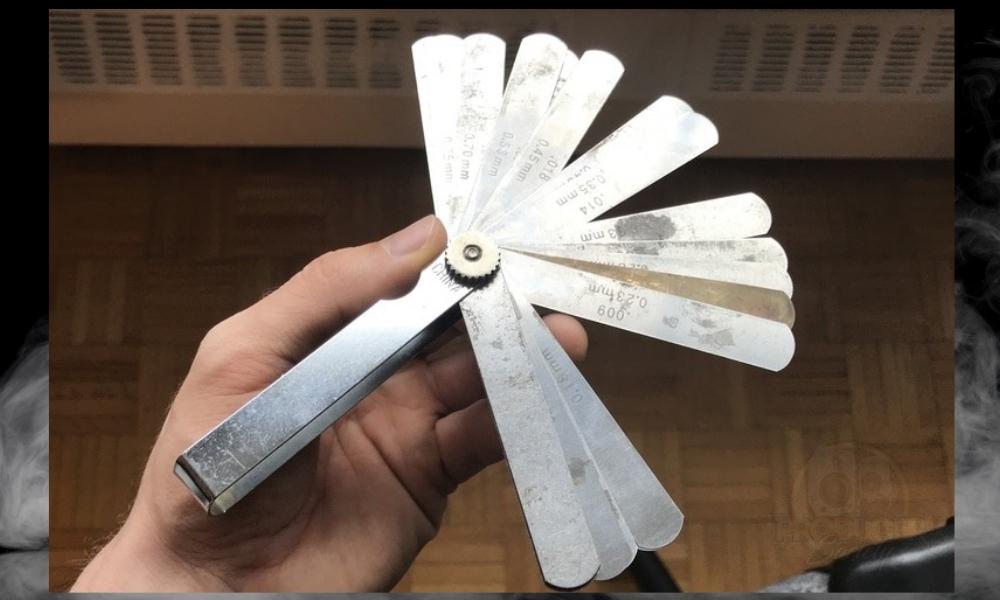
I’ve had these feeler gauges now for a long time, and they’ve served me pretty well. Although, I must say that they’re kind of annoying.
I think there is probably a better way of finding out such measurements more accurately, but I’m not aware of any at the moment.
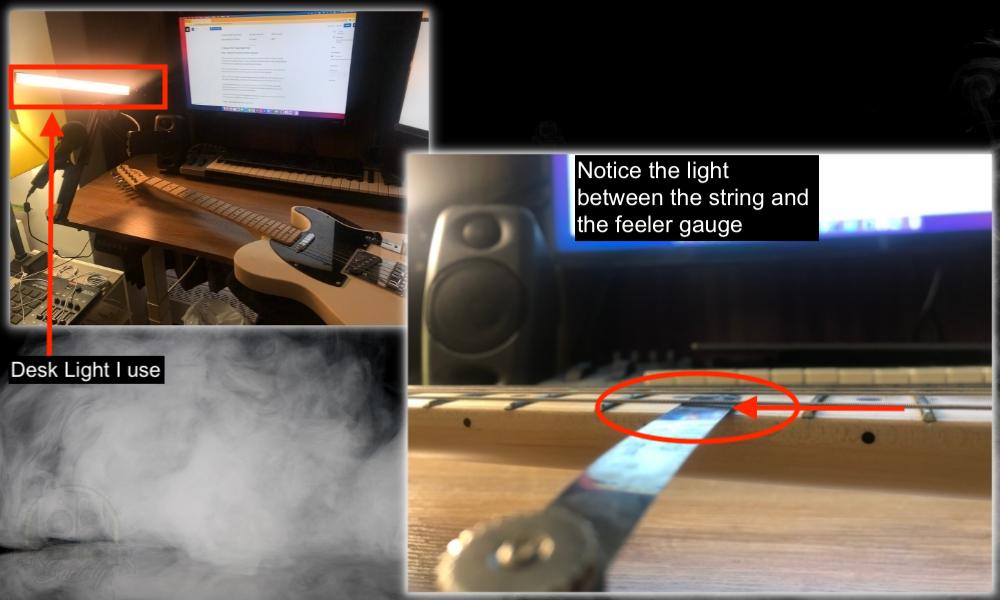
8) Desk Light (Optional)
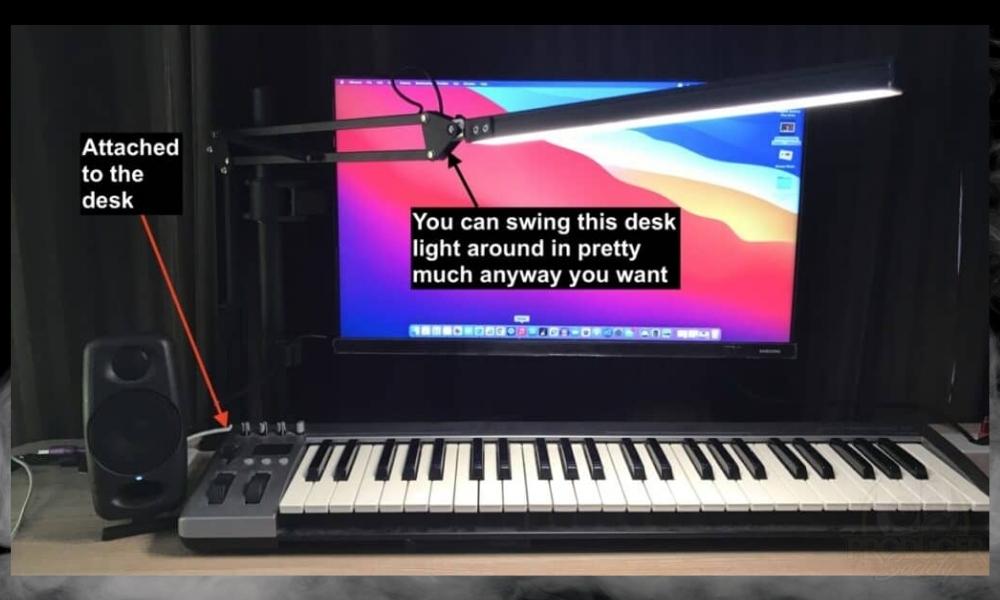
And finally, I’ve got this super handy desk light that I also use for everything. It’s good to be able to see what you’re doing. Consider getting an adjustable desk light to illuminate your workstation if you’re operating in a dimly lit space.
While this piece of equipment is optional, you should not neglect properly lighting up your workspace when making important modifications. We will be dealing with very precise measurements and alterations during this process, so you should do what you can to eliminate guesswork.

There are many versatile and cost-effective lighting options available to you online that will make a noticeable improvement to your workshop environment. And this desk light is one of them, for sure.
How to Adjust the Action on a Squier Telecaster
The exact configuration of your guitar’s action is up to you, at the end of the day, but that said, I do have some general guidelines that you can try out.
Still, it would be best if you always went about making adjustments in the order outlined below. Steps taken out of the proper order may not yield the best results.
Action and Relief Guideline
Additionally, If you’re new to modifying your guitar’s action, you may wish to review Fender’s recommended setup as a reference.
| Parameter | Fretting | Measurement |
| Truss Rod Relief (at 7th fret) | 1st (capo) and 19th fret | .006” to .010” |
| String Height (at 17th fret) | N/A | 4/64” at 12th fret (Treble Side) 2.0/32 – 2.5/32″ – 12th fret (Bass Side) |
1) Adjust the Truss Rod First
With your guitar in standard tuning, measure your truss rod’s relief first before making changes to the bridge saddles. To start, we’ll want to hold our guitar in the playing position so that there is no additional force exerted upon the neck.
As we’ve already detailed, we want to use our capo to barre the first fret. Then, we’ll hold down near the fret that meets the body on the low-E string, which is approximately the 19th fret on the Fender Telecaster.
Next, we want to measure the gap between the top of the 7th fret and the bottom of our 6th string. Unfortunately, your ruler cannot measure six one-thousandths of an inch.
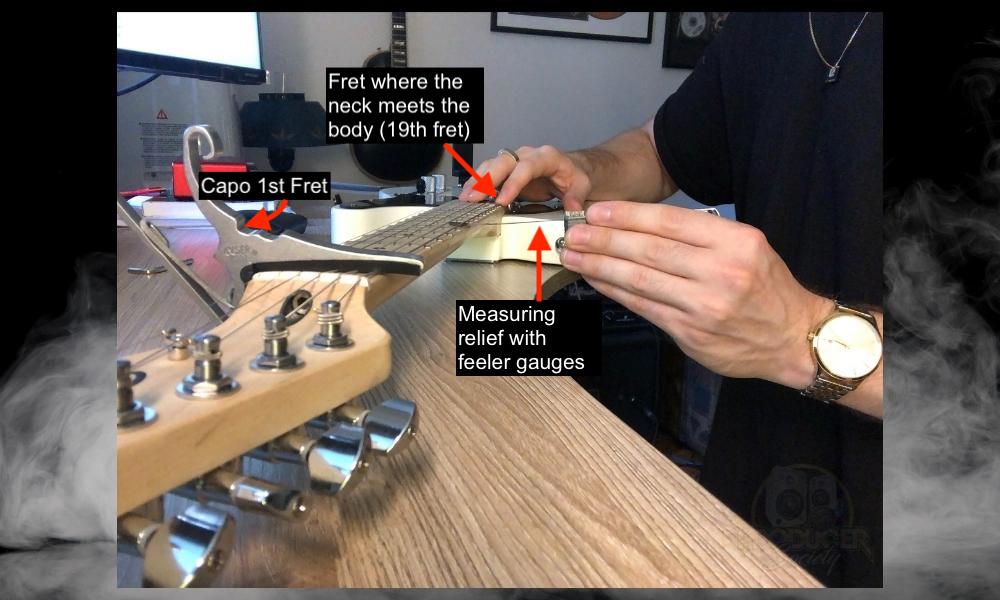
If you’ve got feeler gauges now would be the time to use them. However, you could potentially determine if your truss rod is too tight or too loose by tapping on the low-E string with everything fretted as specified above.
If you do not hear the string hitting against the frets as you tap, then you should add relief to the neck of your guitar by loosening the truss rod.
Similarly, if the relief seems to be more than the thickness of about one or two sheets of paper, then we will need to tighten the truss rod. 0.008″ is usually what I aim for as I said earlier when using feeler gauges.
Remember, slight alterations to your Telecaster’s truss rod can make a significant difference to its relief. Recheck your measurements regularly when making adjustments.
How to Adjust a Telecaster’s Truss Rod
Adjusting the Truss Rod at the Head Location
This is the easiest and the most common way to adjust the truss rod, and it’s for people who have the truss rod on the headstock. It’s also the style of guitar that I’m using for this tutorial specifically.
First, it may be in your best interest to release some of the tension on the strings before making adjustments. By doing this, our truss rod nut should turn more effortlessly. It’s not completely necessary to do this, but you can if you want to.
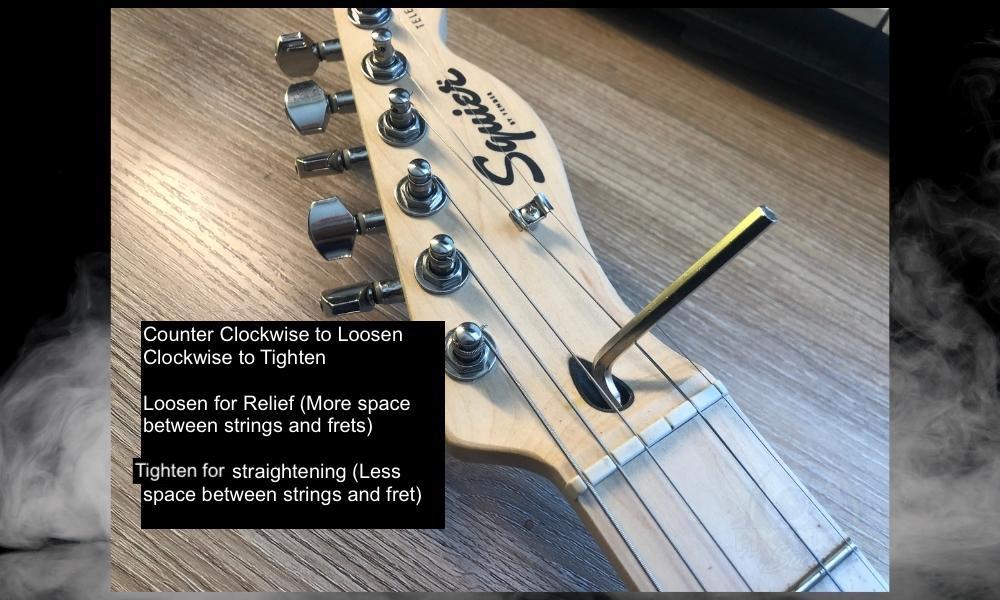
As shown in the Fender Electric Guitars Manual, we’ll use our Allen wrench to turn the truss rod nut. Position yourself so the head of the guitar is facing away from you. Then, turn the nut counterclockwise (left) to tighten the rod or clockwise (right) to loosen it.
Tip:
In many cases, you’ll have to give it an adjustment, and then actually come back the following day and tweak it a little bit more before it’s perfect and 100% to your liking. This also means you’ll need to re-set the action and everything again as well.
Neck Joint Location
The safest way to adjust a truss rod that is only accessible at the heel of the guitar is to remove the neck. First, loosen the strings and place your capo over the first fret. Ideally, we want to prevent the strings from slipping out of place at the head of the guitar.
Next, we’ll remove the guitar’s neck from the body by loosening the four screws located on the rear side. Adjust the truss rod using the same #2 Phillips-head screwdriver required to remove the neck screws.
Keep in mind that the directionality is opposite to that of head-access truss rods. Turn the truss rod adjustment mechanism clockwise (right) to tighten it or counterclockwise (left) to loosen it.
Naturally, the only way to check and see if your adjustments were successful is to reattach the neck and retune the guitar.
2) Measure the String Height at the 17th Fret
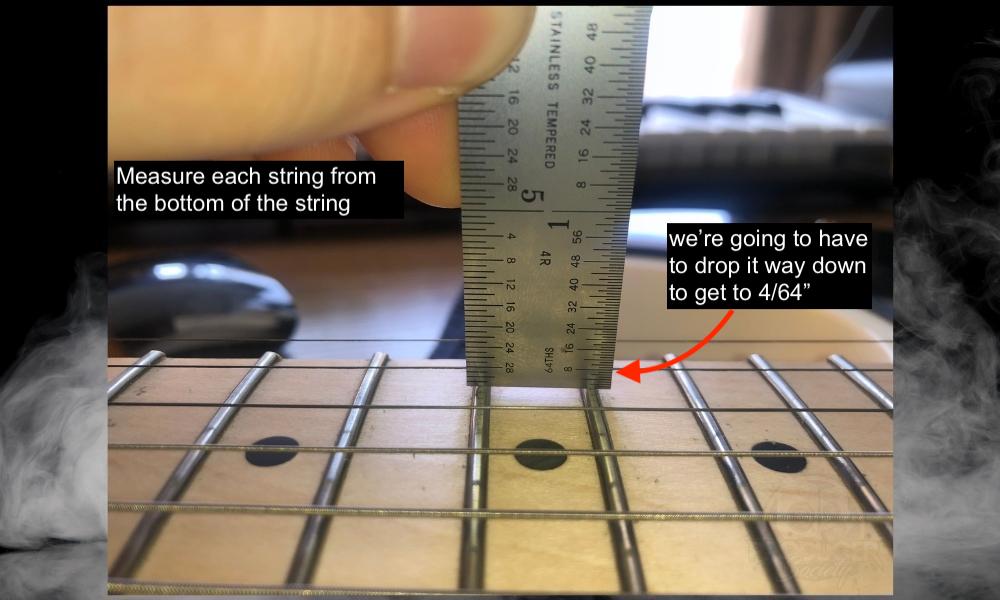
Now that your instrument has an appropriate relief, we want to tune our guitar back into E standard. Use your ruler to measure the distance between the 17th fret and the string in question.
As you can see above, Fender’s factory specifications call for a string height of 4/64″ for each of the Telecaster’s strings. In other words, you should measure a 4/64″ gap between the bottom of each string and the top of the 17th fret.
It’s not uncommon for me to depress the other strings around the strings that I’m currently measuring to get a more accurate reading. Additionally, I’ll sometimes write the measurement down because then I can get more accurate.
3) Turn the Screws to Lower or Raise the Action
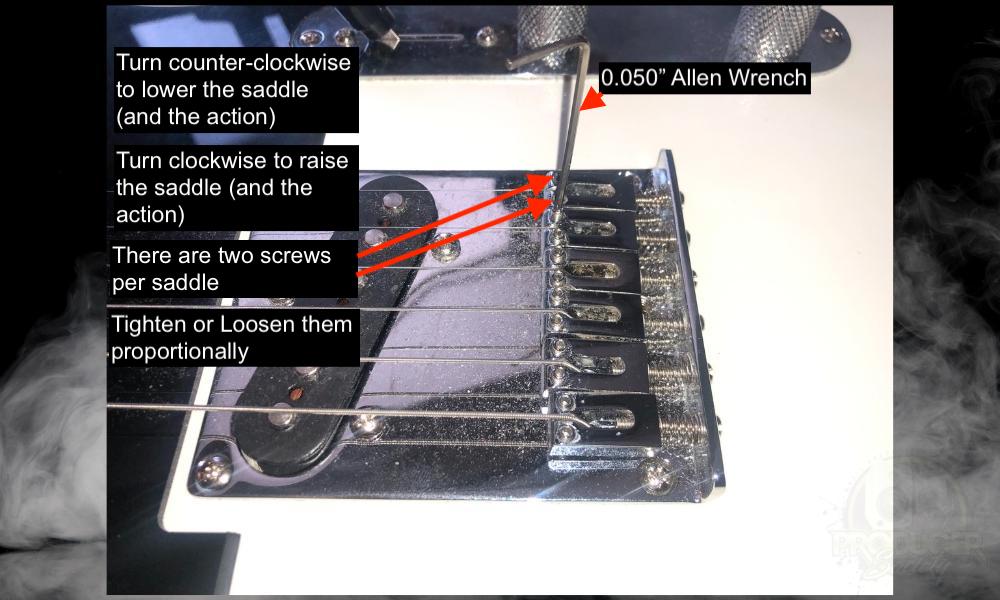
If any of your strings appear too high or too low, we’ll need to correct this issue by raising or lowering the saddles located at the bridge. Each saddle has two hex screws that should be facing upwards as your guitar is lying on its back.
Again, we’ll want to loosen each of our strings to prevent them from breaking as we modify the saddles. Maintain the same positioning we used when adjusting our truss rod to ensure that you turn the screws in the desired direction.
As you can see in this video by MusicNomad Equipment Care, we may not be turning the hex screws in the direction you would think. Turn each screw counterclockwise (left) to lower the saddle’s position or clockwise (right) to raise it.
Regardless of the adjustments you make, ensure that you turn both of a saddle’s screws equally so that it stays parallel to the bridge plate.
If you anticipate having difficulty remembering how much you’ve altered the position of each saddle, try taking notes as you go.
For example, you could label each saddle according to its string, and then record how many rotations you made for each one. Usually, you can just eyeball it though.
4) Tune It Again and Check the Action
Minor saddle adjustments may result in the string height you’re looking for. Once you’ve made alterations to the saddles, it’s a good idea to get your guitar back in tune and then check the action again.
To start, we want to make sure that our saddles are level with the bridge plate, which is to say that no saddles appear slanted. Next, we’ll use our tuner to set each string to its proper, standard tuning.
Use your ruler to measure the distance from the 17th fret to the bottom of each string. Again, Fender recommends a string height of 4/64″ for Telecaster models, but feel free to adjust the strings until they feel right for you.
Ultimately, we want to avoid any excessive fret buzz when strumming the guitar. Plug your instrument into an amplifier and make sure that the sound produced is clean and free of any unwanted or nasty sounds.
Whether or not you enjoy the strings at such a low setting, terrible fret buzz or fretting out always means you have to re-adjust your guitar’s action. Sometimes it’s also because your truss rod isn’t set right.
5) Repeat for All Strings
Some guitar owners may find it simpler to set up one string at a time instead of adjusting them all at once. In this case, we’ll be cycling through steps 2, 3, and 4 until all strings are set to the perfect height.
After setting your Telecaster’s action, it will be necessary to check your guitar’s relief once more, especially after a full 24 hours have passed.
Changing subtle aspects to the way the strings assert tension to the guitar’s neck may also cause the relief to change. If there seems to be a noticeable, undesirable difference in your guitar’s neck, repeat step 1, then check the action one more time.
Adjusting the Intonation on a Squier Telecaster
With our neck relief and string heights set up, it’s time to check our instrument’s intonation. You won’t always need to change the intonation contrary to what some guitar tech people will tell you (at least in my experience). But it’s good to check it anyway.
First, you want to ensure that your Telecaster is as perfectly in tune as you can make it. Next, we want to check and see if each string’s octave, which you’ll find at the 12th fret, matches the open note.
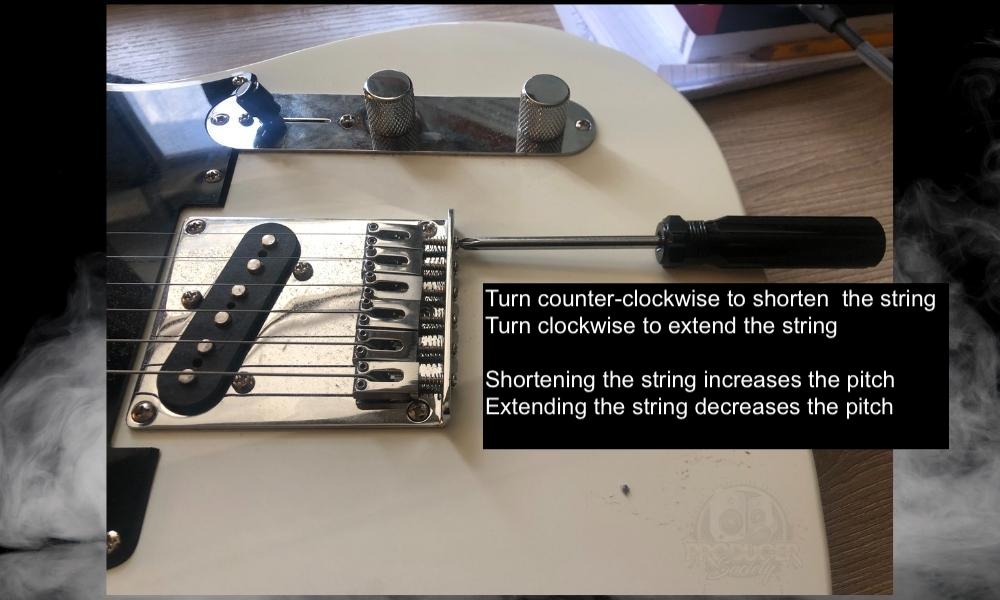
Alternatively, we can use the harmonic at fret 12 to gauge our intonation as well. The fretted note should not be higher or lower than the harmonic. If the notes played at fret 12 are sharp or flat, we’ll need to move our saddles backward or forward, respectively.
By moving the saddle, we actually shorten or lengthen the string. Our goal in doing this is to ensure that our 12th fret represents the very middle of the string. To compensate for a flat note, we want to shorten the string.
Use your 1/4″ Phillips screwdriver to turn the screw located at the back of the saddle counterclockwise. Similarly, we’ll turn the screw clockwise to lengthen the string in the case of a sharp note. Adjusting the intonation should not affect your guitar’s action.
However, modifying the action may affect its intonation. As I said a moment ago, if you make a serious action adjustment, you may have to account for that with the intonation. But small changes to the truss rod and action mean it’ll probably be ok.
How Do I Adjust My Squier Telecaster’s Neck?
To adjust the neck on a Squier telecaster, use a 5/32″ Allen Wrench and turn the nut inside of the headstock clockwise to straighten the neck, or counter-clockwise to loosen it which provides relief.
It would probably be wise to never go beyond 1/4 of a turn at a time, but if you do exceed this by a bit, it won’t be a huge deal.
How to Adjust A Squier Telecaster’s Bridge
Each saddle on a Squier Telecaster has two hex screws that move it up or down. Loosen your string, then use a 0.050″ Allen wrench to turn the screws clockwise or counterclockwise to raise and lower the saddles respectively. Saddles must always remain level with the bridge plate.
Does the Squier Telecaster Have a Floating Bridge?
Almost every model of Fender’s Telecaster features a fixed bridge. However, some limited-edition models, such as the Violinmaster, do feature a non-traditional, floating bridge.
Important Things to Note About Adjusting the Action
1) Your Fender Telecaster May Have A Different Bridge
Depending on the specific model that you have, your Telecaster may have a slightly different bridge or truss rod nut size.
Over the years, there have been various changes at times to the guitars, so you may have to look into your exact model to find the appropriate tools. That said, the information I’ve provided in this article should steer you in the right direction.

