 Written By :

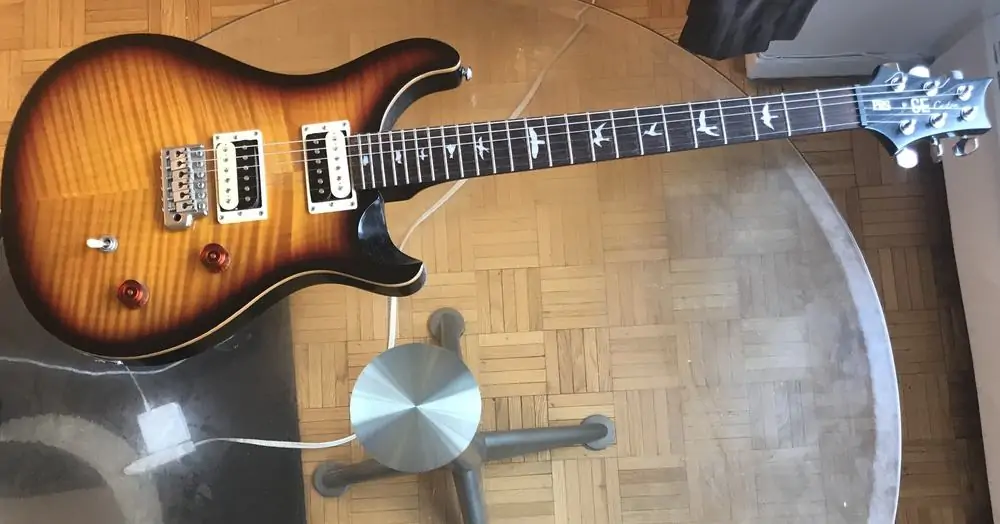
I searched online for a reasonably priced 24-fret guitar that I could play and I wound up choosing the PRS SE Custom 24. While this is an incredibly popular guitar these days, I noticed there aren’t many tutorials on how to set one up properly.
Setting up a Paul Reed Smith guitar is like any other guitar with a hardtail bridge whose strings are fed in through the back, however, you need to use the small Allen wrench that comes with the guitar in order to set the action and the intonation.
Setting Up A PRS Guitar – A Step-By-Step Guide
After not playing the PRS for a long time and not changing the strings on it, I totally forgot how to set one up. Most of the guitars I’ve owned for the last 15 years have had a tune-o-matic bridge like my Epiphone Les Paul Custom and my ESP Eclipse II.
Thankfully, once you’ve set up a guitar with a hardtail bridge a couple of times, it becomes a lot easier.

For setting up a guitar, you really only need a few pieces of equipment, most of which can be found as part of a toolset like this one, although I’d recommend actually getting a proper tool kit from Stew-Mac which is going to be a lot higher quality.
The following list of tools is the bare minimum of what you need to set up a guitar with a hardtail bridge. The same thing goes for setting up an ESP Eclipse too for the most part.
If you’re willing to get a real legit set like what I just mentioned from Stew-Mac, then you can really improve the quality of your guitar set-up, however, what’s listed here is certainly enough.
Thankfully, for the majority of the things on the list, you’ll already own the gear because they come with either a purchase of the guitar itself or as part of some other kit or toolset. In other words, they’re not exactly uncommon or hard-to-find tools.
Brief Set-Up Guideline for PRS Guitar
| Setup Parameter | Measurement | Factory Specification |
| Truss Rod Relief | 0.005″ (0.127mm) | 0.005″ – 0.010″ |
| String Height | 4/64″ (1.58mm) *Measured at the 17th fret from the bottom of each string. | 2/32″ at 12th fret (Treble Side) 2.5/32″ – 12th fret (Bass Side) |
| Pickup Height | 3/32″ for Neck Pickup and 1/16″ for Bridge Pickup – while holding down the very last fret on the guitar neck. *Measured at Both High and Low E-String Side of the Pickup | 3/32″ Bass Side (Both Pickups) 5/64″ Treble Side (Both Pickups) |
Tools You Need for Setting Up A PRS Guitar
1) Pliers

You can use needle nose pliers or wire cutters instead of regular pliers. The only reason I use this tool is for the in-built wire cutter that comes on the bottom of the device. I just like to use this one because it’s fairly versatile due to the main clamp.
What’s nice about these pliers is that you have the added wire-cutter option in addition to the ability to grab onto things with the clamp and pull on them. For example, if a string is caught in a tuning peg, I’ll grab onto it with the pliers and pull it out with this thing. It works great for that.
2) Wire-Cutters

However, I also have these wire-cutters which is for a slightly different purpose. Sometimes I use wire cutters to take off the ends after I’ve finished wrapping them around the tuning peg.
The reason for this is that you can get in much closer to the tuning peg which means there is less string poking out and therefore a smaller chance of hurting your fingers (more on that in my guide).
3) Screwdriver 1/4″

A standard 1/4″ screwdriver like this one is all you’ll need. I use this to take off the truss rod cover, and from what I understand, pretty much all guitars use the same screw size for their truss rod cover (#2 x 1/4″), although, I could be wrong.
I know this screwdriver works for my ESP Eclipse II, my PRS SE Custom 24, my Epiphone Les Paul Custom, and my Fender acoustic. That’s four different brands.
4) Truss Rod Wrench (1/4″ or 7mm)

This is the standard truss rod wrench that comes in the bag when you buy the guitar. It’s important not to lose this wrench because then you’ll have to experiment a little bit to figure out what type of wrench you need.
I know that the ESP and the PRS truss nut style is different, so one doesn’t necessarily work for the other.
5) Allen Wrench 0.050″

This is also an important tool that comes with the purchase of the guitar (or at least I think it did, if it doesn’t, then grab it here on my RPP).
You’ll need this to adjust the screws in the saddle that set the action (height of the strings from the fret). My Allen wrench measures 0.0585″ but it’s slightly too big (it still works though), so get a 0.050″ Allen wrench if you can.
I’m not 100% sure if it’s 0.050″ or 0.0585″ but I know that 0.050″ is a common Allen wrench size for guitars, however, 0.0585″ does work for my PRS SE Custom 24. As I just said, it’s a little big, but it does work just fine and it doesn’t seem to strip the screws.
6) Cloth

I prefer using a micro-fibre cloth or a super soft cloth for wiping the guitar down. I have several of these and I find they work great for cleaning the guitar.
They’re gentle, they work great, and I prefer having them a light colour like this that way I can see the dirt and grime coming off of the instrument.
7) Guitar Polish/Cleaner

What’s nice about this guitar polish is that it can be used for pretty much everything including not only cleaning the instrument but also polishing it. I use this multi-purpose polish for every part of the process except fretboard conditioning and string-cleaning.
When it comes to what type of polish you should be using, pretty much any brand-named product will do, but I err on the side of Dunlop, Gibson, and another company called Luthier’s Choice. It wouldn’t hurt to do a Google Search on it first to see if you have the right type of wood for the polish.
There are some cases where a polish is incompatible with a certain kind of finish, but this is fairly uncommon and it’s only for people who have an older guitar that doesn’t use a polyurethane finish. I’ve written whole articles on this topic before including this one.
8) Fretboard Conditioner

This is the fretboard conditioner that I use. How I use it is I place a microfibre cloth over top of it with the cap off and then flip it upside down, just enough to get one spot of the rag wet.
After getting the microfibre cloth just a bit wet in that spot, I wipe the neck down. You don’t need much fretboard conditioner at all, just enough to wet the fretboard a little bit. It should soak right in.
9) Mitutoyo Straight Ruler

This is a nice ruler that I recently bought for making all kinds of adjustments on my guitars.
It measures in inches, half-inches, 8ths, 16ths, 32nds, and even 64ths. This is the perfect ruler to use for measuring your action, your saddle height, pick-up height, and other important measurements for action adjustment.
This is one of those great purchases that I’ve made over the last few years that has saved me a lot of headaches and I wonder how I ever did anything without it.
Quite frankly, if you’re setting up guitars on a semi-regular basis and you don’t have one of these rulers, then you’re missing out. This makes measuring the action, pickup height, and string height very easy.
10) Snark Tuner

Like I said in the accompanying YouTube video, this is a guitar tuner that makes setup quite a bit easier as well.
A lot of people might have some kind of gripe with clip-on tuners, but they work great for setting up your instrument because you don’t have to plug the guitar into a pocket tuner or into an amplifier if you want to use your tuner pedal.
Using a clip-on tuner will make your life a lot easier when setting up the instrument because it’s just as simple as pressing the power button and starting. Keep it attached to the end of the neck and you’re all gucci.
I’ve found that it tunes the instrument well and I don’t notice a difference between it and my more expensive Boss TU-3 tuner.
11) Capo
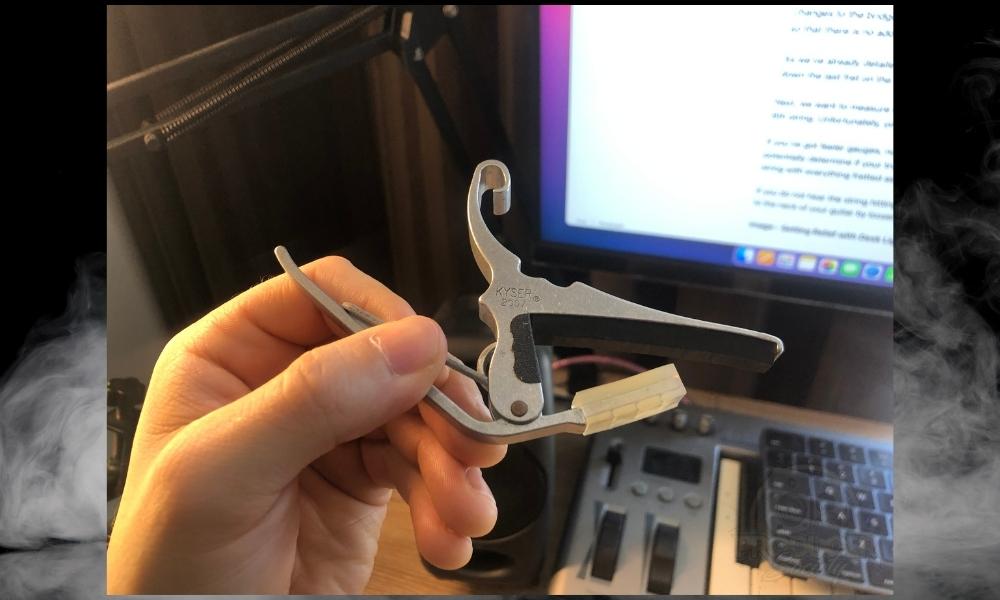
Another thing that is an absolute must for guitar set-ups is a capo like this one, either a regular one or a spider one. They’ll both work.
You’ll need to use this for when you’re measuring the truss rod relief which is done by fretting the 1st fret with the capo, holding down the 17th or 18th fret with your other hand, and then slipping the feeler gauges underneath the 7th fret.
How To Set Up the PRS Guitar
As part of the set-up, I’m going to walk you through a few extra steps including cleaning your guitar and putting new strings on it, just because I feel like changing your strings is a regular part of the set-up anyway.
Or in other words, installing new strings typically necessitates a setup. With that said, I won’t walk you through how to string it up in explicit detail; we’ll just talk about it briefly.
1) Taking the Strings Off

Before cleaning
Take all of your strings off one by one. A lot of people have spread all kinds of guitar-related fear-mongering on the internet over the last 2 decades, including the idea that taking off all of your strings is in some way bad for your guitar neck. Go ahead and take all of your strings off at once; it’ll be fine.
If you plan on re-using the same strings after boiling them (my guide on this), then you’ll want to make sure that you unwrap them from the tuning peg safely.

If you don’t plan on using the same strings, you can just de-tune them one by one and then cut them with the pliers or wire cutters.
2) Cleaning the Guitar Before Setting It Up

After cleaning
To clean the guitar before I put strings on it and set it up, I use the yellow cloth to get rid of most of the dirt, grime, and gunk off the fretboard, and then I use a microfibre cloth to polish it, along with some nice spray from Dunlop or Gibson like what I showed earlier.
The fact of the matter is that you need some kind of liquid to wipe off all of the nasty grime and gunk off the fretboard and it needs to be a substance that’s safe for the guitar. I wouldn’t use water, so just use fretboard cleaner or guitar polish.
The Guitar polish pictured above is a good choice because it does a bit of everything, although, some people like lemon oil which I talked more about here.
It’s meant for cleaning, conditioning, and supposedly restoration but the first two parts get a big eye roll from me. I usually spray the instrument down and wipe it down well, especially, and I mean especially on the fretboard because that’s where the most nastiness tends to be.
Some people recommend using 0000-steel wool but I don’t think it’s necessary, plus, from what I understand, this type of wool can damage maple necks.
I don’t have a maple neck so it’s not something I worry about, however, what scares me away from using wool like that is that I have to use it in my apartment and steel wool makes a mess. For real, try it sometime, and you’ll see what I mean.
Another great tool for cleaning your guitar is canned spray air, which is just pressurized air. You can find rechargeable ones online too.
I use this to clean the pots and other areas where it’s hard to get a cloth or rag, but if I don’t have that, I’ll use a Q-tip instead. I’ll wet it with the guitar polish and go to town on the hard-to-reach spots.

Every 6-months to a year, I’ll also throw some fretboard conditioner on the neck even if it needs it or not. The reason why you want to do that is because it stops the wood from drying out, cracking, and then becoming ruined. That’s what all the people in the know have told me anyway.
Conditioning the fretboard isn’t hard. I just dab an Ernie Ball microfibre cloth with the smallest amount of conditioner I can imagine and then wipe the fretboard down with it. The point is not to douse the fretboard but just to moisten it. The conditioner should soak into the fretboard nicely.
3) Stringing The Guitar Back Up
Now that everything is clean, I’ll put the strings on it one by one until it’s fully strung up. These days, I’m partial to Elixir’s 11-49 gauge strings because they de-tune down to D-standard very well on my ESP Eclipse II but they’re not too hard to bend and vibrato while in E-standard.
My article on Elixir strings also shows that polymer-coated strings work at preserving their freshness and longevity. Putting strings on your instrument is a tutorial on its own, so we won’t encroach upon that topic for now.
4) Tuning It

Tune the strings back to where you want them to be. For me, I’ll use D-standard on my ESP Eclipse and E-standard on my PRS.
If I had an electric string winder, I would use it, but I don’t at this time. I also use a Snark Tuner for tuning my instruments when I’m setting them up, simply because it’s so convenient and easy to use.
I could use my Boss TU-3 tuner, but then I would have to turn my amplifier on and then plug everything in. Using a Snark clip-on tuner is a great way to get around this. Is it 100% perfect? Probably not, but it’s perfect for guitar setups due to how easy it is to use.
Tip:
Use the “Vibrate” function on the Snark Tuner rather than the “Microphone” option. I find the vibration is more accurate than the mic, although, that could be due to the extraneous noise in my place.
5) Adjusting the Truss Rod of Your PRS Guitar

Take the cover off of the truss rod nut with a 1/4″ screwdriver. Then, take the PRS truss rod wrench that comes in the case and use it to tighten (turn clockwise) or loosen (turn counterclockwise) the truss rod.
Usually, after you’ve taken the strings off the instrument, you’ll have to loosen it again but not always.
It’s important to tighten or loosen the truss rod in small increments, because I find that making small changes to it makes quite a large difference. For instance, many people recommend moving it by 1/4 turn, however, I find even that is too much. I move it very little when I adjust it, like 1/8 to 1/16 a turn.
The key is to make small adjustments and then eyeball down the neck again to see what kind of difference it has made. If I want to get really precise like I did in the video that I linked above, I’ll use feeler gauges like this set but these certainly aren’t 100% necessary.
Tip: Use a desk light. This will shine a light on the feeler gauge underneath the string, reflecting it upward and allowing you to clearly see the space between the gauge and the string. When you deal with tiny increments, it can be hard to see what’s going on, and a desk light makes a big difference.

Adjustments like this are mostly based on feeling anyway, however, if I’m trying to get something really perfect, then I will get feeler gauges out. When I’m making adjustments to it, my goal is to get the neck as straight as possible without buzzing, fretting out, or any other problems.

According to Dan Erlewine in his book, Guitar Player Repair Guide, he can get the relief for his electric guitars at 0.004″ after putting a capo on the 1st fret, holding down the fret where the neck meets the body, and then inserting a feeler gauge underneath the 7th fret. You can see what that looks like in the image below:

For me, I normally aim to get my truss rod set to 0.009″ although, I recently tried 0.005″ and I liked that a lot more and will probably continue with that measurement from now on.
From there, I’ll try and get my string height (which we’ll talk about in a moment) set to 4/64″ when measuring from the bottom of the string to the top of the fret, on every string, at the 17th fret.
Just as a reference point, the common factory specification for truss rod relief is 0.012,” however, this is quite a bit of relief and it’s usually beyond what’s needed for the average player.
Personally, even though you’re not supposed to use relief/bow as a way to lower the action, I find that having as little relief as possible makes the guitar way easier and way more fun to play.
6) Setting the Action (String Height or Distance Between Fret and String)

Take the small Allen wrench (the most important tool for setting up PRS guitars), and use it to adjust the action on each string individually. Because it’s a hard-tailed bridge, you’ll have to do each one, one-by-one, and then measure it with the fine ruler that I showed you earlier.
Tip: Put your eyes at string level and press down on the other strings to move them out of the way, that way you can adequately judge where the string is relative to the ruler. Just make sure you don’t artificially lower the string you’re measuring
Like the image above says, on a PRS guitar and with your 0.050″ allen wrench in hand, turn the screw counter-clockwise to lower the saddle which means you’ll lower the action, and turn it clockwise to raise the saddle and therefore raise the action. Do this part before you’ve set the intonation by the way, because this will affect everything.

There are two screws on the side of each saddle, and you have to adjust the action this way. Over the years, I’ve actually learned to appreciate this type of action because you can adjust each string individually, rather than 3 strings at a time as if it’s a tune-o-matic bridge.
Tip: I find it helpful to count the number of Allen wrench revolutions you’ve made, otherwise, you’ll lose track of how many times you’ve actually adjusted the saddle.
7) Setting the Intonation

With the screwdriver, you can now adjust the intonation of each string by either turning the screw left or right.
Turn the screw left to extend the length of the string and to the right to shorten the length of the string. Extending the length drops it down in pitch whereas shortening the length increases the pitch.
This is where the Snark snap-on tuner that I mentioned earlier comes in handy. With the tuner attached to the head-stock, you can make small adjustments to the screws on the bridge and see how they effect the tuning of the string in real-time.
Typically, the smallest adjustment to the strews will have a big impact on the string’s tuning, so after turning the screw, you’ll have tune the guitar perfectly again, check the intonation at the 12th fret, and then repeat the process over and over until it’s perfect. So how does one do this?
Here’s a step-by-step process for setting the intonation on a PRS:
1) Tune the guitar string perfectly with a clip-on tuner
2) Check the tuning of the string at the 12th fret
3) if it’s sharp, turn the screw clockwise to decrease the pitch. If it’s flat, turn the screw counterclockwise.
Repeat this process until you’ve gotten it nearly perfect. It takes a little while to get the intonation perfect, but it’s one of those things that’s crucial to the sound of an instrument, particularly a stringed instrument. One thing to note is that it’s normal to be unable to get it 100% perfect, so don’t worry too much.
Tip: Sometimes, you’ll have to push on the screw after turning it counter-clockwise and then also push the saddle forward. The saddles can be squished together which can make the adjustment useless because the saddle won’t actually move unless you push it forward.
8) Setting the Pickup Height

When choosing the pickup height, I use the measurements 3/32″ on the neck pickup and then 1/16″ on the bridge pickup on both the treble and bass sides of the pickups (high-e and low-e-string).
To measure the pickups on your PRS guitar, you have to fret the very last fret before taking the measurement, otherwise, you’ll bottom the string out on the top of the pickup. Do this to both pickups and measure on both sides of the pickup (treble and bass).
Turn the screwdriver counterclockwise to lower the pickup and clockwise to raise the pickup.
One tip for measuring pickup height is to place the ruler closest to the poles on the outside pickup, rather than the poles of the pickup on the inside (the white pickup is the outside and the black pickup is the inside).
Also, there are times when one pickup in the same housing is higher than the other. In that case, I’ll typically measure from the highest pickup.
Important Things to Mention About PRS Guitar Set-Up
1) Follow The Proper Order Of Guitar Set-Ups
Start with the truss rod adjustment first, then the action and string height, then the intonation and choose the pickup height last. The reason for this is that the truss rod adjustment and string height adjustments are going to change the distance from the string to the pickup.
You could probably interchange the string intonation and the pickup height as well because I don’t believe it matters which one of the two you go with first, however, doing the truss rod adjustment and then the action adjustment should come before the rest.
2) Set The Guitar Up Again the Following Day
Once you’ve set everything up, give it another day and then set it up again. Tune the guitar once again the following day, check the relief/bow, adjust the string action and intonation again if you have to and then the pickup height last. I find that I usually need to do it again the following day.
3) This Tutorial Primarily Concerns itself With the PRS SE Custom 24
This is the only PRS guitar that I own, so their other models may use different types of bridges, truss rods, neck types, and more. From what I do understand, however, most PRS models use similar technology for their models.
4) A Lot Of the Measurements Are Merely Guidelines
The vast majority of standards and guidelines I use are from Dan Erlewine’s book, however, I’ll typically modify them or use them as just a jumping-off point. I think it’s a good idea for you to do the same, because, no one can tell you the best way to set up the guitar. After all, it’s ultimately up to you and your playing style.
5) Measurements Are Almost Always Made From the Bottom of the String
When I first started adjusting guitar necks and doing all kinds of measurements on my own, I wondered if the measurements were taken from the bottom or the top of the string, and the answer is that they’re almost always measured from the bottom. Maybe this is common sense, but for me, it wasn’t.

