Every guitar player needs to have at least one tuner on them, pretty much at all times. I know that I have several tuners, including a BOSS Chromatic TU-3 tuner, 2 Korg tuners, and one Snark clip-on tuner. If you say that’s too many, you’re wrong.
Because I also have one on my iPhone and I even use the Blue Cat Audio Hot Tuna which I got from Plugin Boutique. One of the more difficult ones to use though, at least at first, is the pedal version simply because not everyone knows how to use pedal effects.
To use a guitar tuner pedal, put the pedal at the front of your signal chain (a cable in the output and a cable in the input) and connect it with a 9V DC adapter, or a 9V battery. Press the footswitch and then tune the guitar like usual, although, the chromatic mode will be the most versatile.
The short blurb I just shared with you should be enough to get you going if you’re somewhat familiar with the guitar gear jargon. However, most people who come to this post will want a little more. So that’s what we’re going to do in the section down below.
Step-By-Step Guide to Using A Standard Tuner Pedal
Most guitar tuner pedals are fairly similar to each other, although, they certainly come with different bells, whistles, and cool features. One thing the TU-3 tuner has, for example, that others do not is the extra-bright LED option as well as the Streaming Mode.
That said, the fundamentals of how a tuner pedal works are almost the same. But the BOSS TU-3 and the older versions of the same pedal are definitely among the most commonly used tuner pedals.
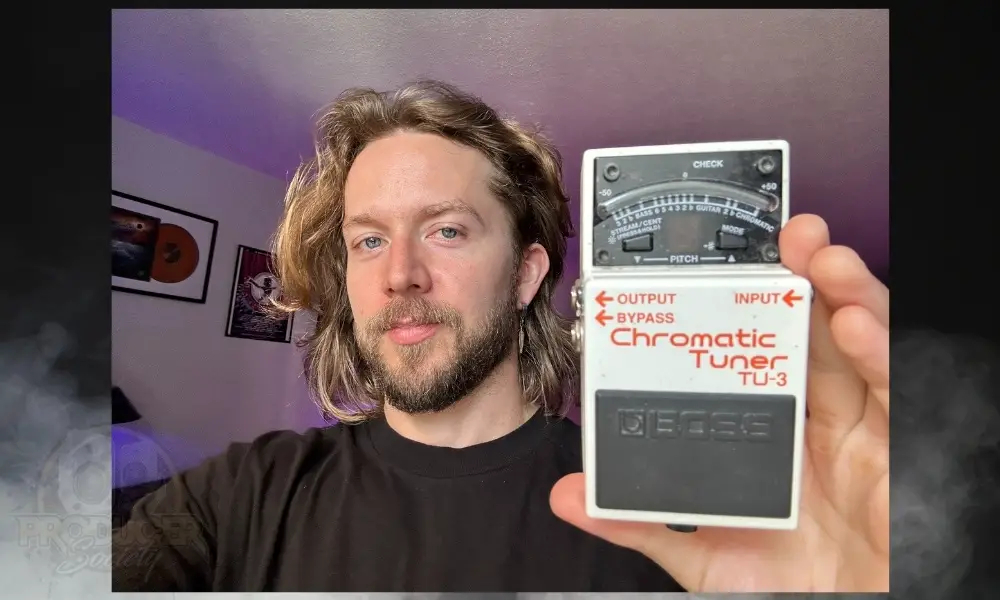
You can get a standard tuner pedal like the Boss TU-3 almost anywhere.
1) Connect the Tuner Pedal to Your Guitar and Amplifier
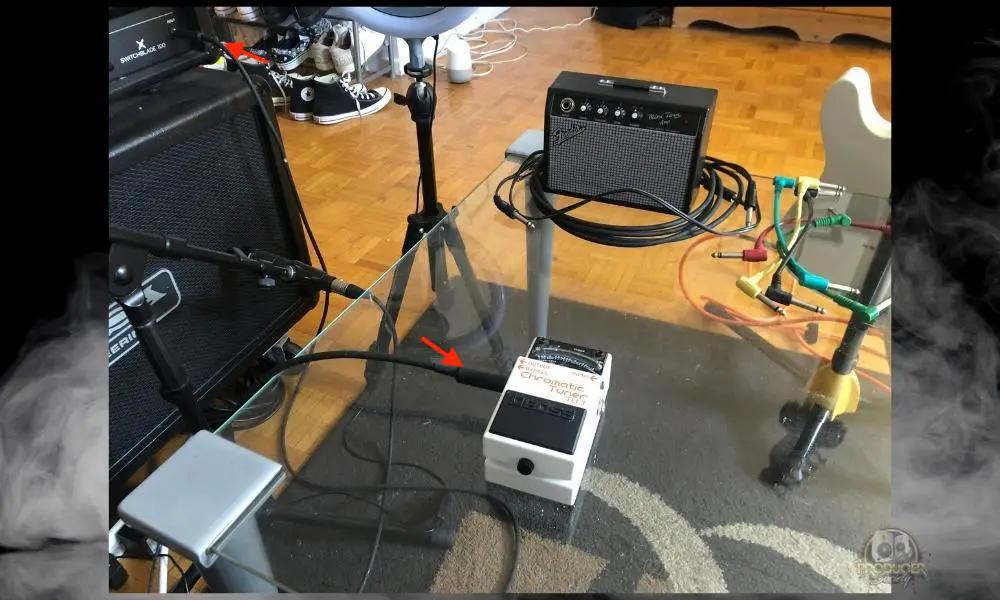
Connect your 1/4″ instrument cable from your amplifier’s input to the output of the guitar pedal as you would normally. I either use RoadHOG or Ernie Ball cables for the output, but it depends on what’s at the shop (as I’m not that picky about it).
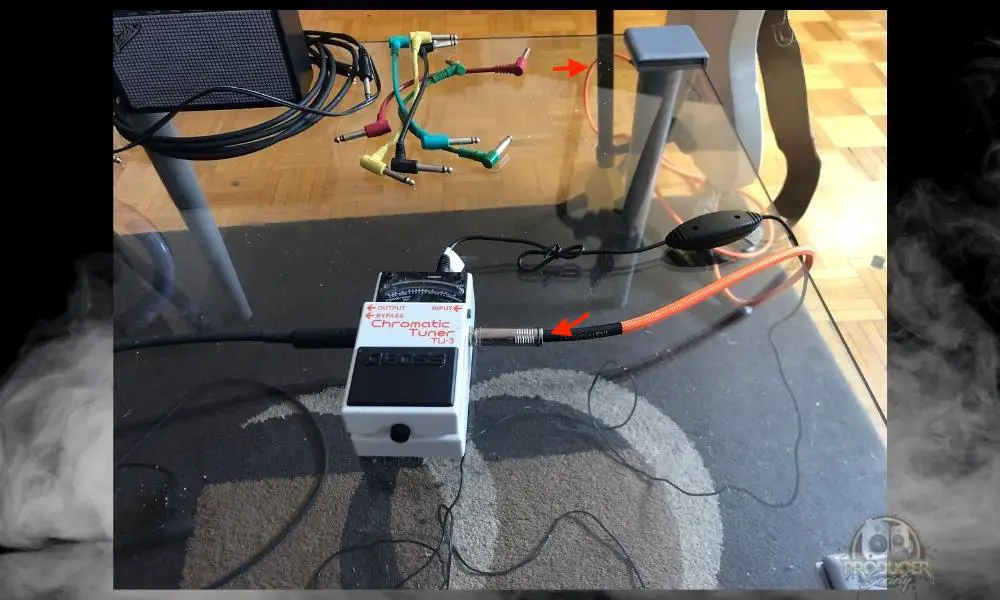
Then, I’ll connect my Ernie Ball right-angled cables (these are my favourite cables to get for the guitar input). I usually put the power into the pedal after I’ve connected everything, but it’s not a big deal if you do it before.
2) Power the Tuner Pedal With a 9V AC Adapter (or a Battery)
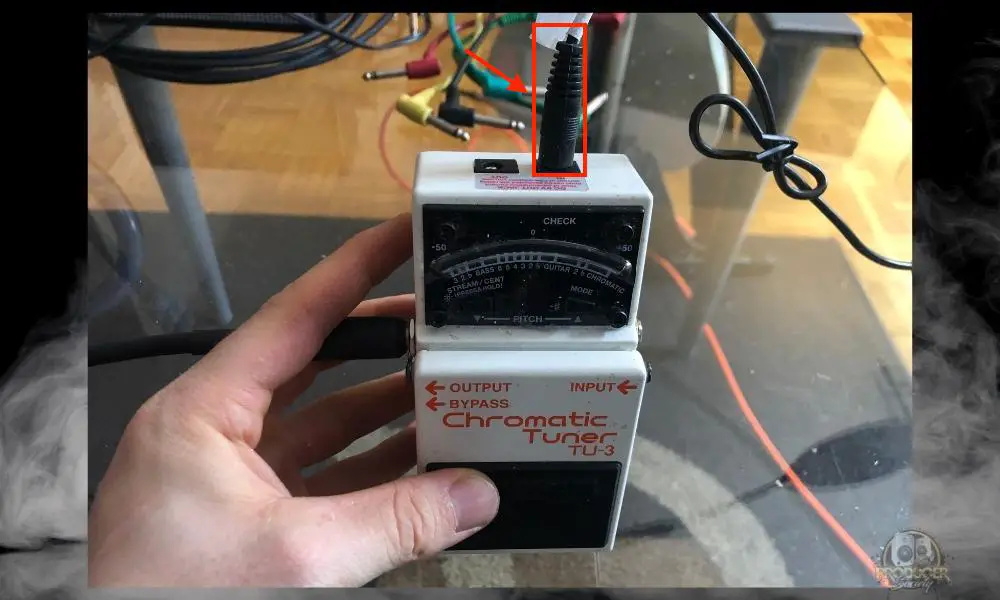
Pretty self-explanatory here. You just want to connect the power cable to the top DC input jack. For most tuner pedals, and particularly the TU-3, it’ll say something like “IN.” The slot next to it is the daisy-chaining jack, which I’ll show you how to use shortly.
The 9V AC to DC Power Adapter from Boss
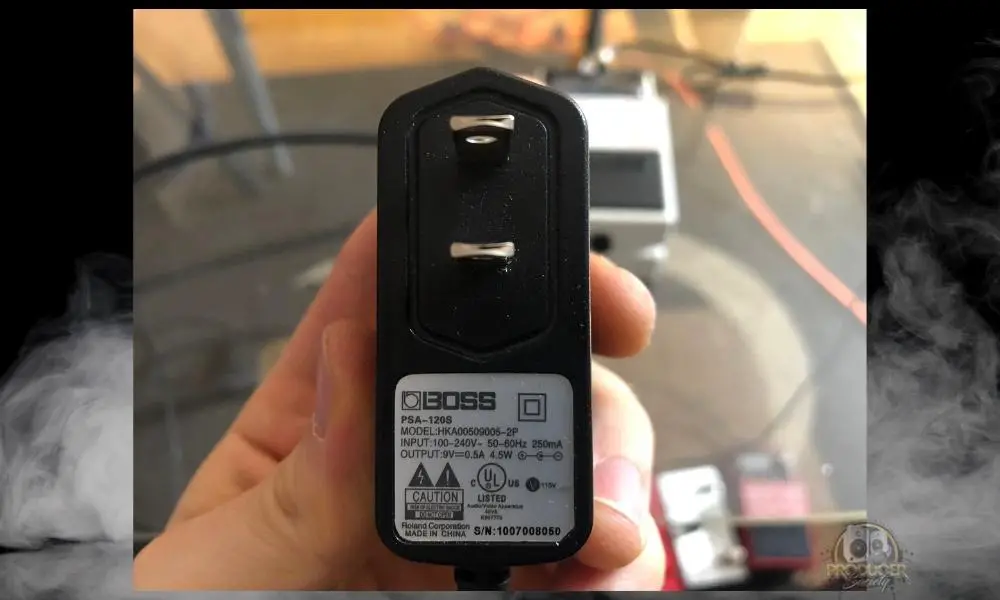
The power adapters can be a bit tricky sometimes because the terminology and language used can be confusing. For instance, some pedals will say they’re an AC adapter, which leads you to believe that you could be feeding Alternating Current into the pedal.
But really, what they mean is that it turns AC power from the wall into Direct Current which almost all pedals use.
I have a few old-school pedals, notably, the Digitech Whammy Pedal IV, and the Line 6 POD, and both of these pedals use Alternating Current power adapters. These are AC adapters that also feed AC power into the pedal.
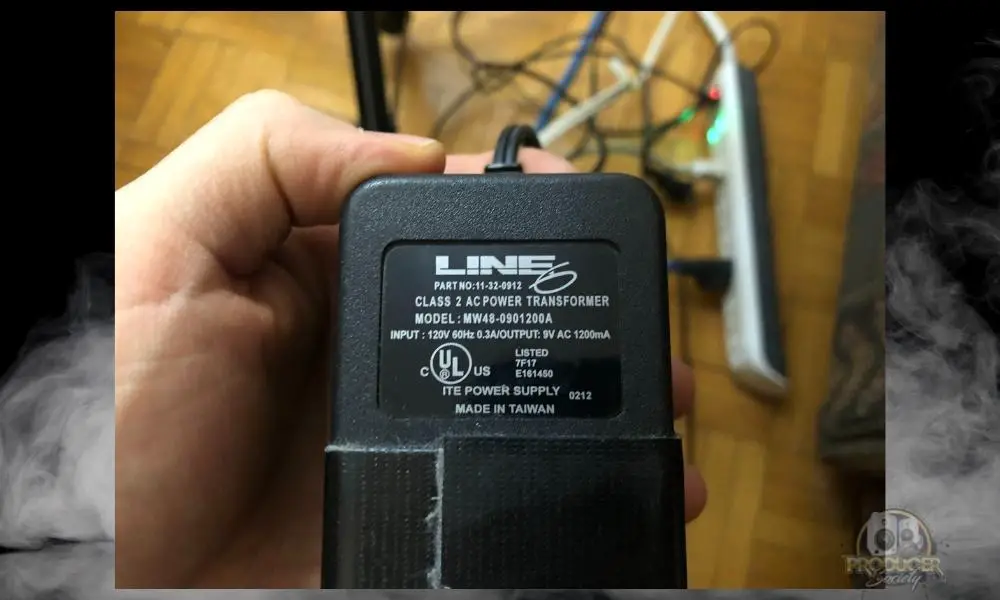
But we don’t want that for this pedal, which uses DC power. Many guitar pedals will come with a power supply, but I’ve noticed that BOSS pedals often do not (with some exceptions).
All you need is an AC to DC 9V adapter that’s center-negative. Don’t overthink it. Most 9V DC adapters will work just fine, because almost all of them (at least everyone I have seen), have been center-negative.
Like I said in my guide on the BOSS Loop Station, adapters and power supplies are normally something I only get if they’re name-branded.
The Kind Of Battery To Use For Your Tuner Pedal
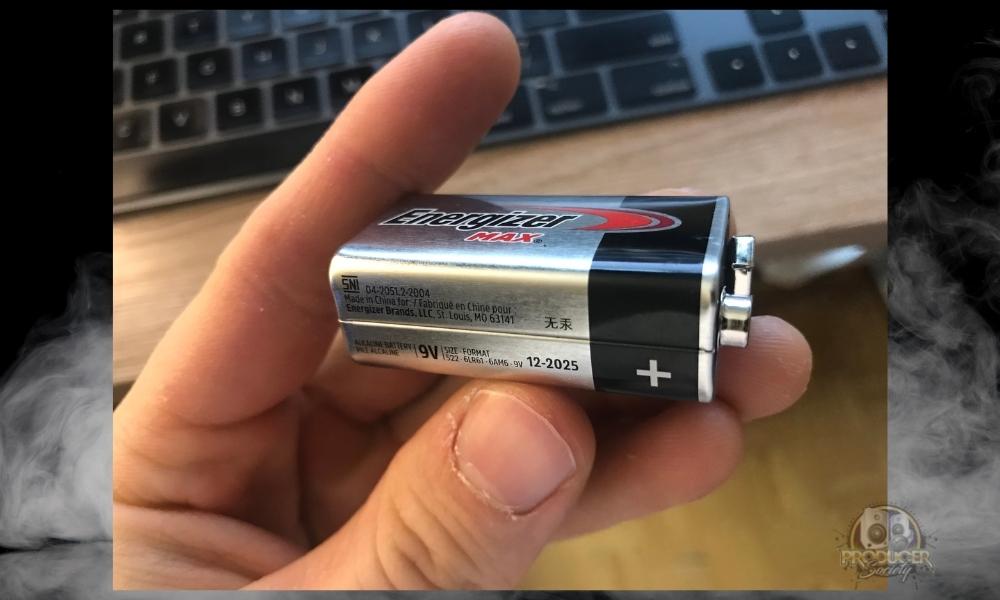
You could also use a 9V battery to power your pedals, but anyone who has done this before knows how much they suck. 9V batteries will last you maybe 6 hours if you’re lucky.
A power-hungry pedal may last even fewer hours than that. I would skip using one of these, but if you feel you must, Duracell or Energizer are always a good choice.
3) Press on the Foot Switch to Turn the Tuner Pedal On
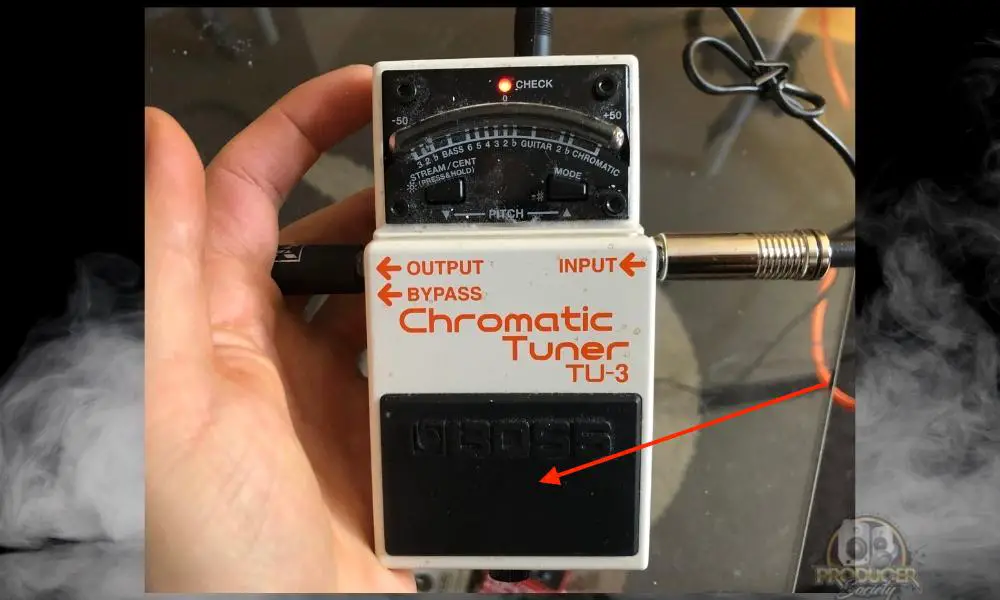
Once you’ve powered up your tuner pedal, press on the footswitch to activate it. If you’ve followed the instructions and put the 1/4″ cable in the output, instead of the bypass, the tuner pedal will mute the amp.
4) Pick One Mode From the BOSS TU-3
Chromatic Mode (The Best Mode for Most People)
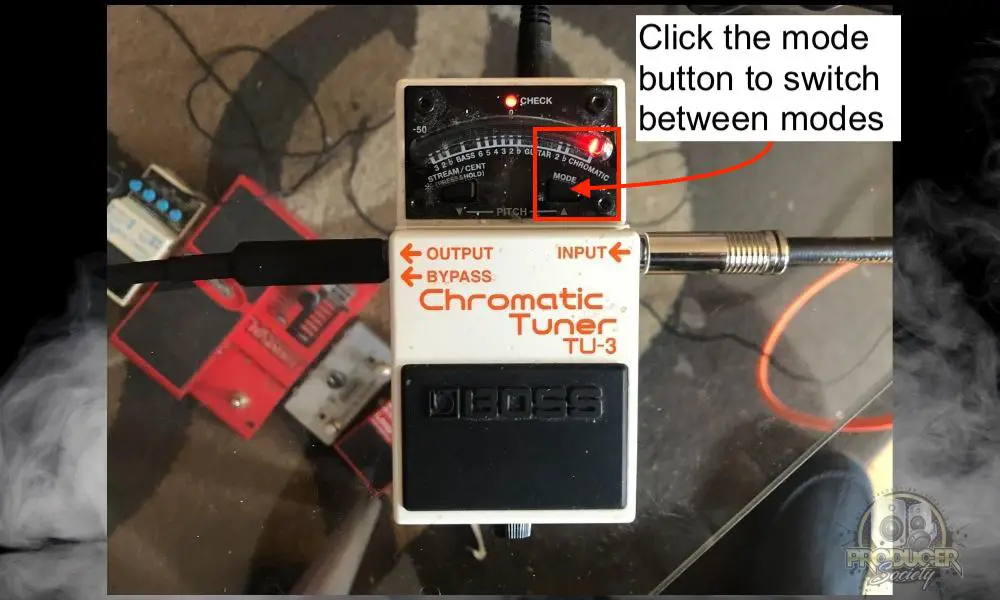
I’m sure other people use this pedal for different things, but I find myself just using the chromatic setting all of the time, rather than any of the other ones. Even if I want to tune down to D standard, I would still do it that way.
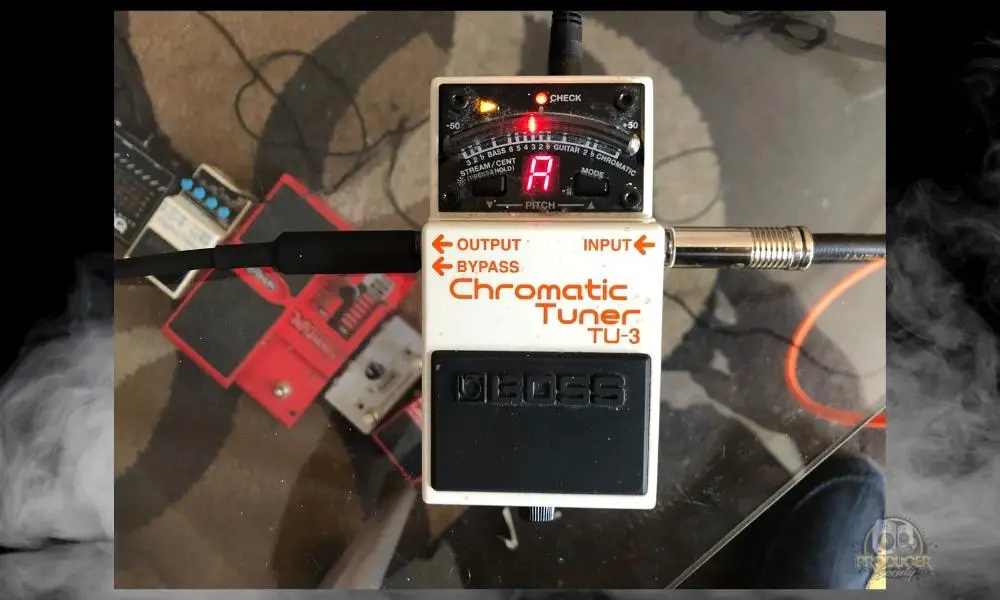
Chromatic, in case you don’t know, refers to all 12 notes with all the accidentals, ie, C, C#, D, Eb, E, F, F#, G, Ab, A, Bb, B. Although, the tuner pedal won’t use flats; it only uses sharps.
Punkademic’s Music Theory Comprehensive Complete is a great course to get via their All-Access Pass if you want to learn all of this stuff. The All-Access Pass gives you access to everything on the site.
Streaming Mode
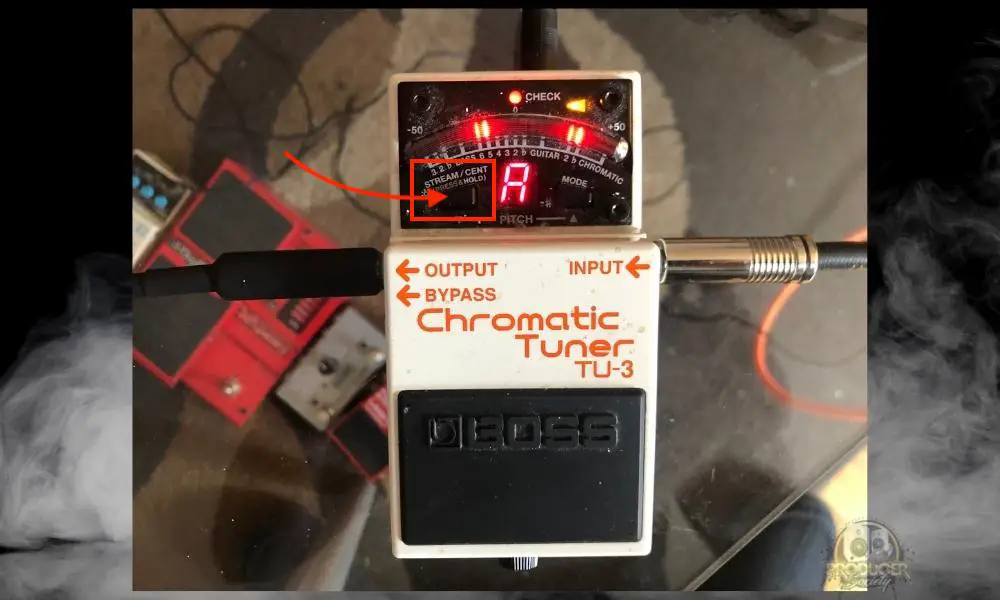
If you click the “Stream/Cent” button, you’ll begin using the Streaming option instead, which is kind of bizarre, in my opinion. Essentially, it is a more visual way of tuning your strings. I’m not really into it, but I’ll explain it to you.
Rather than having just one meter which tells you to tune the string sharp or flat, instead, the Streaming mode offers two.
And they move together in the same direction to tell you whether to tune sharp or flat. The faster the two meters move to the left, the flatter you are. But the faster the two meters move to the right, the sharper you are.
Cent Mode

Cent mode is just the standard mode. The dial moves from left to right depending on how flat or how sharp it is. If it goes too much to the left, it’s flat, and if it moves to the right, it’s sharp.
Guitar Mode
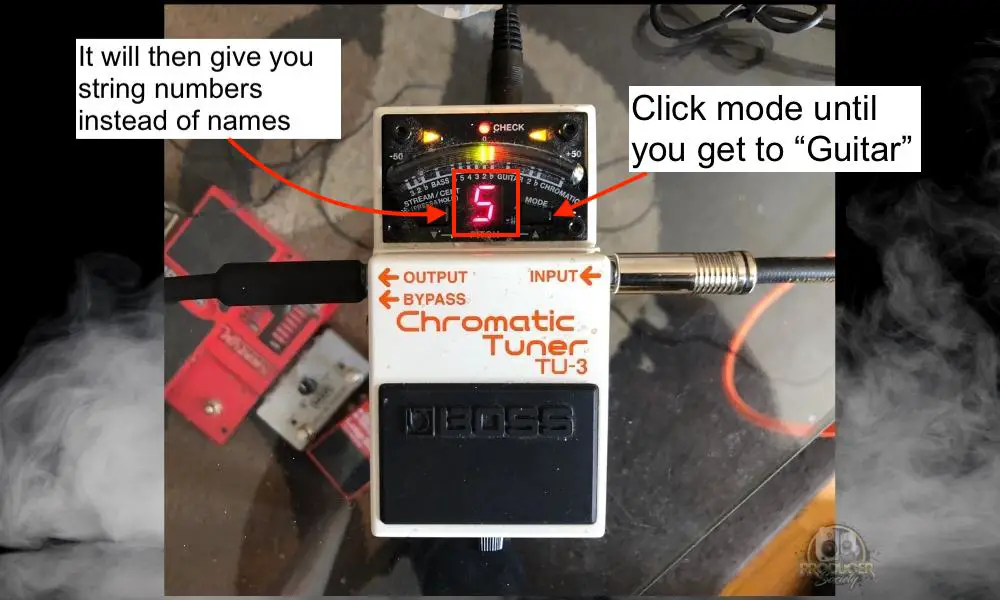
Here’s where we start to get into more of the bells and whistles because I can’t imagine that people use these settings.
Maybe they do, I don’t know, but it makes the most sense to me to just tune the strings according to their names (E, A, D, G, B, E).
In effect, when you switch to Guitar mode on the Boss TU-3, it’ll give you the numbers of the strings, rather than the name of it.
For instance, the “1” refers to the High E-string, and the 6 refers to the Low-E string. I’m sure you can figure it out from there.
Bass Mode
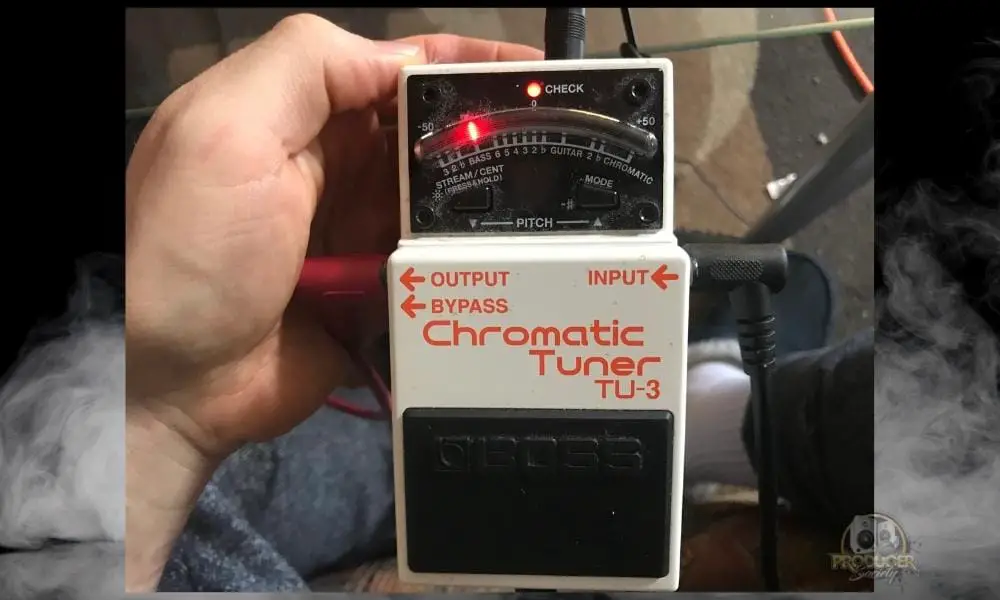
Bass Mode functions in pretty much the same way as the “Guitar” mode, except it uses the four strings of the bass guitar as a frame of reference. They are E, A, D, G. Believe it or not, I actually had to look up the notes of the bass guitar.
Flat and Double Flat
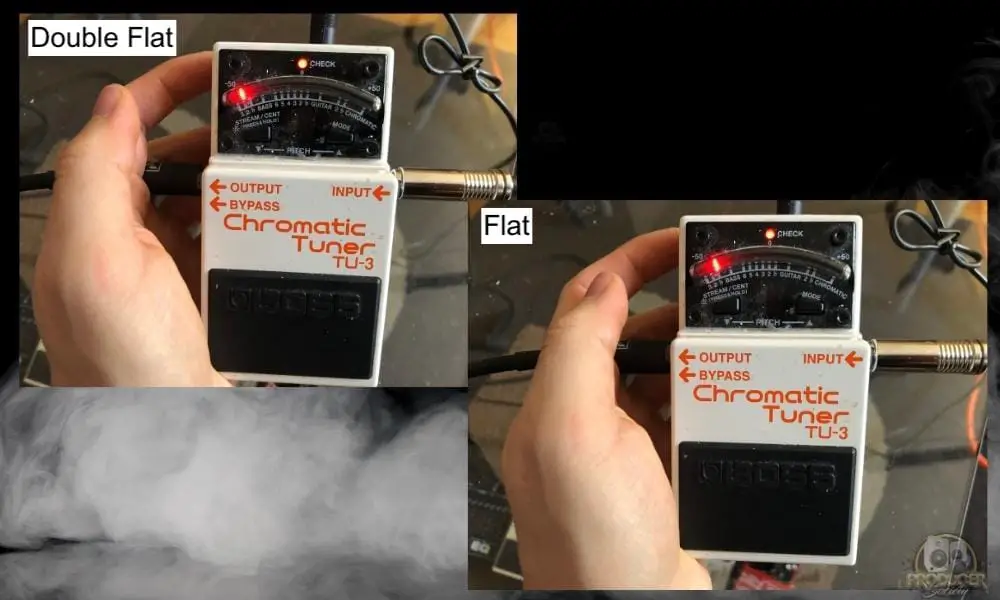
By hitting the Mode button and switching to flat, double flat, or triple flat (in the Bass guitar’s case), you’ll tune your guitar 1 semi-tone lower.
In other words, one flat means you’re tuning down to Eb Standard instead of E Standard. 2 flats are D standard. And 3 flats is C# Standard. I often use this setting if I’m going to tune just one semitone down or down one whole step.
LED Mode
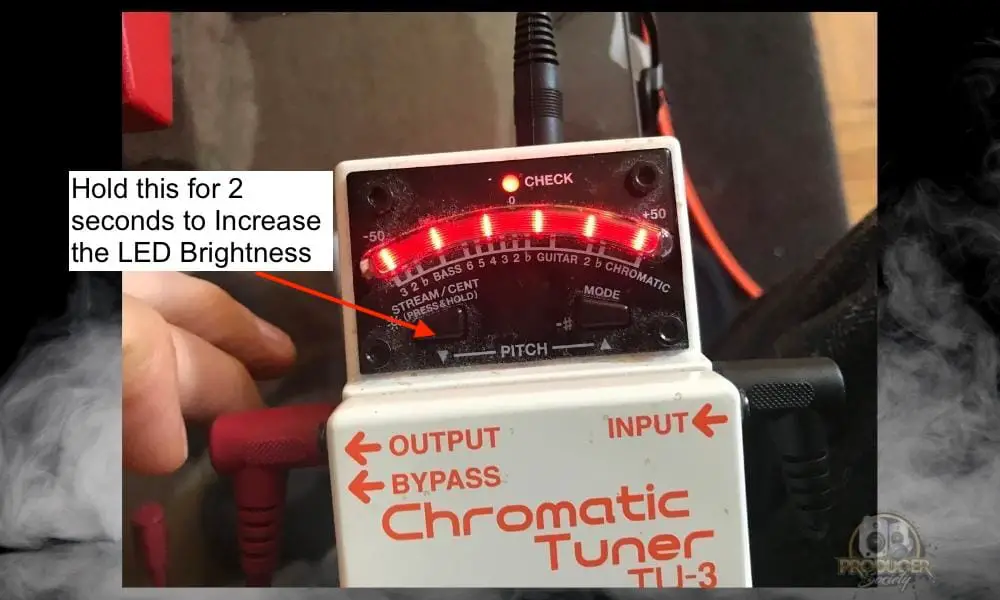
If you’re using this outside and the sun is too bright, the extra LED power you get from this pedal is really handy. By simply holding the Stream/Cent button for 2 seconds, you’ll toggle between normal LED and maximum brightness. I just leave it on Max at all times.
Power Other Pedals Using the Daisy Chaining Option
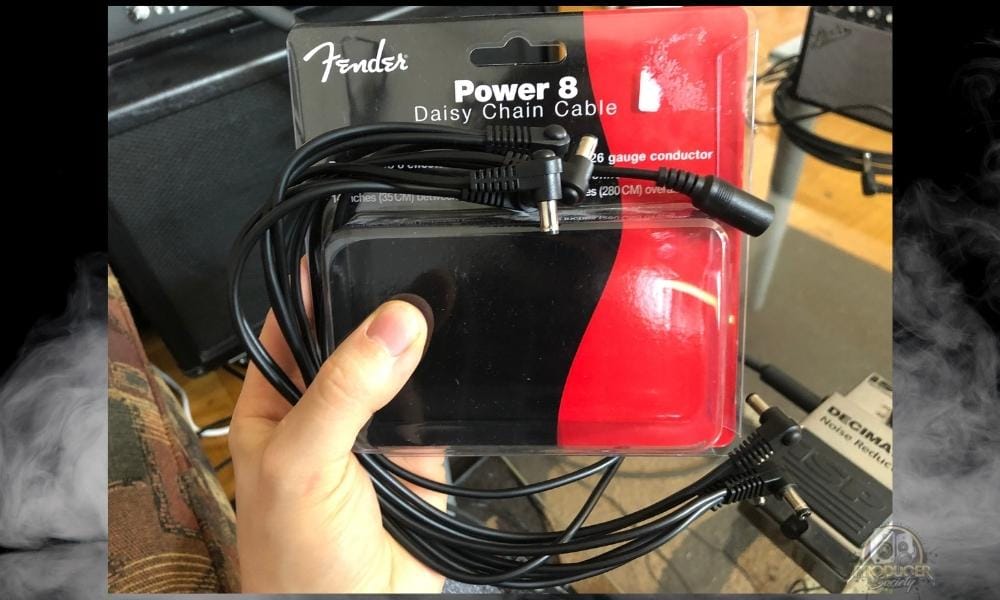
I didn’t know it was even possible to do this until recently. The OUT DC Jack on top of the TU-3 allows you to use the pedal as a power supply to other pedals in your rig.
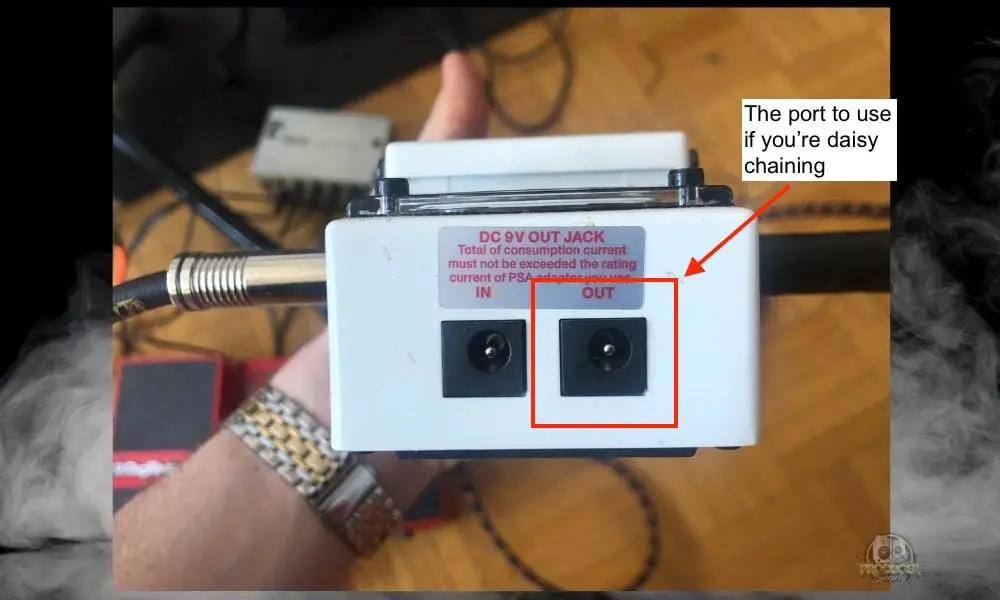
Using the Fender Daisy Chain cables, you can run one from the TU-3 into the DC Input of the other and power it that way, assuming you’re running the appropriate adapter into the TU-3 (9V AC to DC power adapter as I showed earlier).
From what I’ve experienced thus far, it can be quite noisy, which I imagine is one reason why people choose to use isolated power supplies instead like the Voodoo Labs Pedal Power 3 +.
Either way, it’s good to know the option is there. And I could see how a lot of people would use daisy chaining cables instead.
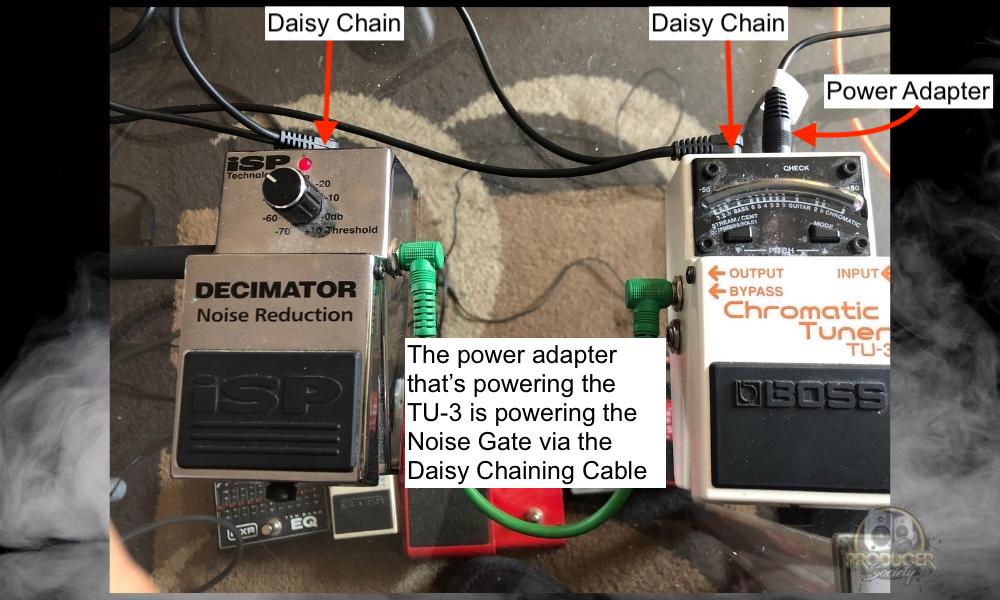
Important Thing to Note: I’m using the Fender Daisy Chaining cables and not the Donner ones. I can’t speak for the Donner cables, but they seem to be well-reviewed.
5) Turn The Tuning Heads While Strumming the String
I think this part is self-explanatory, but I chose to go through with it anyway because I like to be thorough. There are many types of headstocks, but the majority of them fall into two camps: the inline headstock, and the 3+3 headstock.
Some headstocks like the ESP LTD guitars will have headstocks that are flipped upside down (they look super cool), but nearly all the standard guitar headstocks are one of these two.
For Inline Headstocks (Telecasters and Stratocasters)
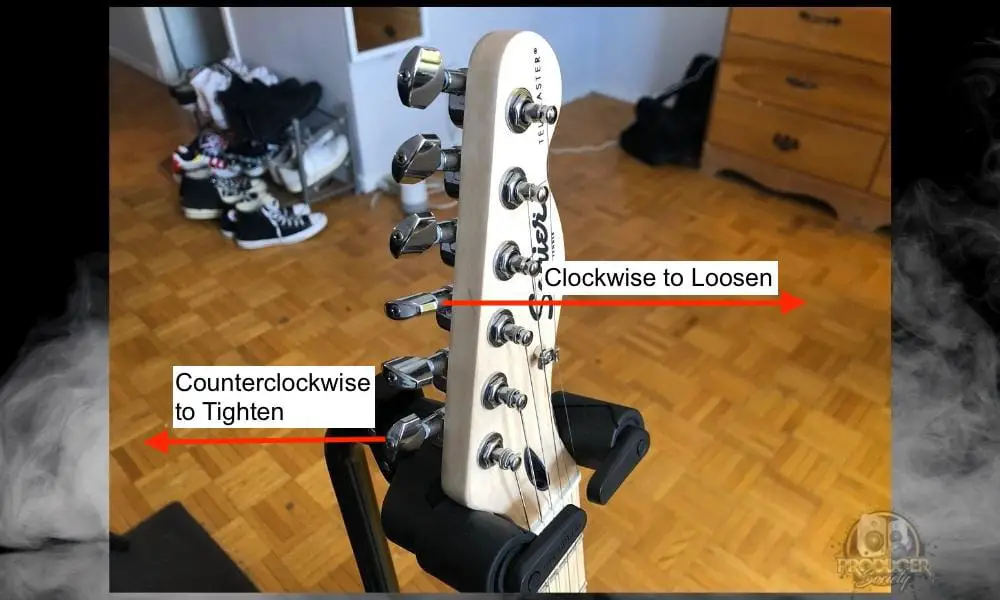
For the inline headstock which can be found on all Stratocasters and all Telecasters, you’ll want to turn the tuning knobs counterclockwise to raise the pitch, or clockwise to lower the pitch.
For 3+3 Headstocks (Gibson Les Pauls)
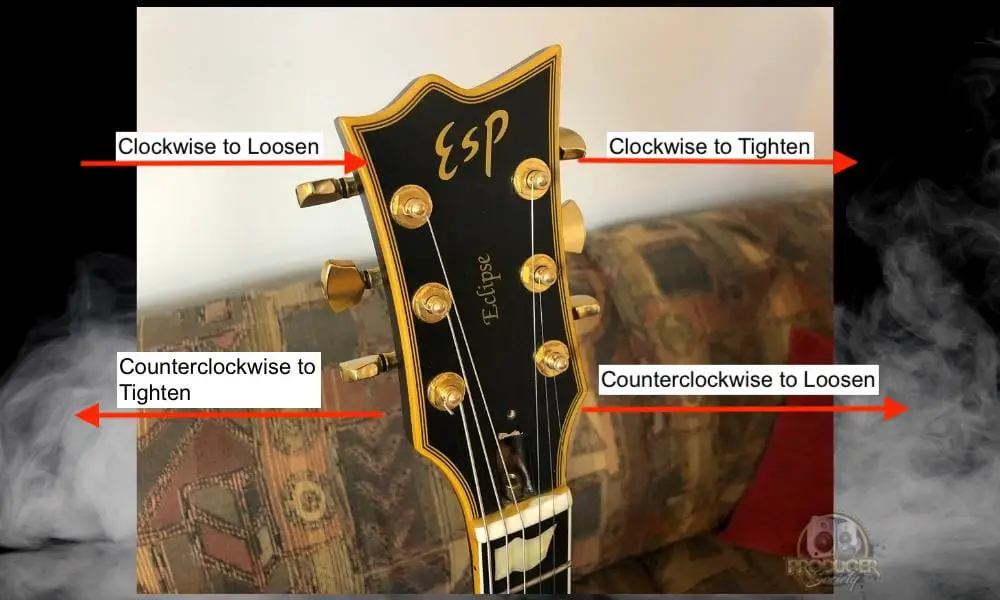
On a 3+3 headstock, it’s a bit different, although the first side on the left is the same. On the opposite side of the headstock, you do the opposite.
How to Tune to An Alternate Tuning
To tune a guitar to an alternate tuning with a tuner pedal like the BOSS TU-3, you’ll want to use Chromatic mode. This mode allows you to tune to whatever note you want including all of the accidentals. However, the BOSS TU-3, for example, uses all sharps instead of flats and sharps.
I’ll show you how to do it in a second because I think it’s worth pointing out. After all, it even escaped me while I was learning how to use it.
How the Boss TU-3 Indicates That You’re Tuning To An Accidental (#)
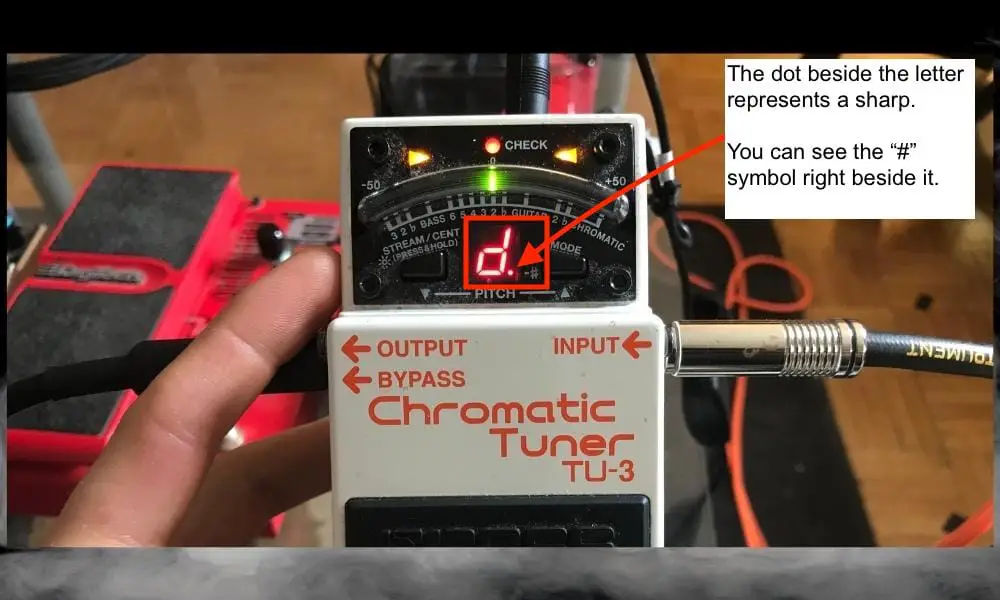
It took me a bit to figure out how the chromatic tuner actually worked on the BOSS TU-3. Simply put, to tune to a note with an accidental, you just tune the BOSS TU-3 to the note you want, however, the accidental is represented by the small dot beside the letter.
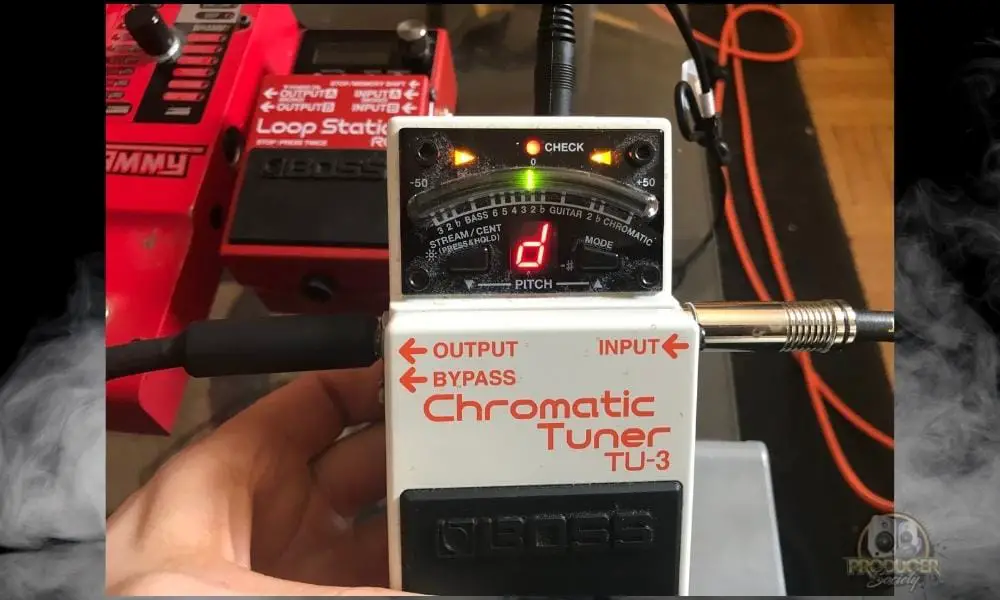
Maybe you knew this right away, but I know I didn’t. If you were the same as me, you’re welcome. Moving on though, let’s talk about where to actually put the tuner pedal in our signal chain because this can be confusing as well.
Where to Put The Guitar Tuner Pedal in The Signal Chain (Pedalboard)?
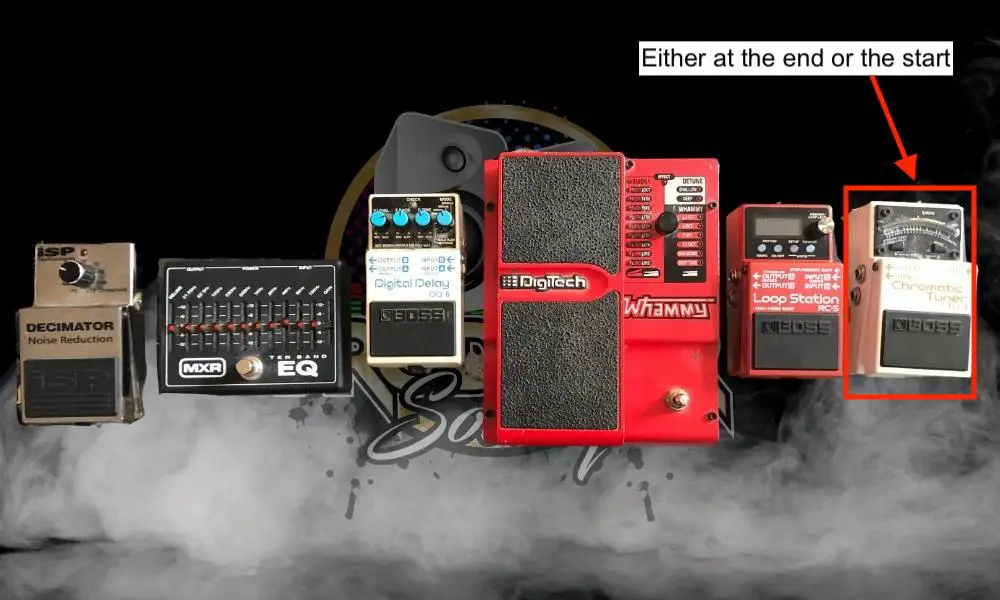
The standard practice for placement of the guitar tuner pedal in the signal chain, particularly on the pedalboard, is at the end of the chain. The first pedal after the guitar is usually the tuner, because then you get a clean sound going into the tuner for accuracy’s sake.
Although, I’m pretty sure that if you put the tuner at the start of the signal chain (the one closest to the amplifier), you would probably be fine. I’m fairly certain I’ve done it before and there wasn’t a big difference. Try it out and let me know, maybe I’m wrong.
How to Use Bypass on the BOSS TU-3
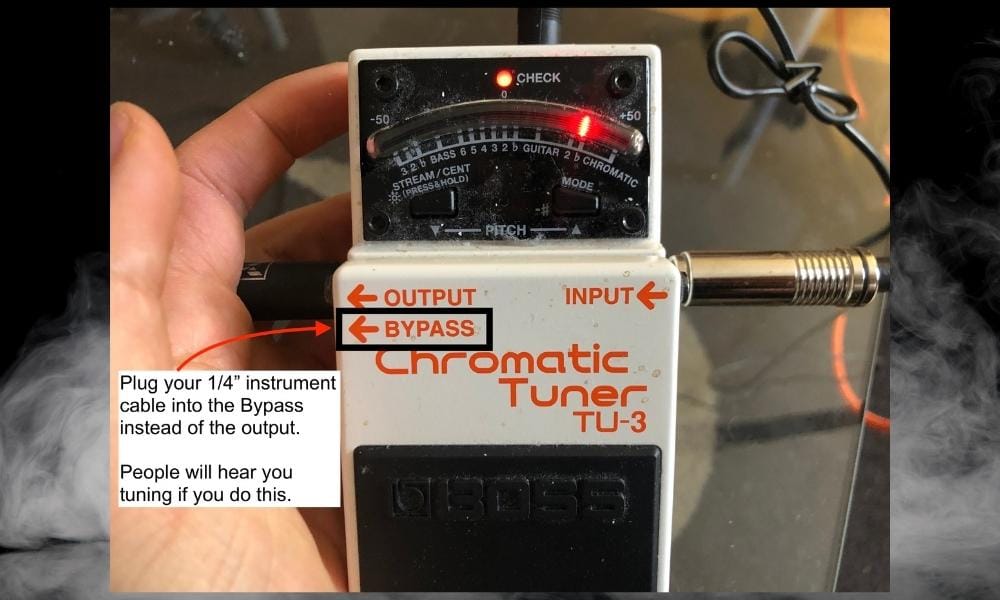
Another feature on most tuner pedals is the ability to choose Bypass or not. This means that you can choose to have people hear your tuning, or you can choose to mute it. I exclusively use the “Output” and not the “Bypass,” because who wants to hear me tuning?
I imagine there is a reason why this has been included on the BOSS TU-3 tuner pedal, but I’m not sure why that is. You would have to ask someone with a bit more knowledge than me.
How to Change the Pitch Reference Point from 436Hz to 445Hz
![436 Hz - 445 Hz - How to Use A Guitar Tuner Pedal [Signal Chain FAQ + More]](https://travelingguitarist.com/wp-content/uploads/2022/03/436-Hz-445-Hz-How-to-Use-A-Guitar-Tuner-Pedal-Signal-Chain-FAQ-More.jpg)
The last feature on the list is the Pitch Reference Point. On the BOSS TU-3, you can change the frequency by which you compare all the other notes.
440Hz is the note, A, and it’s the standard that most of us use to tune our guitars and instruments. However, you can actually use a different reference point instead. On the BOSS TU-3, for instance, you can choose from 436Hz to 445Hz.
To change the pitch reference point on the BOSS TU-3, click the Stream/Cent button at the same time as the “Mode” button, and then click “Stream/Cent” to decrease it by one, or the “Mode” on the right to increase it by one.
The number goes from 6 to 0 to 5. “6” means you’re sitting at 436Hz and “5” means you’re sitting at 445Hz.
One Tip for Using A Tuner Pedal to Tune Your Guitar
One tip for tuning your guitar with a tuner pedal is to use the neck pickup and then decrease the tone with the tone knob. The idea behind this is the signal will have fewer harmonics which makes it easier for the tuner pedal to pick up on it.
Shout out to Steve Preston who made this comment on the Anderton Blog YouTube channel. They did a great video here where they discussed what I’m about to talk about in the next section.
Important Things to Note About Tuner Pedals
1) Different Tuner Pedals Have Other Features
Something I alluded to earlier and in my article on looper pedals, is that while many tuner pedals are fundamentally the same, they often have different features.
Much of what I taught in this article can be applied to other tuner pedals too, although, the controls might be a bit different.

 Written By :