 Written By :

The first few dozen times I set up my Epiphone Les Paul, I made several errors, like continuously using the wrong Allen wrench for the truss rod screw which was a big mistake in retrospect. After years of practice, I’m much better at it and with a minimal number of tools. The paragraph below is the TLDR:
To set up an Epiphone Les Paul
1) Use a 4mm Allen wrench to set the truss rod relief to 0.008.” Use feeler gauges to measure.
2) Set the action to 5/64 and 4/64 at the 12th fret on the low & high-E sides
3) Set the intonation
4) Set the bass & treble pick-up height to 3/32″ and 1/16″

Setting Up An Epiphone Les Paul – A Step-By-Step Guide

A Brief Set-Up Guideline for Epiphone Les Paul
If you’ve never done it before, taking the correct measurements the right way is often the hardest part, and it’s certainly something I’ve struggled with.
If you already have experience with setting up your guitar and simply need the specs, here’s a quick rundown of what I recommend. I did the same thing in my guide on how to set up a Telecaster.
These are loosely based on Guitar Player Repair Guide writer, Dan Erlewine’s factory specs as well as this YouTube video.
On the left-hand side of the chart shown below, we have the set-up parameter. The fretting column explains which fret needs to be held down to make the measurement.
The measurement column is the actual measurement, of course, and then we have the factory specifications which are listed as a point of comparison on the right-hand side. I’ve also included the measurements in metric.
| Set-Up Parameter | Fretting | Measurement | Factory Specification |
|---|---|---|---|
| Truss Rod Relief (at 7th Fret) | 1st (capo) and 19th (with finger) | .008″ [0.2032mm] | .012″ [0.30mm] |
| String Height (at 12th fret) | N/A |
Low E: 5/64″ [1.98mm] High E: 4/64″ [1.19mm] |
Low E: 6/64″ [2.38mm] High E: 4/64″ [1.58mm] |
| Pickup Height | While fretting 22nd Fret |
Neck Pickup: Low-E: 3/32″ High-E: 3/32″ [2.38mm] Bridge Pickup: Low-E: 1/16″ High-E: 1/16 [1.58mm] |
Neck Pickup: Both Sides: 6/64″ [2.38mm] Bridge Pickup: Both Sides: 4/64″ [1.58mm] |
These specs are a great starting point for an Epiphone Les Paul. But since your personal preferences might differ, you can adjust these slightly to taste.
For instance, the factory specifications are usually too hard to play with and therefore not a lot of fun, and who wants that?
I prefer a lower action myself, so I lower the string action at the 12th fret just a bit and adjust the neck relief accordingly. Usually, this means that I’ll have the truss rod relief set to 0.008″ or 0.20mm.
Now, if you don’t know what these numbers mean and how you can measure them and get the perfect setup, let me show you the tools and proper steps required.
Some of the tools are easy to get your hands on, others not so much, but either way, I’ll give you the place where you can get each.
Additionally, I’m going to pepper in some explanations, tips, tricks, and other useful things to know that’ll help you make more informed decisions.
Tools You Need for Setting Up An Epiphone Les Paul
You may already have all these tools in your home or garage, but if you don’t, I do recommend getting them before you start the process. A man is only as good as his tools.
I’ve included a link to where you should get each. My other article on how to set up a PRS also has a big list of tools.
However, if you’re interested in getting everything all at once, a good tool kit to get is the Music Nomad set-up kit on zZounds, as it includes much of what you need all in one basket. Looking back on it, it’s properly what I should’ve done all those years ago.
1) Pliers/String Cutters
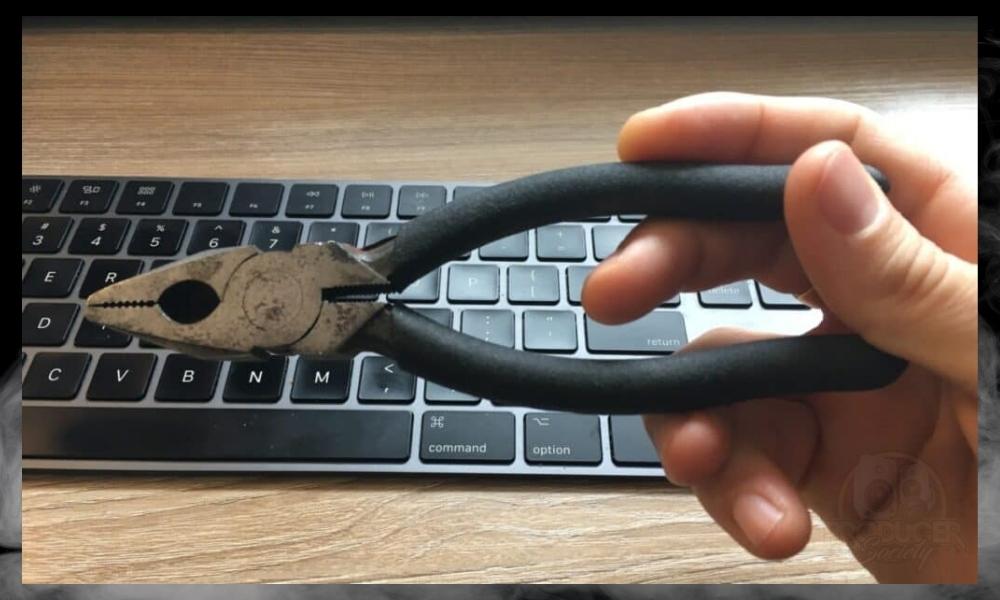
You’ll need a pair of pliers or string cutters to cut off the excess string after you’re done restringing your guitar. In some cases, the strings may also get caught in the peg hole, in which case, you can pull them through with the pliers. For cutting, wire cutters are better.
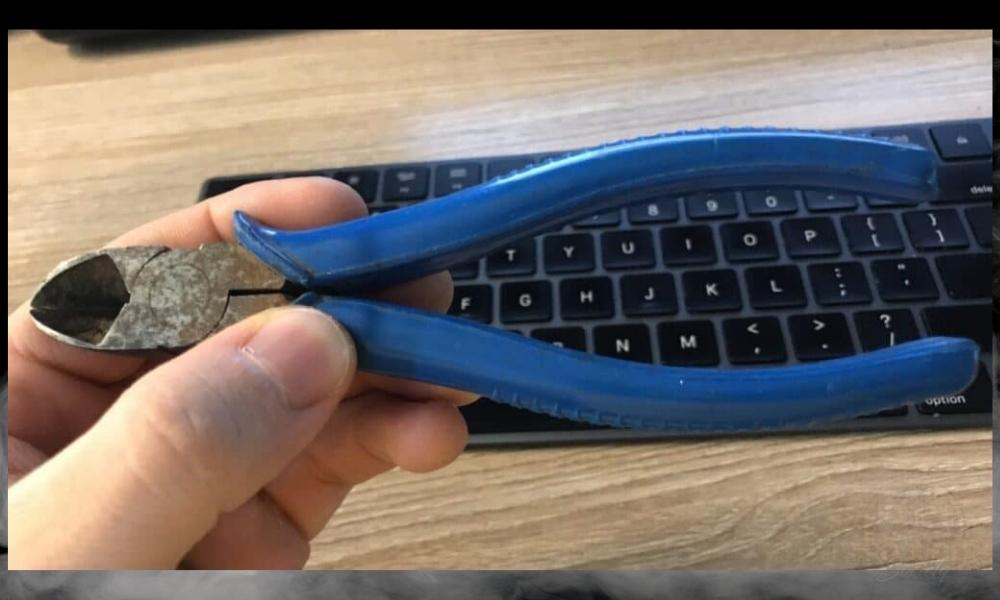
As I just said, wire cutters are better for actually cutting the strings, so I recommend having a pair of both pliers and wire cutters. They’ll come in handy and are much easier to work with. Anybody who needs to perform set-ups semi-frequently will want wire cutters.
2) Philips Screwdriver 1/4″ or #2
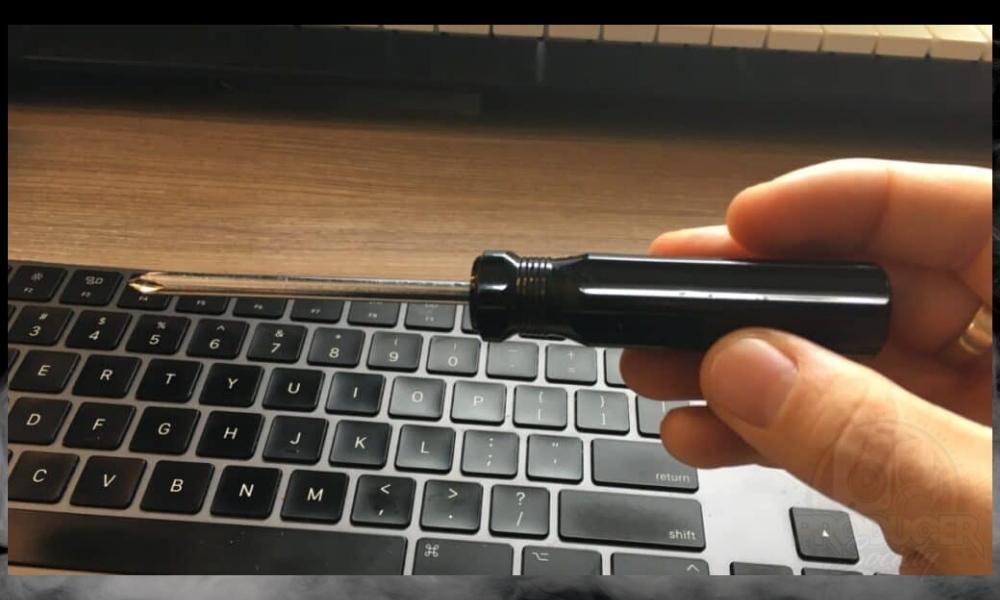
You’ll need a screwdriver with Philip’s head for all the plus-shaped (+) screws. This includes the screws on the truss rod cover, the pickup height adjusters, as well as the pickguard. I recommend going with the 1/4″ screwdriver over the #2 but both should work.
3) Flat-Head Screwdriver

A flat-head screwdriver will help you adjust all the flat screws (–), such as on the bridge and tailpiece.
If you can get your hands on one that has a right-angled handle on it, I would recommend getting one of those instead. If you have a tune-o-matic bridge though, you could just loosen the strings and then turn the pegs with your hands.
4) Truss Rod Wrench 4mm (Hex)
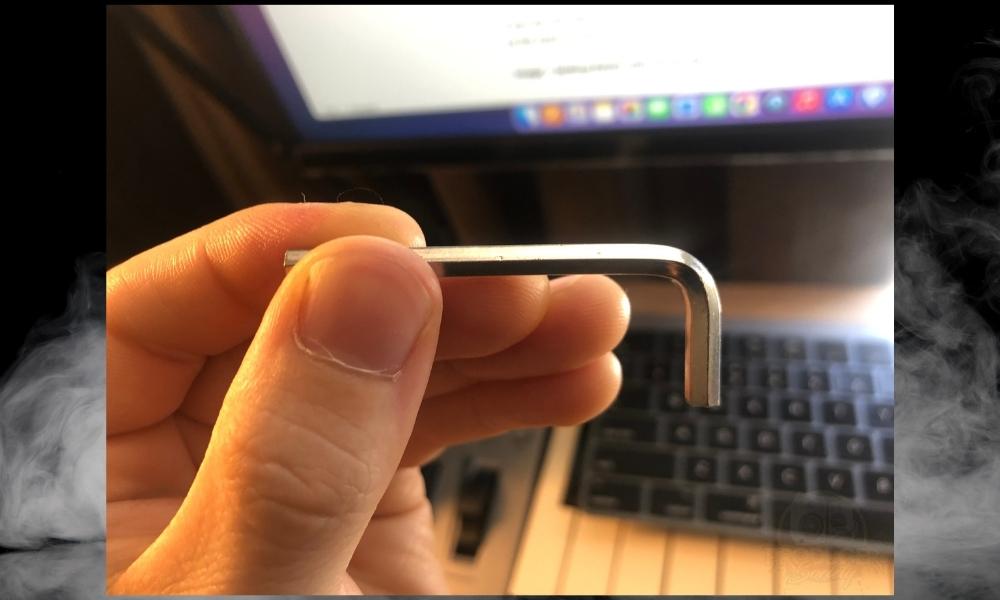
You’ll need a truss rod wrench to adjust the truss rod and the neck relief. Many guitars often have different truss rods, but for an Epiphone Les Paul Custom, you’ll likely need a 4mm Allen wrench (also called a hex key).
I find the 4mm wrench is the best one to use. Some will recommend the 5/32″ but the 4mm seems to me to be a more proper fit.
5) Mitutoyo Straight Ruler
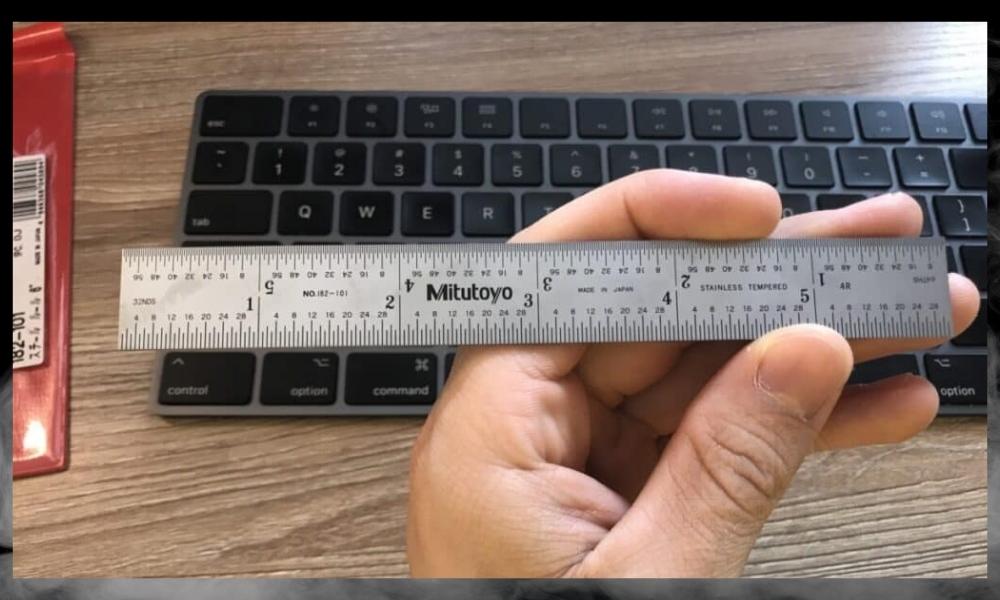
The Mitutoyo ruler is great because it’s high-quality steel, it’s straight-edge, and the measurements are accurate and diverse. You can measure in imperial or metric, and I couldn’t recommend it enough.
It will come in handy for all kinds of things including taking the pickup height measurements and measuring string action. It’s a fantastic buy on Amazon.
6) Cleaning Cloth
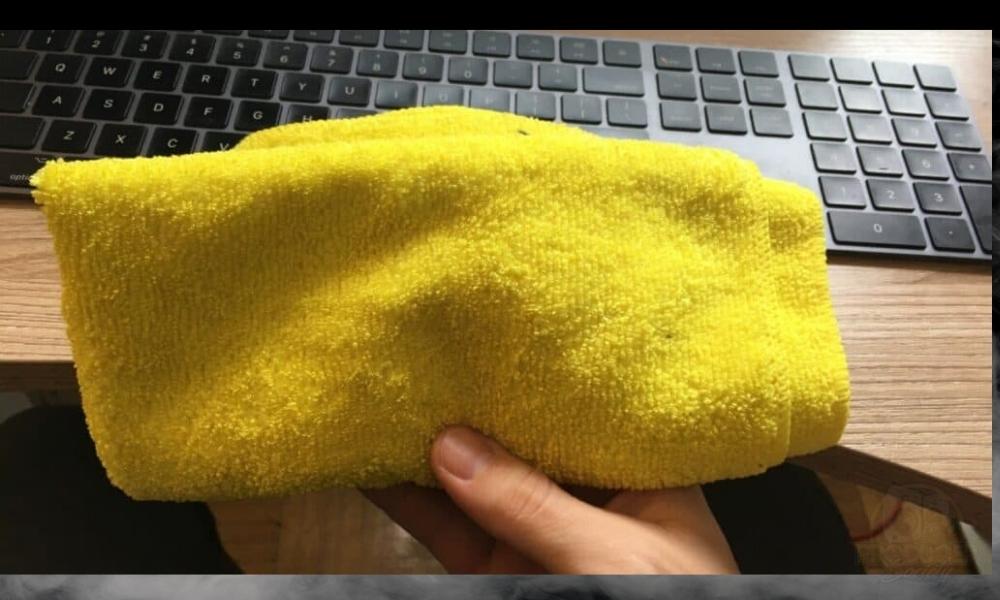
A clean, dry, soft cloth for cleaning all parts of the guitar. I recommend a microfibre cloth, as they pick up dust and grease better than other cloths.
You can use multiple types, but the microfibre cloth is great for cleaning the neck and for getting into hard-to-reach places. Buy a bundle of them on Amazon and you won’t go wrong.
7) Guitar Polish/Cleaner
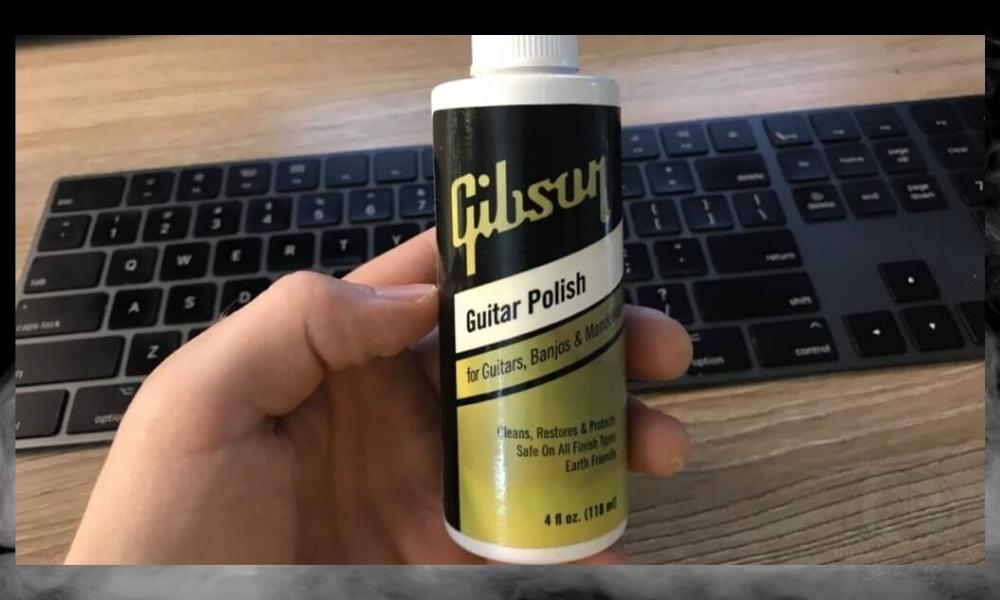
While you’re cleaning your guitar, using a proper polish can help it shine much better and give it the brilliance and sparkle you’re looking for.
Since it’s easiest to clean the guitar when the strings are off, I recommend doing this whenever you change strings so you get the shiny new guitar feel.
8) Fretboard Conditioner
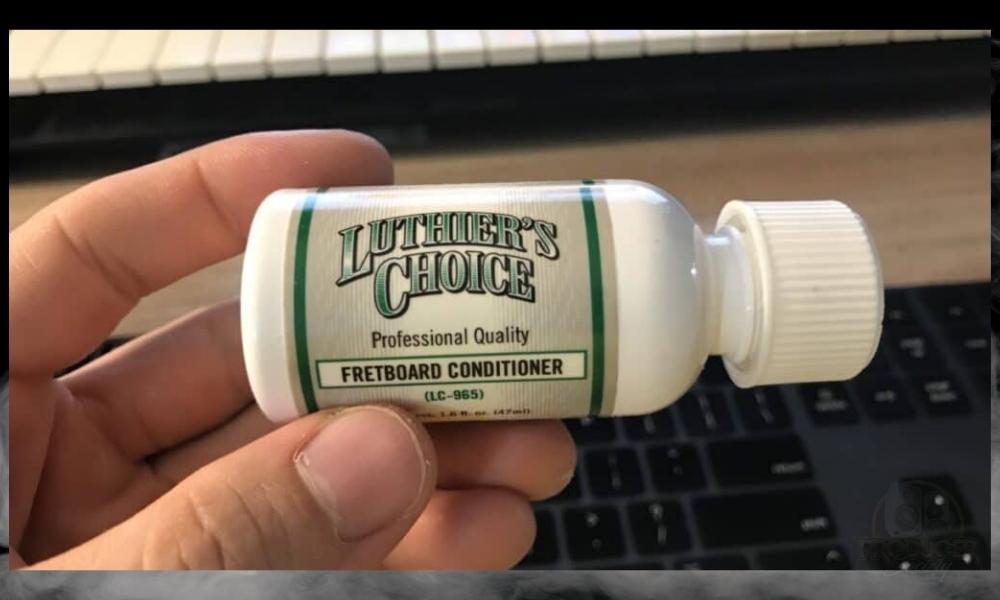
This isn’t totally necessary, but depending on your climate’s humidity and how often you play guitar, fretboards do tend to dry up every now and then, which can lead to cracking.
Using a fretboard conditioner like lemon oil (but not lemon necessarily) while cleaning the guitar helps keep it smooth and moisturized.
I usually use it whenever I change strings, which realistically, is only once every six months. You could probably get away with using it only once per year.
Don’t be afraid to use a conditioner other than lemon oil. In fact, I usually shy away from lemon oil just because I don’t want it to be scented.
9) Snark Tuner
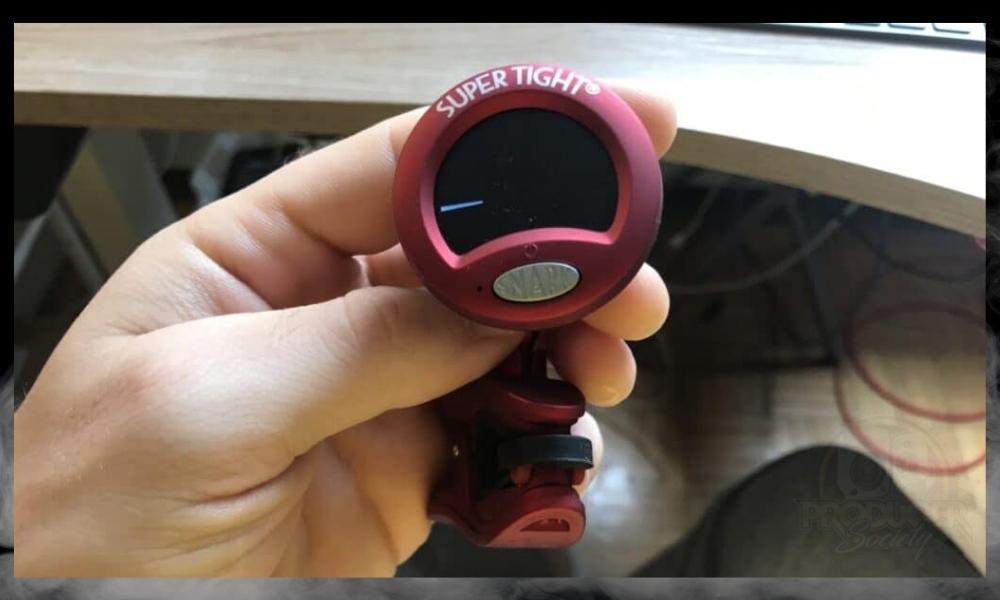
You can use any guitar tuner – a clip-on, a mobile app, or a DAW plugin, but I recommend Snark tuners for their fast and relatively accurate tuning. You can easily tune within +/- 1 cent, and this will help you check your intonation accurately as well.
I find the Snark to be essential for guitar set-ups because then you don’t have to repeatedly plug the guitar back into your tuner when you’re setting it up. You can just clip it onto the headstock until you’re done.
A lot of people hate on the Snark tuners, but I have nothing but nice things to say about them. I also own one from Martin, and it’s not nearly as good.
10) Capo
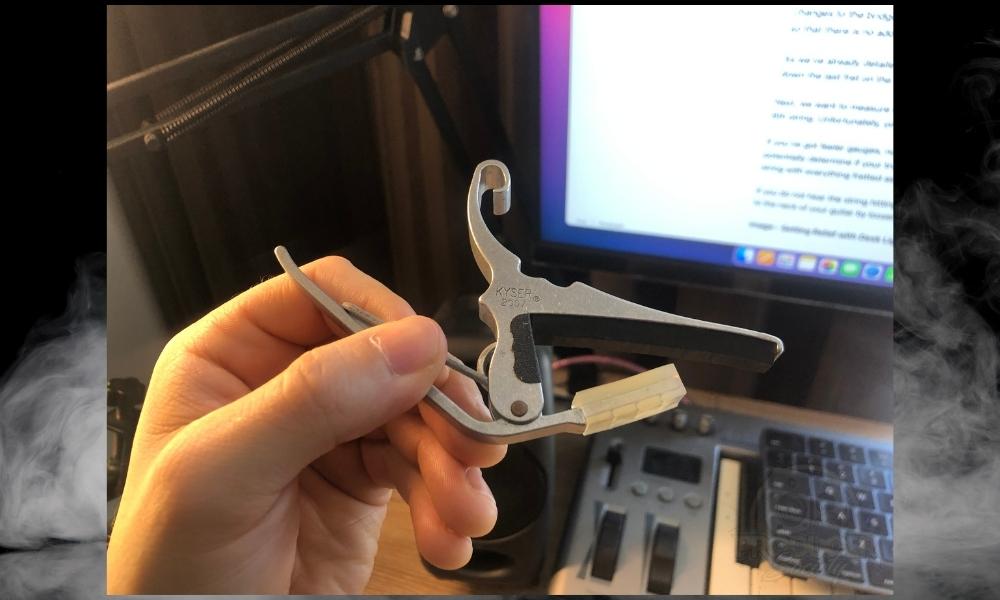
A capo is another must-have tool for guitar set-ups because it’s great for adjusting the truss rod and doing other things like changing strings.
It helps you clamp the strings down while you’re taking measurements. This frees up your hands and makes it easier than doing it with your fingers. You can also use it to clamp down strings when you’re stringing it up.
11) Feeler Gauges
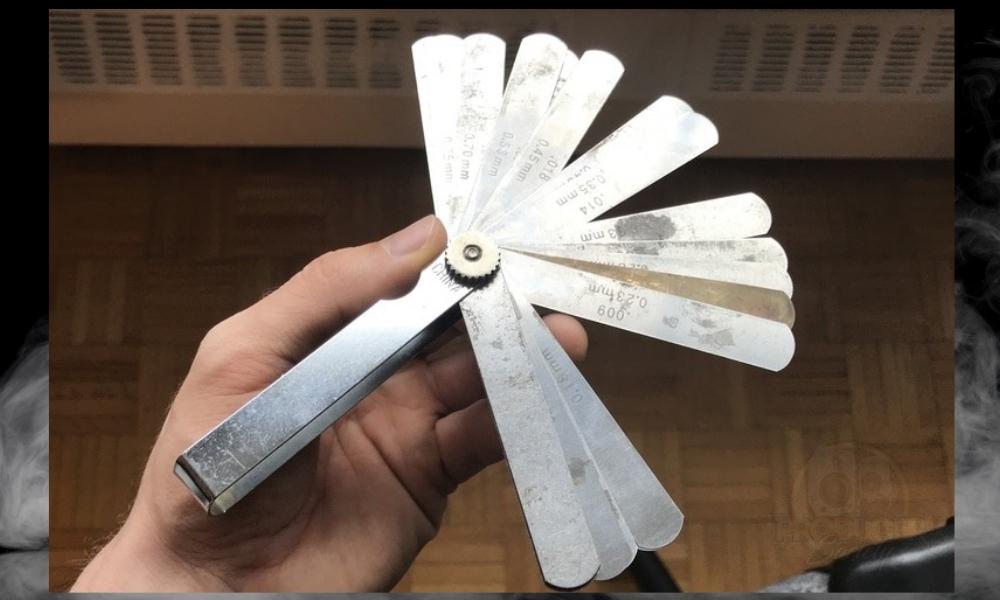
Feeler gauges are what you use to measure the distance between the string and the fret when you’re setting the truss rod relief. I’ve deliberately chosen the better gauges on Amazon because it’s important that you use quality gauges.
If you can get your hands on better ones for a better price, go ahead, but ensure you’re getting something decent. You’ll thank me later.
12) A Desk Light
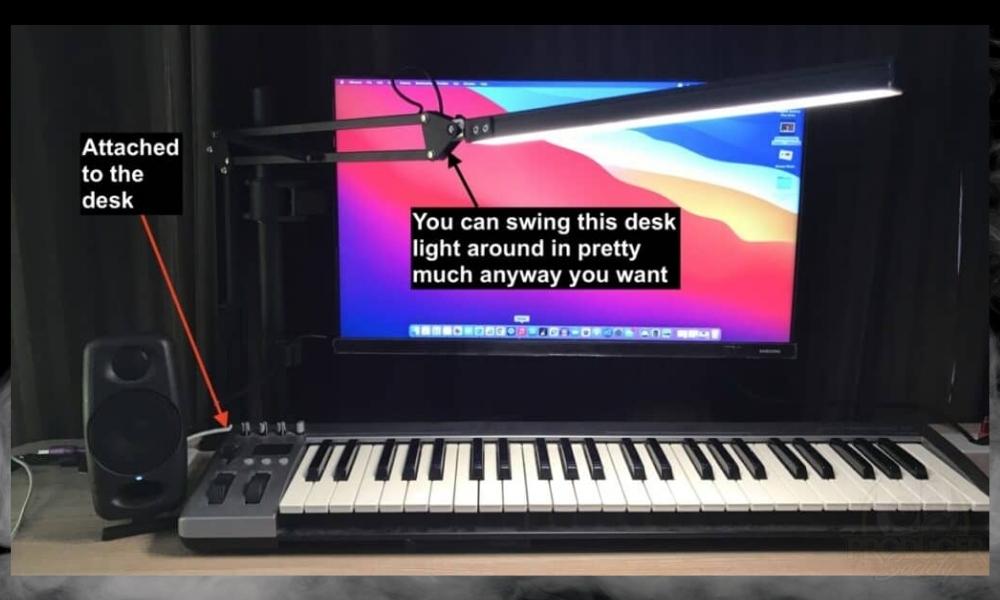
A desk light, or any kind of hyper-specific and adjustable light, proves very useful for setting up a guitar because you can get the light in really close for setting the truss rod relief but also for cleaning.
It’s also very useful for taking proper measurements. So let’s get into how we use all of these tools for setting up the guitar.
How to Set Up the Epiphone Les Paul Custom


So now you’ve got all of the tools in place and you’re ready to start setting up your guitar. Before you start the process, place the guitar on a stable desk and support the neck with a suitable neck holder, or even use some foam, a towel, or a full Kleenex box.
I position the light toward the neck so I can see what I’m doing, and then I start taking the strings off.
1) Take the Strings Off

The first thing you’ll need to do is remove the strings from your guitar. To do this, detune your guitar completely, and simply use your wire cutters to cut each string around the 12th fret. If you don’t have a wire cutter, you can simply unravel the strings from the tuners.
Remove the cut strings from the tuners by rotating them to unravel, and be careful as metal strings can scratch your finish. Next, remove the bottom parts of the strings from the saddle while avoiding any scratches.
At this point, some people like to measure the height of the bridge and tailpiece posts so that you can set them again before stringing the guitar.
This will give you a reference point. To do this, simply take your ruler, place it flat against the body and the tailpiece, and measure. You could also just count the threads on the screw so you have a rough idea of where the bridge was sitting.
Do the same for the bridge. Measure both sides for both the bridge and tailpiece. Now, you can take them out if you need to clean them; else, I recommend leaving them in place so that you don’t accidentally move the screws.
2) Clean the Guitar Before Setting It Up

Next, you’ll want to clean your guitar before you start adjusting anything. This will help ensure that all the parts of your guitar are in good working condition and make it look brand new.
You can use a guitar polish/cleaner and a fretboard conditioner to clean your guitar better. What I usually do is I hold the guitar polish bottle about 1.5 feet away from the guitar, and then I spray it a bunch of times, while trying to avoid the electronics a bit.

For the fretboard conditioner, I just dab the cloth with the conditioner and then rub it nicely onto the fretboard. There’s no reason to douse it in conditioner. I find that often just two dabs are enough to get sufficient conditioner soaked into the wood.

First, just use a clean and dry cloth to wipe down every part of the guitar. Microfiber works best, but cotton cloth works just as well. Wipe everything, including the tuners and other hardware.

For the headstock, the back of the neck, and the body, spray guitar cleaner onto the finish, then wipe it down with a microfiber cloth.
Always check the cleaning agent to ensure it is suitable for the surface you are applying it on: some finishes don’t react well to these chemicals.
But the standard finish on a Les Paul shouldn’t have an issue. For ‘deep cleaning’ the fretboard, start with an old pick or any other rigid plastic to scrape out any grime in case you haven’t cleaned it in a while.

Don’t use metallic objects on the fretboard to avoid damage. Use a soft brush or the same cloth to remove any dust off the fretboard.
For the frets themselves, if you find that they look unclean or perhaps a bit uneven or grazed off, you can use some sandpaper or 0000 steel wool to gently file them down and clean them.
But don’t do this too much to avoid disturbing the fret levelling. For the other hardware, such as bridge, tailpiece, pickups, and knobs, I recommend only cleaning them with a cloth and not using any chemicals as it’s not necessary.
After cleaning, remove the truss rod cover using a 1/4″ screwdriver as it’s easier to remove before putting on new strings.
3) String the Guitar Back Up
Once your guitar is clean, you should set the posts of the bridge and tailpiece to the height you noted earlier before you start stringing it back up.
Measure the height of the posts using the ruler or the thread count, as I described earlier by placing it flush against the body.

If they’ve changed, set them to the height you noted before cleaning. This will save you a lot of time as default heights are often a great starting point for further adjustments after you’ve tuned up. Now, place the bridge and tailpiece back on the posts.
Tip: It’s not totally necessary to measure anything at this point, because you’ll be setting the action and pickup height anyway.
Next, put your strings on the guitar. To do this, thread each string through the appropriate tailpiece slot and tuning peg, and wind it until the string is tight. What I normally do is set the tuning peg holes all in the same direction before I start putting the strings through:

Make sure to leave some slack before cutting the excess string off. A nice rule of thumb for slack would be leaving one-and-a-half times the tuner’s length.
Another way of measuring this is to put your hand on the neck perpendicular to the fretboard. From there, I add even more slack, because I find that I often undershoot how much string should be there.

While winding the pegs, make sure that none of the string winds overlap with each other. I do this by trying to get each string wind to go underneath the previous wrap.
This would prevent issues with tuning retention and will also keep things neat and tidy. I also recommend putting a kink in the string after putting it through the hole.

This will ensure that it winds around the tuning peg in a clean and neat way. Another great rule of thumb is to remember that the strings should be on the inside of the headstock. A picture is worth a thousand words so here’s how that looks:

Before tuning, you could lubricate the nut grooves and the string contact point on the bridge saddles with lubricating oil. This supposedly improves tuning stability.
Dip a small piece of excess string into the oil and use it to apply a small drop into the nut grooves and spread it, then wipe off the excess. Personally, I don’t do this, but a lot of people recommend it.
4) Tune The Guitar

Now that your guitar is strung up, you’ll need to tune it. I recommend using the Snark, and not the one I’ve got here. I used my Martin tuner for this tutorial simply because it was closest to me at the time.
If you’re using a clip-on tuner, simply clip it onto Les Paul’s headstock and pluck each string one at a time. The tuner will tell you if the string is too high or too low.
If it’s too low, turn the tuning peg counterclockwise until the string is higher, but if it is too high, turn the peg clockwise until it is lower than the desired note and then tune back up to it.
Repeat this process until every string is in tune. It is important to only tune up to a note and not loosen the string to tune it, as this ensures that the tuning will be stable and last as long as it should. This isn’t a big deal though. It’s just easier to tune up to a note.
5) Adjust the Truss Rod

Once your guitar is in tune, you can start adjusting the truss rod. The truss rod is what controls the amount of relief in the neck. If you hadn’t already removed the truss rod cover, remove it now using a Philips screwdriver for the plus-shaped screws.

The best way to look for relief or bow in the neck is to just look down the neck, followed by a proper measurement which I’ll show you how to do now.
To check the amount of relief in the neck, simply clamp the low E string at the first fret using a capo and use your finger to fret where the neck meets the body (18th to 19th).

Then, use your feeler gauges and slide them underneath the string to find the measurement between the strings and the fret.
If you’re having trouble seeing the gap between the strings, you want to shine the desk light at the feeler gauge so you can see the light reflect off of it underneath the string. It looks something like this:

Remember, place the feeler gauge as flat as possible underneath the string and against the fret and make it so there is no gap, but it’s also not pushing the string up.
The ideal gap is between .008” and .012” according to Epiphone and Gibson’s recommendation. I usually aim for 0.008.” Try getting the closest feeler gauge between the fret and string as you can without moving the string, or without being too far away.
Tip:
For additional accuracy, put the guitar in playing position, ie, sitting in your lap as if you were going to play it. This is the best way to get the most accurate measurement.
The truss rod can be turned clockwise and counter-clockwise to add or reduce relief, which makes the neck bow less or more concave, respectively.
Generally, a Les Paul’s neck tends to become concave, and the relief increases over time. See the image above for reference.
If there is too much relief, turn the truss rod nut clockwise using the truss rod wrench to reduce it. This tightens the truss rod and straightens out the neck.

Do not turn the nut more than 1/8th turn at once to avoid overdoing it and to prevent any damage to the truss rod. If there is too much bow, loosen the truss rod by turning the wrench counterclockwise.
After each truss rod adjustment, retune the guitar and measure the relief again. This can take a few times to get the ideal relief, so repeat it until you get proper neck relief. Just remember to always tune the guitar perfectly before measuring.
If you haven’t done a truss rod adjustment in a long time, or perhaps never, it may take a second for the truss rod to actually start moving. Don’t worry if it makes a creaking sound. Just keep your increments small, and you’ll be totally fine.
Once you’ve set the truss rod to a place where you’re happy, you can move on to setting the action.
6) Set the Action

The next step is to set the action. The action is how high the strings are from the frets. To set it, you’ll need to adjust the bridge height. Remember to have your neck relief set properly before this, as it will impact the action.
Measure the height of the strings from the 12th fret. To do this, keep the ruler you’re using balanced on the surface of the fret. It’s not rocket science.
Remember, action is measured from the top of the fret to the bottom of the string, and not the fretboard, as mentioned by Gibson’s luthiers. Make sure you measure at the high-E string 12th fret and the low-E 12th fret.

In my view, the height of the Low E string measured at the 12th fret should be 5/64” (0.078”), and the height of the High E string should be 4/64” (0.062”).
Tip:
Similar to measuring relief, the way to get the most accurate measurement is to do so while the guitar is sitting in your lap in playing position
Once you’ve established how low or high you need to go, loosen the strings a good amount before you make changes.
This will allow you to adjust the height of the bridge without any problems, ie, stripping the bridge nut with a screwdriver or causing other issues with the bridge.
Now some Tune-O-Matic bridge models have thumbscrews underneath the saddles, so you can just rotate those slightly with your thumb. You’ll need to loosen the string a lot if you want to use the thumbscrews.
But if yours doesn’t have them, use a flat-head screwdriver to turn the screws on each post of the bridge in small turns.

Turn the screws clockwise using to lower the saddle if the strings are too high. If the strings are too low, turn the screws counterclockwise to raise the saddle. Remember to be careful not to scratch the finish accidentally.
The recommended action should work just fine for most players, but check the results yourself by picking up the guitar and playing every note loudly (on every string and fret) to check for buzzing.
You can also try bending, as sometimes buzzing is only noticeable while bending. If you find that there’s buzzing, there can be a few different reasons: the action is too high, the neck relief isn’t set right, or the frets aren’t properly dressed and levelled.
The first scenario is often a common fix, so just try raising the action. If the buzzing is on only a few specific frets (maybe just one fret), then it’s more likely that the fret is not level with other frets.
This is best fixed by a luthier, as it may require sanding down all frets and rechecking the levelling. In most cases though, people are just hyper-vigilant with fret buzz. It’s the nature of fretted instruments to at least have some buzz.
7) Set the Intonation
The next step is to set the intonation. Intonation is a measurement of how in-tune the instrument is with itself. It’s like comparing the tuning of frets 0 to 12 with frets 13 to 22.
If the guitar is perfectly intonated, the 12th fret harmonic and the 12th fret note would be exactly in tune, with only a +/- 0.2 cent difference.
This will require a fairly accurate tuner to judge properly. With your tuner active and the guitar perfectly tuned, play the open string and get the strings tuned as perfectly as possible.
Now, play the 12th fret harmonic of that same string. If the 12th fret harmonic is flatter, use a flat-head screwdriver to turn the small saddle screw of the E string clockwise to shorten the string, and check again.

If the 12th fret harmonic is too high, then turn it counterclockwise and bring it back. Repeat this process until the two notes are as close as they can get.
If the 12th fret harmonic is sharp compared to the open string, turn the screw counterclockwise to lower the pitch. If the 12th fret harmonic is flat compared to the open string, turn it clockwise. This extends and shortens the string respectively.
This has to be done for each string individually. After that, play several notes across each string and make sure that they sound properly intonated using the tuner. I find that the Epiphone Les Paul Custom has fantastic intonation.
Tip: Make sure to stop the string from vibrating and then also stop the tuner from measuring in between measurements.
1) Pluck the string to check the tuning.
2) Stop it from vibrating.
3) Wait for the tuner to stop.
4) Then measure the harmonic at the 12th fret.
8) Set the Pickup Height

The last step is to set the pickup height. The pickup height is how high the pickups are from the strings. You’ll need to adjust the screws on the sides of the pickups to set it.
According to a thread on TheGearPage, if the pickups are too high, they’ll sound muffled and create feedback because they’ll pull the strings. If they’re too low, they’ll sound thin and won’t have enough output volume.
To measure the pickup height, press the low E string on the last fret, and use your ruler to measure the height from the neck pickup pole to the string. Do this with the high E string on the opposite side, and repeat both steps for the bridge pickup.
The ideal height on an Epiphone Les Paul is 3/32” for the neck pickup and 1/16” for the bridge pickup measured on both sides of the strings, the low-E, and the high-E.
Also, remember not to adjust the pole pieces on any pickup: they’re usually fine straight out of the factory. Only adjust the two screws on either side of the pickups.

After the full setup, tune the guitar perfectly and check the measurements once again if you’d like to, and play something on your guitar. If everything works fine and there are no issues, you’re good to go. Start playing some of your favorite songs.
If there are any issues, like fret buzzing or an uncomfortable action, or the pickups don’t sound good, then check your measurements and adjust slightly according to your preference. Also, don’t screw the truss rod cover back on just yet.
In any case, I recommend checking everything again after one day to see where it stands. The neck, in particular, needs some time to be fully set into its new position.
If everything plays well after a week or so, then screw the truss rod cover back on, which might require loosening the strings a bit. In most cases, you’ll just have to give the truss rod another turn by just a bit and maybe adjust the action a wee bit, and then it’s perfect.
Other Articles You May Like
- How Much Does An Epiphone Les Paul Custom Weigh? [ANSWERED]
- How To Set Up A PRS Guitar (Step-By-Step)
- How to Set Up a Squier Telecaster (Step-By-Step)
- Why Triads Are Important To Learn on Guitar [ANSWERED]
Important Things to Mention About the Epiphone Les Paul Setup
1) Don’t Be Afraid To Take It To A Guitar Tech
If you’re not comfortable doing it yourself, there’s no shame in taking it to a professional. A qualified guitar technician can set up your guitar for you and make sure that it’s done correctly.
After that, you can take measurements of the specs and set it up yourself the next time. Just remember to be patient. Walk through each step carefully, and double-check your work as you go.
2) This Process Applies To Almost All Les Pauls
Since most Les Pauls and inspired guitars use similar hardware, including a Tune-O-Matic bridge, the process for setting them up is about the same. You may need a few different screwdrivers or wrenches, but you can follow through with these steps.
3) Start With the Truss Rod and End With the Pickup Height
I always start by taking the strings off > cleaning the guitar > re-stringing it > truss rod adjustment > action and string height > intonation > and pickup height. Then the next day, I do it all over again.
Acronym: TAIP = Truss Rod, Action, Intonation, Pickup Height
4) You’ll Probably Need To Set It Up Again The Next Day
In fact, you most likely will. I know that I usually have to do everything twice, but it’s way less work the second time because I don’t have to change strings and the measurements are at least close to where I want them to be.
In some cases, I even find it’s worth my time to go back the 3rd time to really dial everything in perfectly.
5) Measurements Are Just Guidelines & Common Practices
Everyone has their own idea of how to set up their guitar. This is just how I do it. And I’m not a luthier or a professional technician, so all I have for you is what I know from experience.
6) Always Make Measurements From the Bottom of Strings
You always want to measure from the bottom of the string, and not the top. Don’t worry about accounting for your string’s thickness when measuring.

