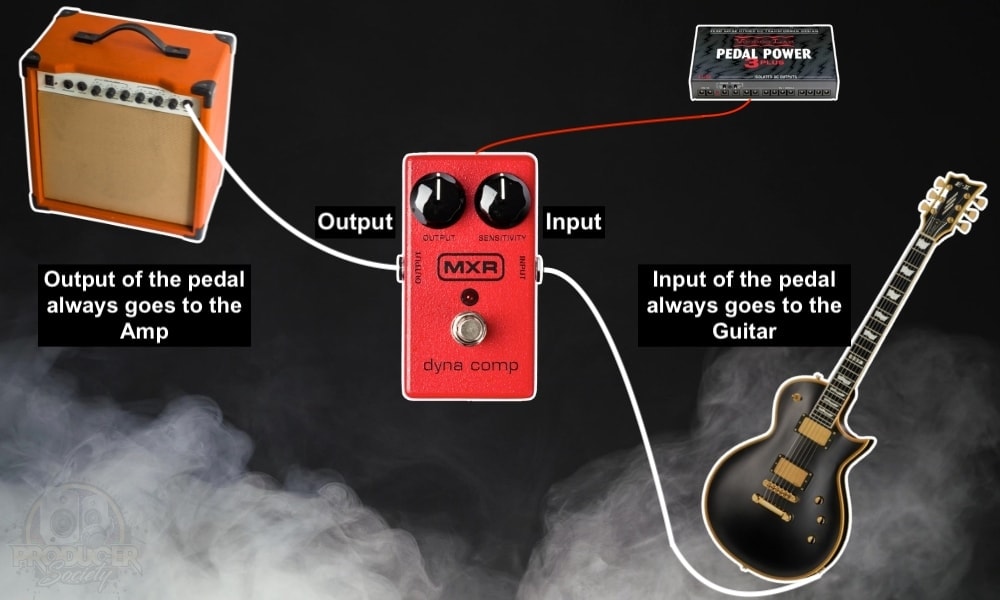
Connecting guitar pedals in your setup can actually appear complicated at first but it’s really not at all. Remember that output essentially means “to amp” and input means “to guitar.” That’s the main thing. I often messed that stuff up when I first began. Here’s a short form version of how to do it first:
To connect a guitar pedal to your guitar & amplifier
1) Turn your amp off
2) Connect your 1/4″ cable to your guitar
3) Connect the other end to the pedal’s input
4) Connect another cable from the pedal’s output to the amp
5) Power the guitar pedal with an isolated power supply or 9V battery
What Gear You’ll Need to Connect Your Amp, Pedals, & Guitar
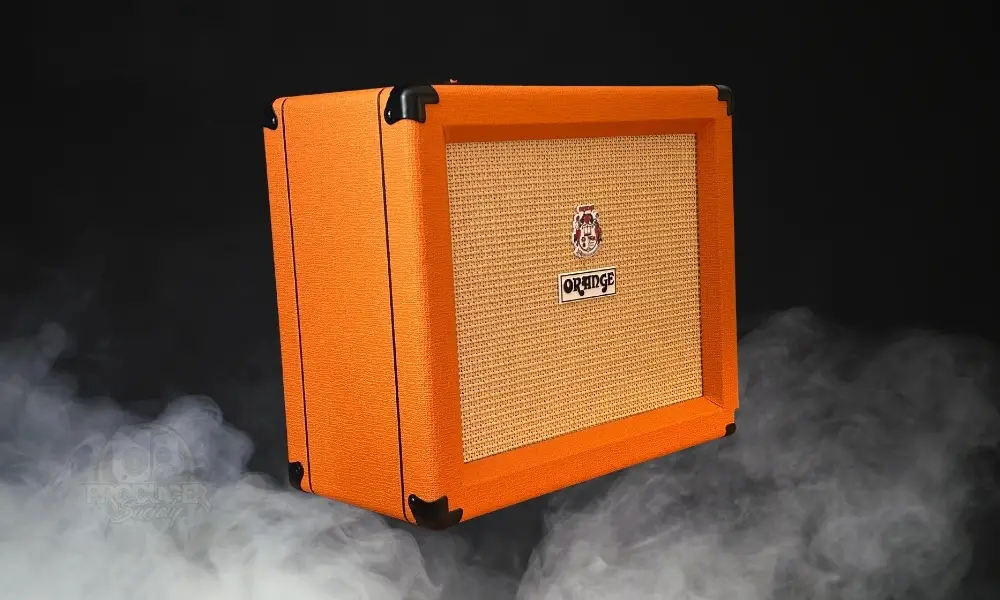
There are many little tips and tricks to share including what gear to buy, signal chain placement, and also some other great ideas that players pick up on over the years. It goes without saying that you’ll need a guitar, an amplifier (with or without an FX Loop), and your pedal, so we won’t discuss those things.
In this section, I’ll share what I believe are the best pieces of equipment for you to get. Let’s start with the instrument cable, which is the most important.
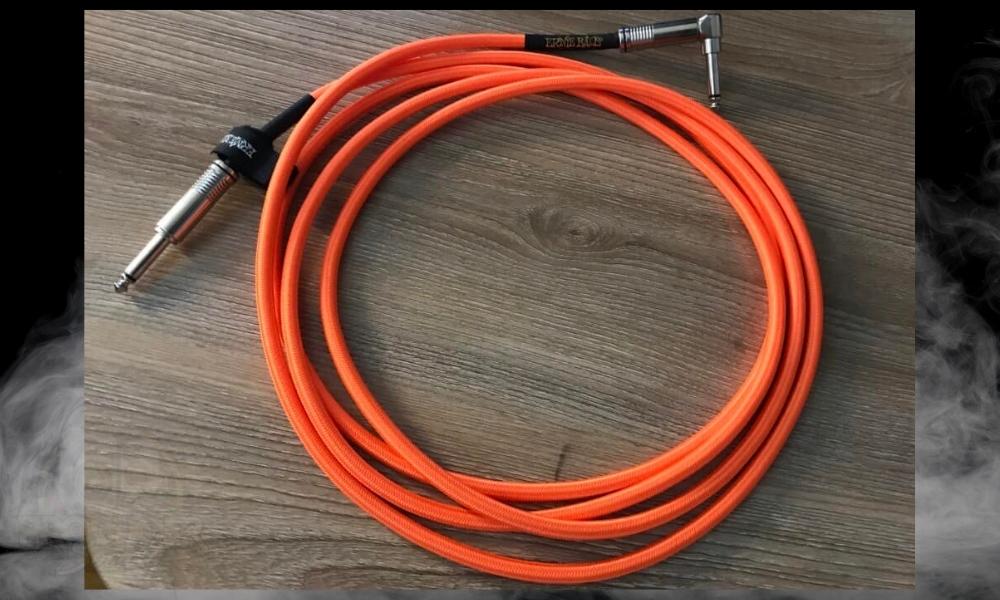
1) 2 Instrument Cables (Right-Angle Is The Best)
I really like right-angle guitar cables because they’re better for playing guitar on your couch or in a chair, and they’re also better for pedalboards. Going forward, I probably won’t buy anything but right-angled cables.
2) Power Supply or Battery (9V, Isobrick, Pedal Power 3 +)
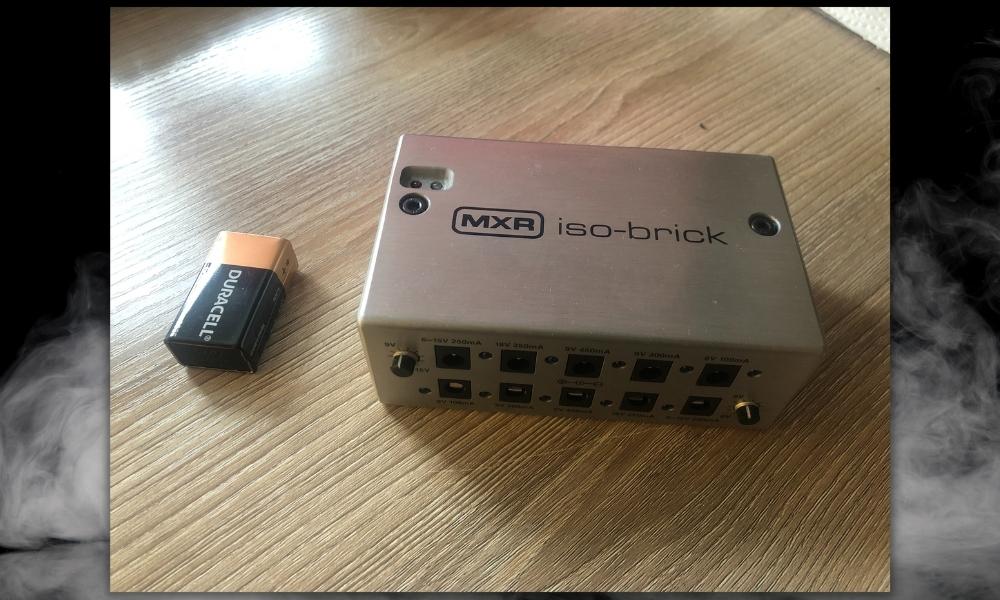
I don’t even bother with 9V batteries, although there are definitely some advantages to using them that I’ve discussed before. Including being the most isolated power supply that you could use and also not requiring messy cables. They don’t last though.
Another one that isn’t talked about a lot is that carbon-based batteries can make an old-school fuzz, wah, and other filter pedals sound better.
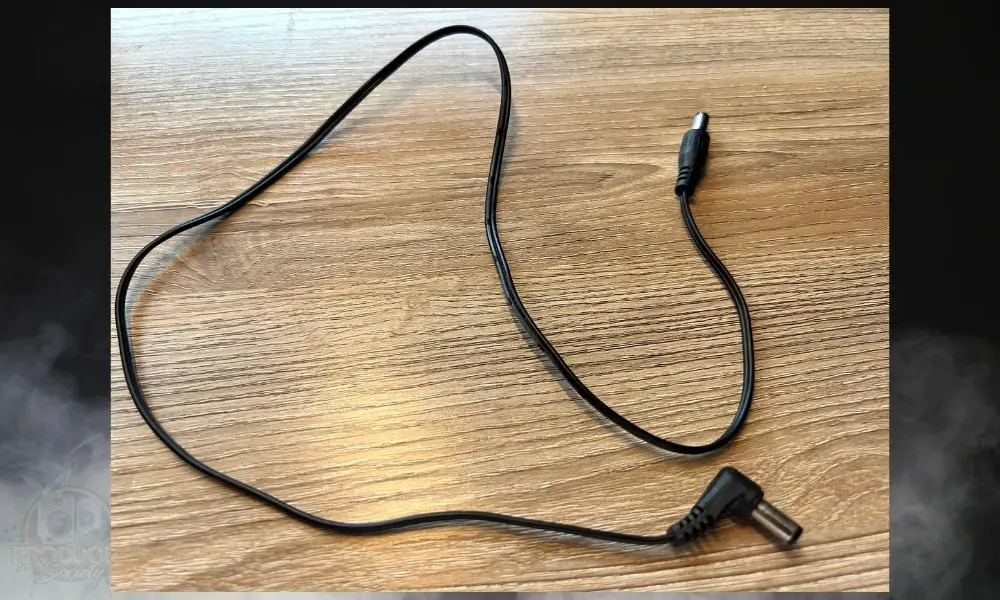
3) Power Cables (MXR)
These are for connecting your power supply to your pedal. I’d recommend getting some from MXR, Voodoo Labs, or even Donner would work fine.
The Donner stuff seems to get pretty good reviews despite the low price. I find the Voodoo Labs cables have a hard time going into my wah pedal though, so the MXR ones are usually what I recommend instead.
4) Patch Cables (Hosa)
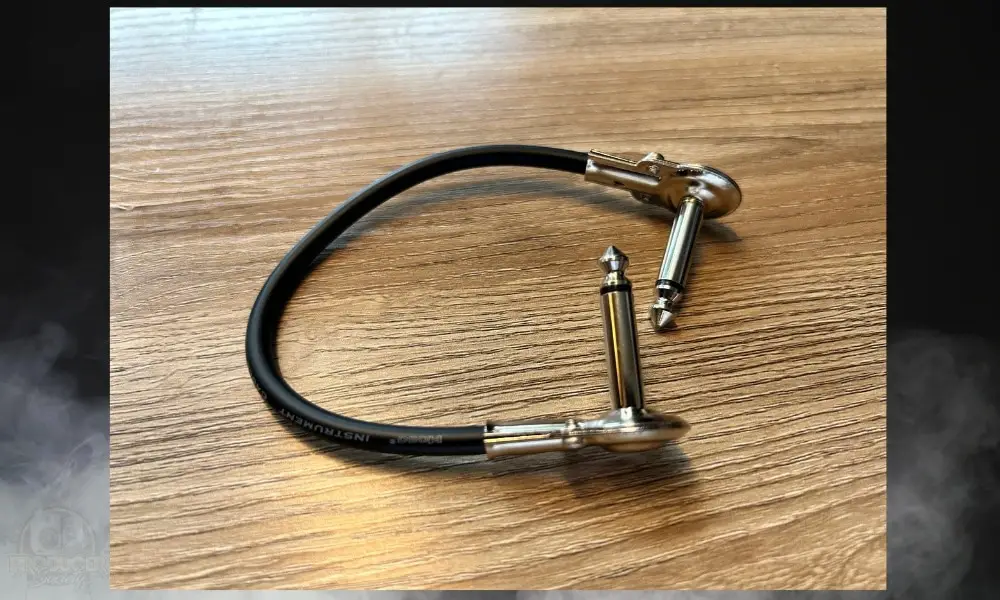
I’ve got several different types of patch cables for my pedals, but I would say that these pancake patch cables from Hosa are the best.
They’re high quality, and flexible, and they make connecting pedals super efficient. And most importantly, they don’t get in the way ever which is super important when setting up your board. If you do choose to make one someday.
How to Connect Your FX Pedals To Your Guitar & Amplifier
1) Start with Your Amp and Pedals Turned Off
I actually learned this from all the commenters sneering at me about it in my BOSS RC-1 tutorial video. The reason for this is that it just makes way less noise. No cracking, popping, static or any of that.
2) Connect A Cable Between the Amp & The Pedal’s Output
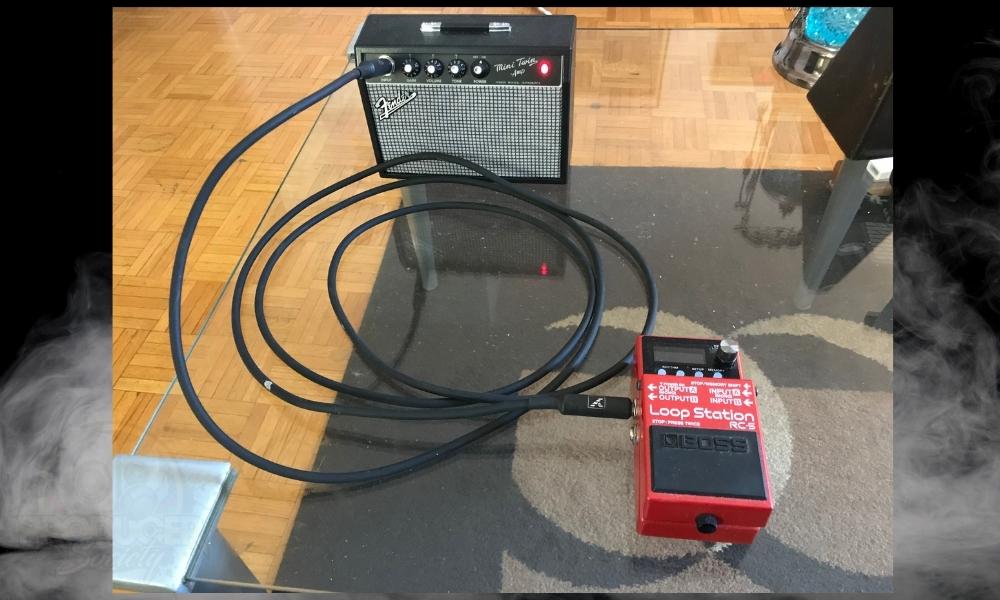
Remember, the output always goes to the amp. You’ll also want to use the mono outputs and inputs.
3) Run Another Cable Between The Pedal Input & Your Guitar
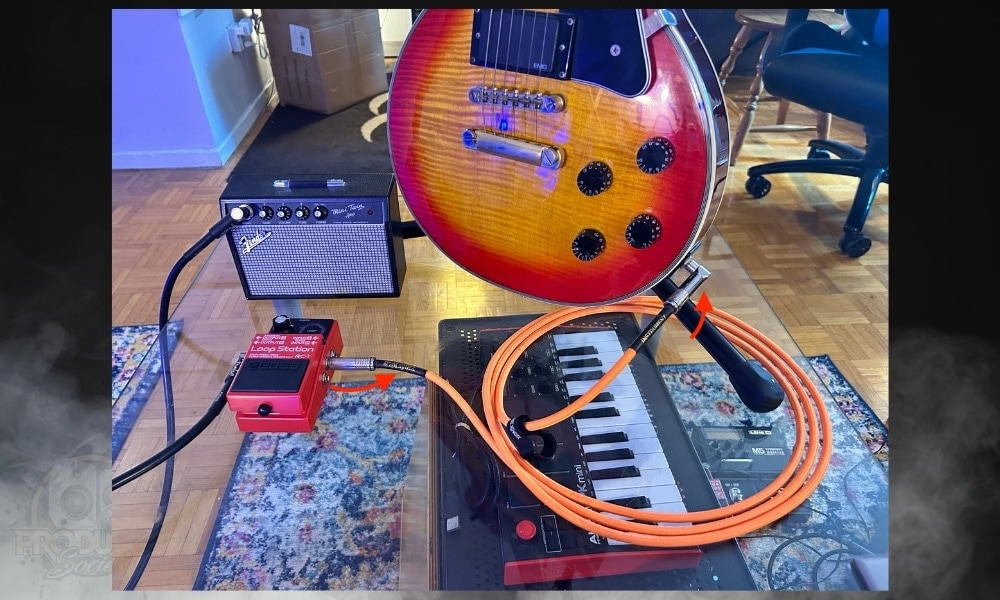
Get that right, and you’ll never have to worry. The next thing we need to take care of is the guitar pedal’s power supply.
4) Connect Your Power Supply To Your Pedal
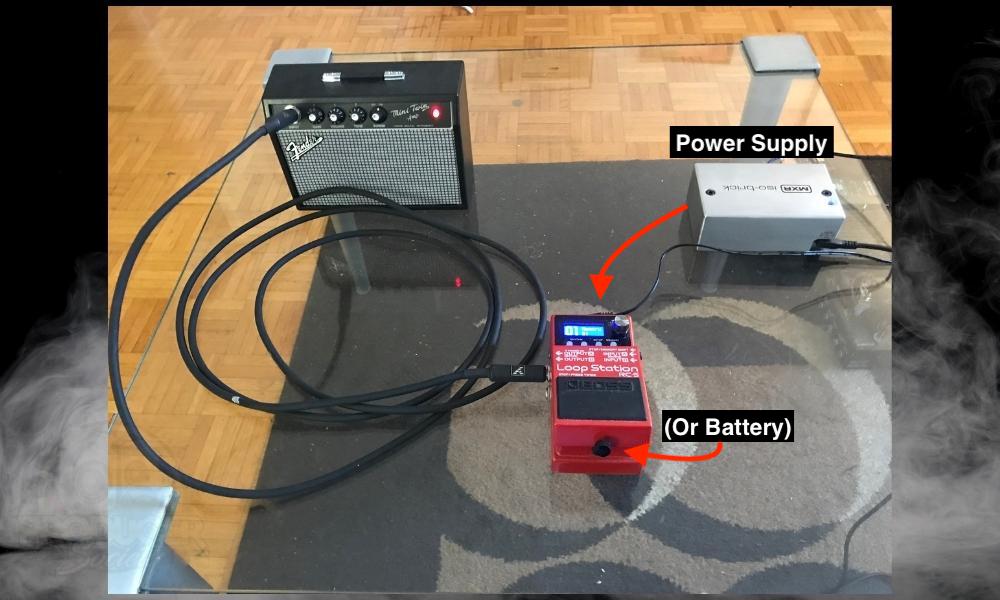
Make sure you’ve chosen the proper voltage and current draw. Most pedals these days will use 9VDC power and rarely do they use anything above that, although, there are some exceptions.
For instance, my old-school Digitech Whammy Pedal uses alternating current which is actually kind of annoying. I’m glad they switched to 9VDC in the later reiterations.
Additionally, you want to ensure your power supply is supplying enough power at a time. As long as the current draw is over what’s needed, but is not under, you don’t have to worry.
In other words, 9VDC at 300 mA for a 9VDC 50 mA guitar pedal is totally fine. You wouldn’t want to use 9VDC at 45mA though because then the pedal won’t work properly. Getting the voltage right is super important though. Make sure you get that right.
5) Turn On The Amplifier Last
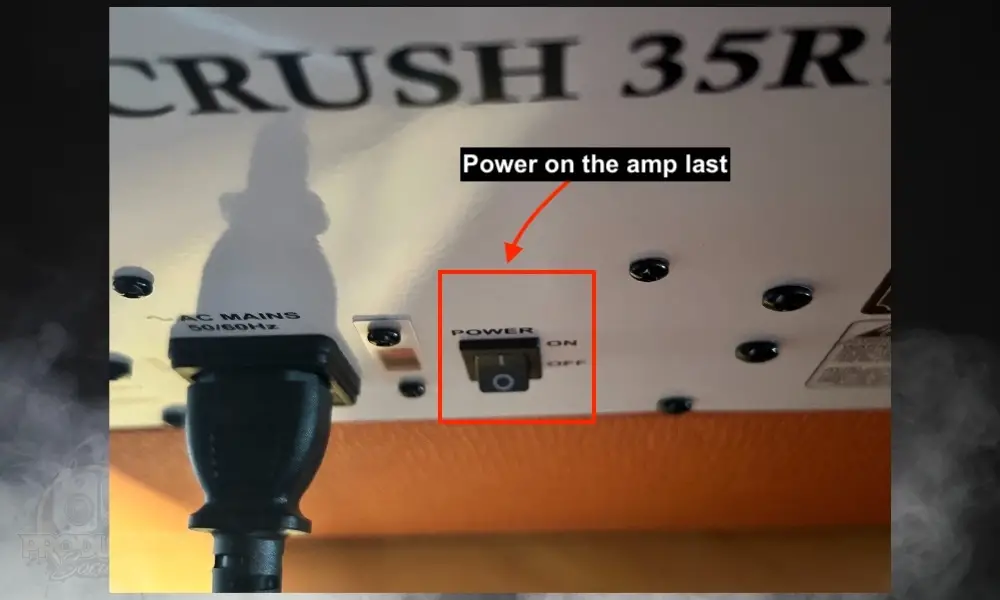
You’re good to go now, and your pedal will work the way it’s supposed to. But what if you want to connect a bunch of guitar pedals? It’s pretty easy and it follows the exact same principle.
How To Connect Effects Pedals Together
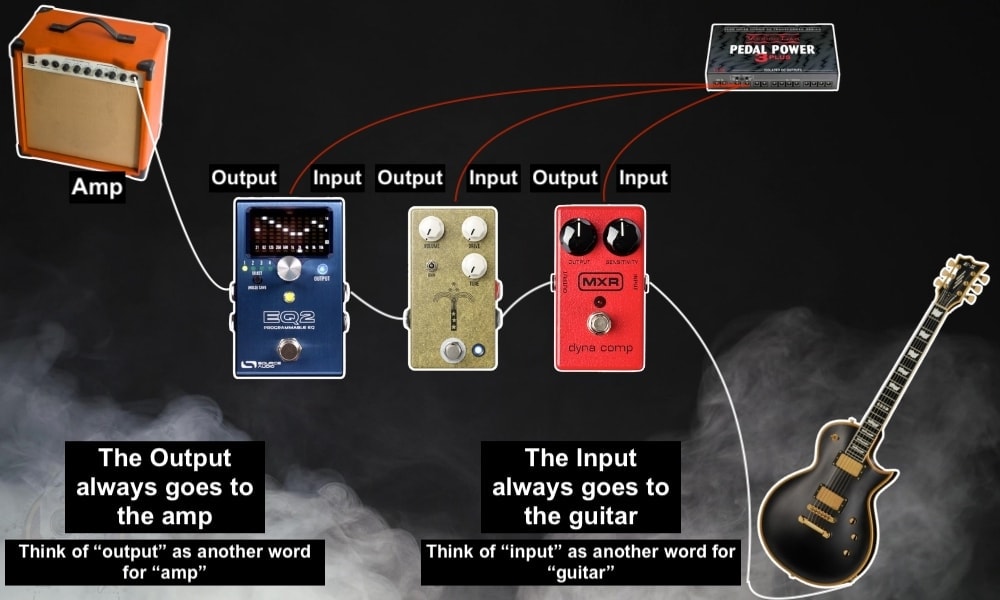
And really, it’s as simple as that. Let’s walk through the process a bit more carefully though for clarity’s sake.
1) Get An Isolated Power Supply (No Daisy Chain)
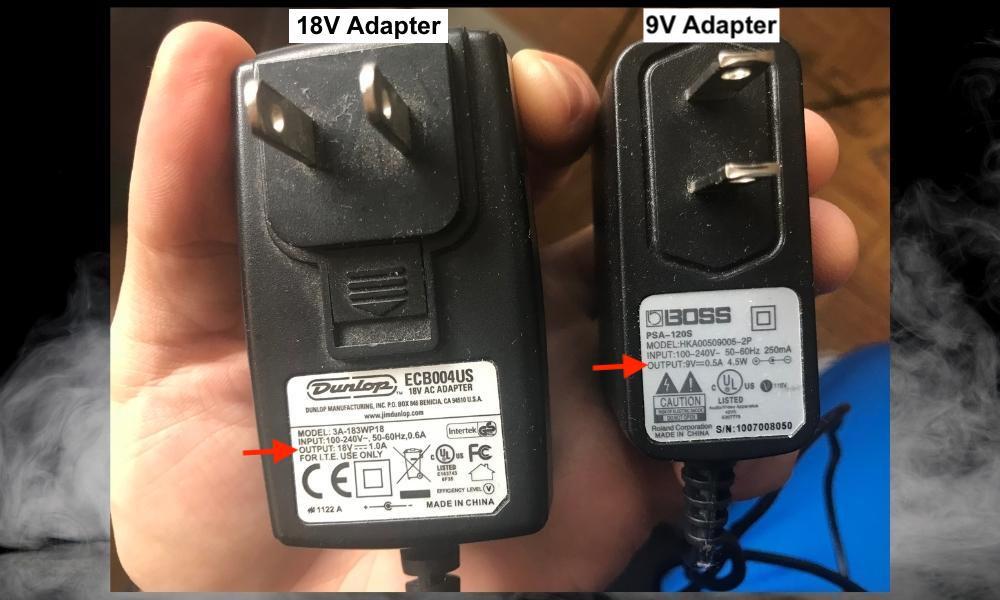
Use a dedicated power supply either in the form of a single wall-wart adapter or via a bigger power supply brick like the ones I mentioned earlier.
2) Get Another Patch Cable

3) Connect The Pedal’s Input To The New Pedal’s Output
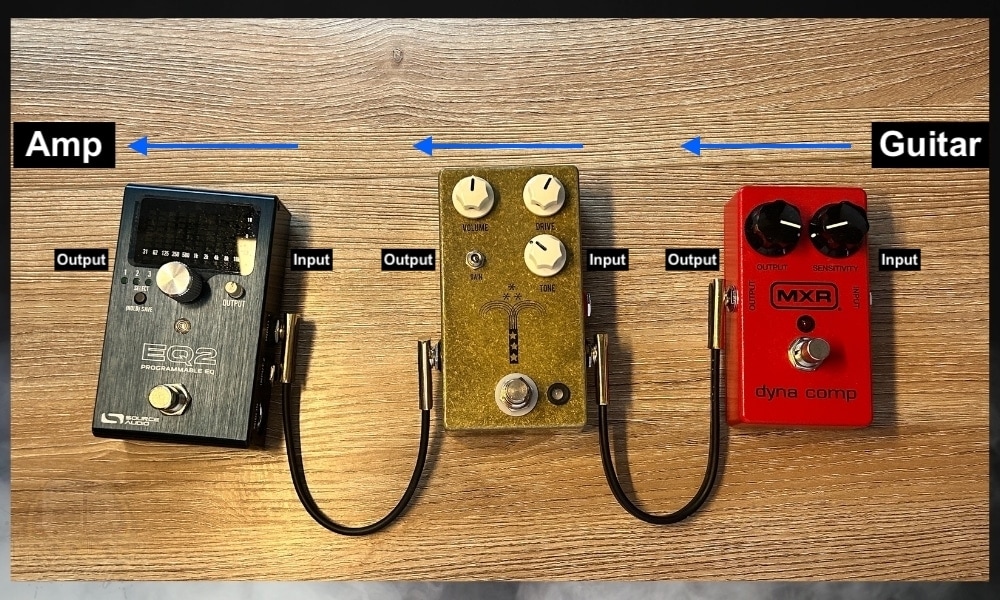
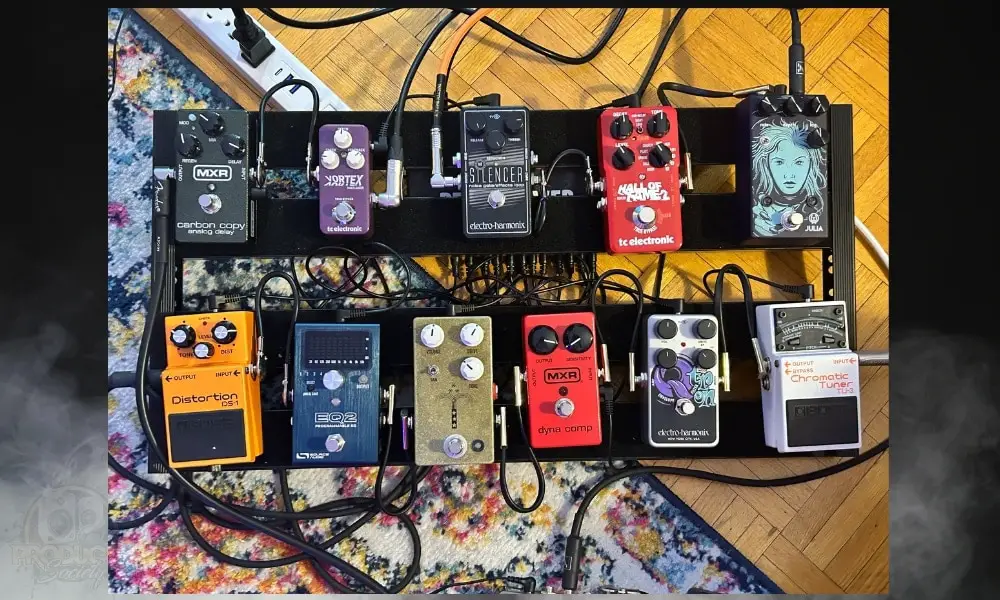
Now you’re done, but we’re not finished here yet. I’ll share a few tips with you that I’ve learned over the years. The first one I’ve already mentioned.
5 Tips for Setting Up Your Guitar, Amp, and Pedals
1) Use A Powerbar to Turn Everything On
![Where to Put The Flanger In Your Signal Chain? [ANSWERED] - 1](https://travelingguitarist.com/wp-content/uploads/2023/08/Flanger-Where-to-Put-The-Flanger-In-Your-Signal-Chain-ANSWERED.jpg)
I love this setup, even though it technically infringes upon the first tip. I have my amp and my two pedalboard power supplies connected to a separate power bar.
This means that if I want to start playing the guitar, I just hit the switch on the power bar and I’m ready to rock.
It saves me from having to walk over to my amplifier, turn it on, and then walk to my other outlet and turn on my power supplies. It’s a great way to smooth out this somewhat cumbersome process that often can steal my creative flow.
2) Don’t Daisy Chain Pedals
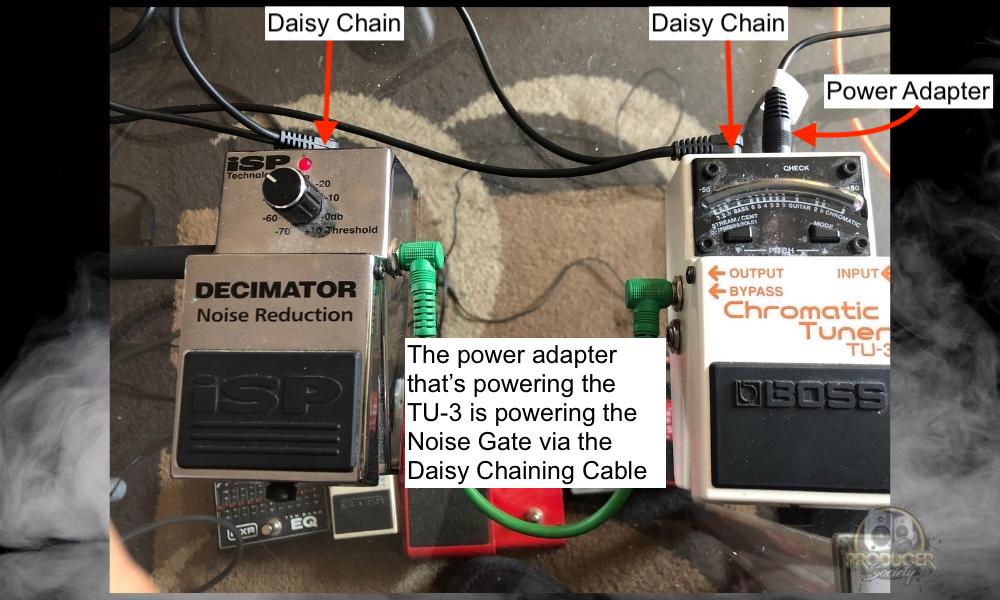
I don’t like doing this because I mostly just consider it as an inexpensive – but temporary – solution for not having enough power supplies.
If you hate noise and other problems as much as I do, you’ll want to skip daisy chaining. Maybe some people like to do it and can do so without problems, but I’d rather not.
3) Keep The Power Cables Away From The Patch Cables
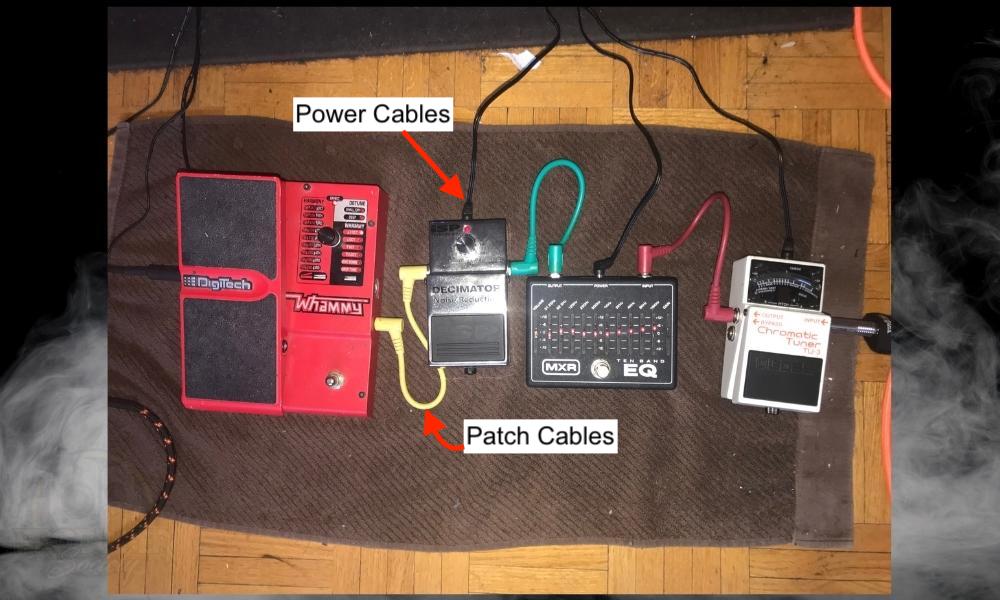
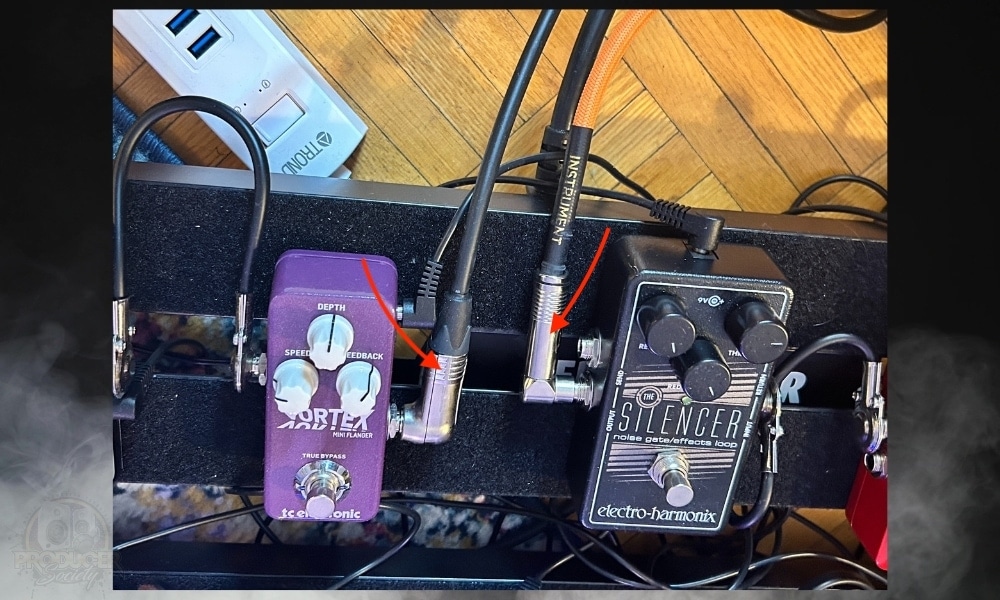
Similar to #3, this is a good practice to follow because it minimizes noise. Frankly, it’s not something I always follow though which you’ll notice about my board in the next image. But it’s a good thing to do if you’re a stickler for doing things properly.
4) Get A Pedalboard
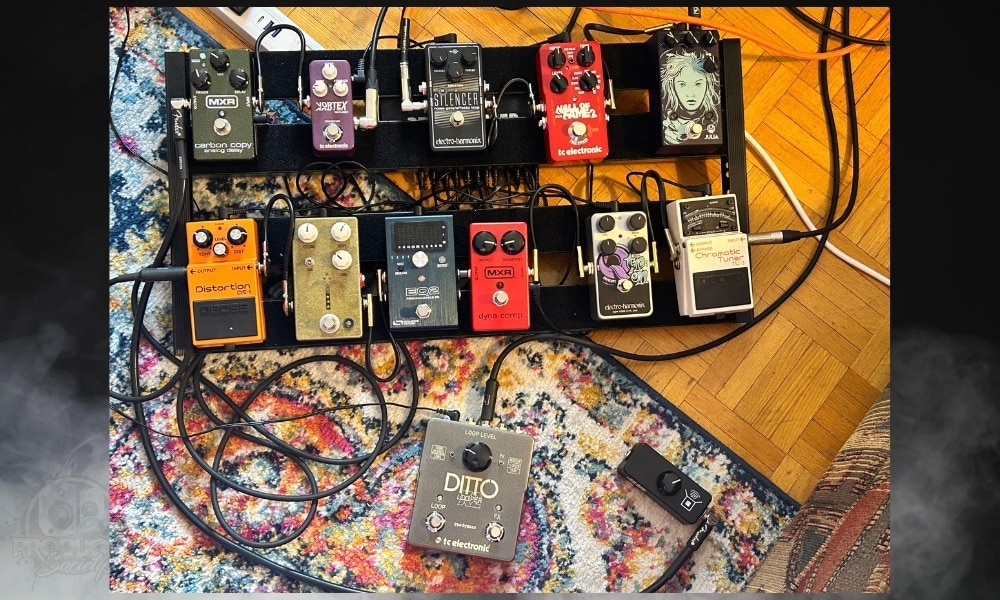
Are the Spaceships good enough for touring? I’m not sure and I can’t really say, but mine is great for at home.
My only regret is not getting the bigger Harley Benton Spaceship 80 because I’ve got even more pedals I’d like to put on my board. What’s the point of having all of these awesome pedals if I can’t use them all?
5) Familiarize Yourself With Common Pedalboard Guidelines
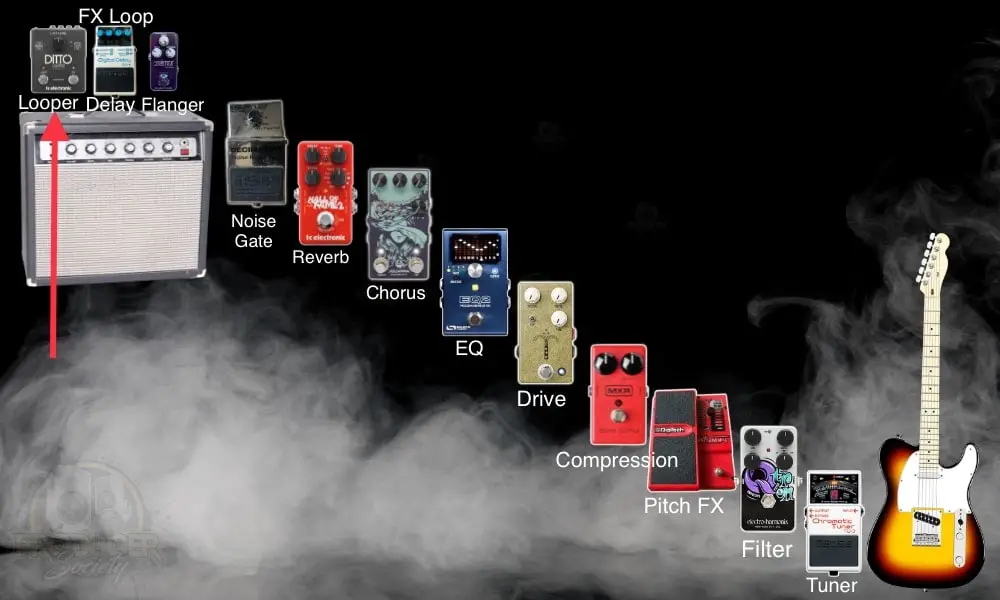
Amp < Gate < Time-Based FX < Modulation < EQ < Drive/Distortion < Compression < Pitch < Filter/Wah < Tuner
There’s probably a better pedalboard setup that I haven’t come across because mine is always a work in progress.
That said, what I’ve got for you here is going to work just fine as a jumping-off point for your own board. One of these days, I’ll make a more in-depth piece about pedalboards. Here are some other articles you can check out.
Other Articles You May Be Interested In
- The Ultimate Troubleshooting Guide to Guitar Pedals [EASY]
- How to Fix A Wet Guitar Pedal [Dead SIMPLE]
- Where to Put The Flanger In Your Signal Chain? (Quick Tip)
- Do Looper Pedals Work With Any Amp? [ANSWERED]
Important Things To Note About Connecting Guitar Pedals to Your Amp
1) Remember Output Means “To Amp” and “Input” Means “To Guitar”
Of course, these terms don’t literally mean “to amp” and “to guitar,” but I think this is a great way of remembering the order of how things should go. I can’t be the only person in the world that has gotten pedals backwards before. At least I hope I’m not.
2) In Most Cases, You’ll Use Mono Inputs/Outputs
I mentioned in passing earlier that you’ll want to use mono inputs and outputs. There are other cases where the stereo ports are better, but for most players, the mono inputs/outputs are the ones to use.

 Written By :