 Written By :

It can be pretty frustrating when you’ve sunk probably thousands of dollars into your guitar rig, only for some pedals or maybe even several of them to stop working on you. It’ll probably happen right when you need them the most too, just because that’s how it goes.
While I’m not a guitar pedal technician, I know the ancient mantra: “Keep It Simple Stupid,” is often the way and the light out of the darkness. Usually, the problem is easy to fix, if they’re fixable in the first place.
The most effective guitar pedal troubleshooting tips are
1) Turn up the amplifier and guitar knob volume first
2) Try your amplifier on its own without pedals
3) Isolate the problematic guitar pedal
4) Check the patch and power cables
5) Ensure you’ve connected to the proper input/outputs
The above tips I believe are the most common and the most effective, at least from my experience. That said, as your problems get more specific and more complex, so do the solutions. For that reason, I’ve collected a list of what I believe are the most effective troubleshooting tips.
29 Troubleshooting Tips for Guitar Pedals
![The Ultimate Troubleshooting Guide to Guitar Pedals [EASY] - Pyramid](https://travelingguitarist.com/wp-content/uploads/2022/06/The-Ultimate-Troubleshooting-Guide-to-Guitar-Pedals-EASY-Pyramid-.webp)
Like many other things in life, when you have to troubleshoot a particular problem, it’s a good idea to start from the bottom of the pyramid first. This means you want to start with the most common solutions first. If you got it wet, though, your options may be limited.
In the world of smartphone problems, this usually looks like turning your phone on and off, and the same thing goes for computers. For guitar pedals, the top of the pyramid looks a little different.
You can start working your way up the pyramid which usually means getting more specific. For example, you wouldn’t want to start by checking the soldering inside the pedal.
This is top-of-pyramid stuff, whereas checking to see that your guitar and amplifier’s volume are turned up is probably the first thing you should do. We’ll start with that first because I know this is an issue for me.
1) Turn Up Guitar And Amp Volume (Check Bypass)
![Stand-By, Pickups, Master Volume - The Ultimate Troubleshooting Guide to Guitar Pedals [EASY] - Pyramid](https://travelingguitarist.com/wp-content/uploads/2022/06/Stand-By-Pickups-Master-Volume-The-Ultimate-Troubleshooting-Guide-to-Guitar-Pedals-EASY-Pyramid-.webp)
We’ll start with the easiest – and most obvious solution first – which is the kind of thing that gets on people’s nerves. Make sure you’ve actually turned up the volume on your pick-ups and your amplifier first.
I don’t know how many times I’ve done this before I finally realized this was usually the culprit. These days, it’s now the first thing I troubleshoot if I can’t figure out what’s going on.
Turn up the volume on your pick-ups and do the same thing on your amplifier. As I was saying earlier, the simplest solution is usually the best way to start. While you’re at it, make sure you haven’t accidentally switched on the Stand-By or Bypass feature on your amp.
2) Try the Amplifier On Its Own (No Pedals)
![Guitar Cable to Amplifier - The Ultimate Troubleshooting Guide to Guitar Pedals [EASY]](https://travelingguitarist.com/wp-content/uploads/2022/06/Guitar-Cable-to-Amplifier-The-Ultimate-Troubleshooting-Guide-to-Guitar-Pedals-EASY.webp)
The next thing I would do is make sure that it’s actually the pedals that are causing the problem and not the amplifier. You would do this by disconnecting your pedals/pedalboard and going straight from the guitar input to the amplifier input.
You don’t want to spend your time troubleshooting pedals when really it’s your amp that’s the problem. Guitar pedals aren’t always to blame, but they commonly are because a lot can go wrong when you’re using so much gear.
While you’re doing this, you’ll discover whether it’s the primary 1/4″ instrument cable from your guitar to your amp too.
After you’ve run the test and you know it’s something to do with your guitar pedals, you then want to figure out which one it is that’s causing the issue.
3) Isolate the Problematic Guitar Pedal
![Connect Guitar, Pedal then Amp - The Ultimate Troubleshooting Guide to Guitar Pedals [EASY]](https://travelingguitarist.com/wp-content/uploads/2022/06/Connect-Guitar-Pedall-then-Amp-The-Ultimate-Troubleshooting-Guide-to-Guitar-Pedals-EASY.webp)
Isolating the problematic guitar pedal can either be a pain or super easy. For instance, maybe the moment you press the footswitch on the pedal, everything stops working. In that case, you obviously know that that is the one causing the issues.
However, in other cases, it’s not quite as clear. But even though it’s not clear, it’s still fairly straightforward to figure out because you just have to start removing the pedals one by one until you’ve found the troublesome unit.
As an added step, connect that pedal between your amplifier and your guitar to see if it’s the one causing issues. Once you’ve identified that it is the problem, you can start moving slowly down the list in terms of the most common solutions.
4) Check the Patch and Power Cables

Are you sure your patch/power cables are properly connected? Go ahead and press on them and make sure they’re actually pressed in the way they should be.
The nice thing about using the MXR Isobrick (my guide on it), for example, is that there are bright blue LED lights.
While I’m unsure how nice these are to use on a dark stage, they’re great for using at home or in your garage, for a number of reasons. The first one is that you know for sure that everything is connected because they light up blue.
If you’re just using a standard 9V AC to DC adapter, you’ll probably need to check on them manually by pressing on them.
5) Ensure You Don’t Have Inverted In/Out Jacks
![Source Audio EQ2 (Input/Output) - The Ultimate Troubleshooting Guide to Guitar Pedals [EASY]](https://travelingguitarist.com/wp-content/uploads/2022/06/Source-Audio-EQ2-InputOutput-The-Ultimate-Troubleshooting-Guide-to-Guitar-Pedals-EASY.webp)
Another big cause of pedalboard problems has to do with the IN/OUT jacks. I, and clearly a few others on this forum, have struggled with this issue a few times in the past, although, it rarely happens as much as it used to.
Simply put, you may have just accidentally switched around the Input and output cables so everything is backward. It’s especially easy to do this if you’ve got a ton of pedals on your pedalboard and things are kind of messy.
But it’s more commonly seen when people build their own pedals and they have the inside jacks switched around like what’s shown in the image above.
6) Make Sure You’re Using Good Cables

The next common issue is your cable. I’m not sure if it’s the way I wind them up or what, but I find that cables go out more often than they should.
These days, I’m willing to spend a bit more money on them (I like the Ernie Ball cables like this), and my new ones are working just fine, but we’ll see how long they go for.
This is doubly important for the patch cables and the power cables. In my opinion, it’s worth your money to drop a bit more cash on high-quality patch/power cables.
Both are important too. I like the Planet Waves 1/4″ Inline Adapters for my BOSS pedals because their jacks line up nicely. For patch cables, I think the Hosa Patch Cables are a great choice. The MXR are good ones too. I know I like them and a lot of other people do too.
7) Buy A Brand New 9V Duracell or Energizer Battery

For those of us who haven’t dropped cash on something like the Voodoo Power Supply or the MXR Isobrick, it may be a good move to head on over to the store and get yourself a brand new, fresh, 9V battery from Duracell or Energizer.
Don’t just grab one from the fire alarm, your air conditioner remote, or whatever else uses a 9V battery. The thing about guitar pedals is they often need quite a bit of current to work the way they’re supposed to.

This means a 9V battery is going to run out pretty quickly. Getting a fresh battery in your pedal will let us know whether it’s an issue with the power supply or something else.
8) Ensure You’ve Connected To The Proper Input (Stereo/Mono)
![Mono Outputs/Inputs - The Ultimate Troubleshooting Guide to Guitar Pedals [EASY]](https://travelingguitarist.com/wp-content/uploads/2022/06/Mono-OutputsInputs-The-Ultimate-Troubleshooting-Guide-to-Guitar-Pedals-EASY.webp)
This is only a problem if your pedal has more than one input and output. For example, my Loop Station, Clone Looper, Digitech Whammy Pedal, and Digital Delay pedal all have several inputs for mono/stereo connection.
In most cases, you’ll just want to keep it simple and connect to the inputs that say “mono” on them, but it depends on what you’re doing.
The same thing goes for the Digitech Whammy Pedal. You’ll have to connect to the Wet ADDED on the Whammy for it to work on a pedalboard.
9) Ensure You’re Providing the Proper Current Draw (mA)
| Pedal | mA Rating |
| Boss RC-5 | 170mA |
| Digitech Digital Delay DD-6 | 55 mA |
| Digitech Whammy | 265mA (9V AC) |
| ISP Decimator | 30 mA |
| MXR 10-Band EQ | 25mA (18v) |
| Boss TU-2 | 50mA (With Strong LED) |
In case you didn’t know, some pedals require more current at a faster speed than other pedals. For example, a BOSS TU-2 chromatic tuner won’t take much power, and neither will an ISP Decimator.
A Loopstation, on the other hand, takes an incredible amount of mA (170), as does the Digitech Whammy Pedal and there are others that take a lot too.
If you’re using a power supply like the Isobrick, you’ll want to ensure you’re using the proper mA rating for each pedal. It’s not hard to figure out though. If you’re using more than its required mA, you’re fine, but you don’t want to use less.
For example, 300mA is just fine for the BOSS RC-5 Loopstation, but you wouldn’t want to use the 90mA option. The pedal just won’t work the way it’s supposed to. So make sure your pedals are getting adequate power.
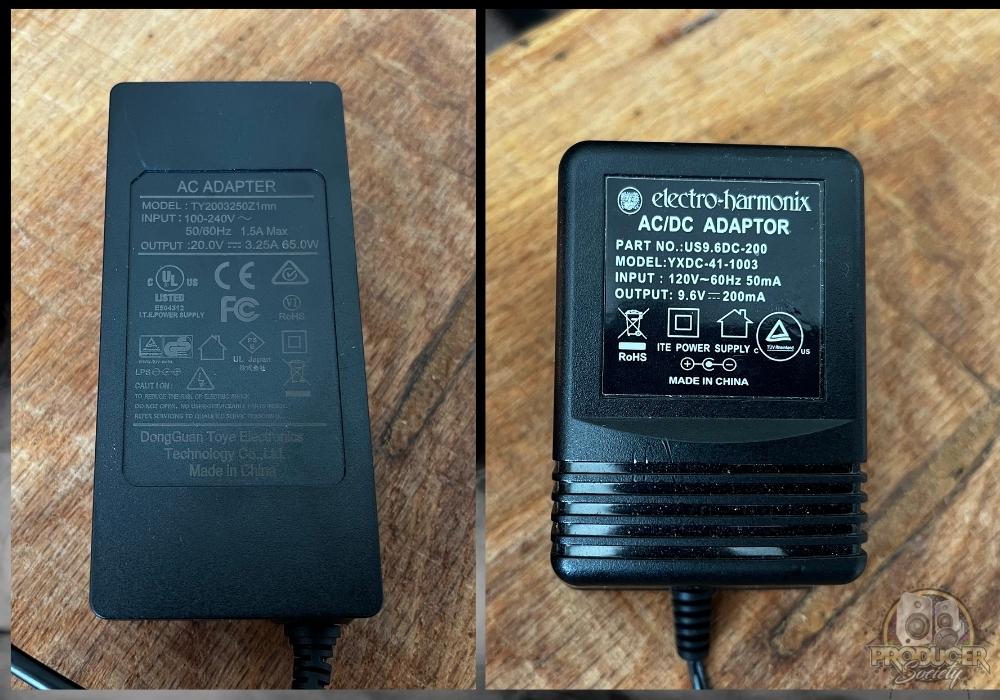
10) Ensure You’re Using Proper Voltage (9V not 18V)

For example, my MXR 10-Band EQ requires 18V, so I want to make sure I don’t crisscross my 10-Band EQ power adapter with a 9V pedal. This would be bad news bears.
Doing the opposite won’t be so much of a problem though. Giving an 18V pedal 9V won’t damage it. It just won’t work sufficiently.
11) Use An AC or A DC Adapter (Some Pedals Need AC)

From my experience, it’s hard to come by a pedal that uses alternating current (AC). All of my pedals, except for my Digitech Whammy Pedal which is over 15 years old at this point, use direct current (DC) power and not AC.
In case you didn’t know, the power that comes from your home’s outlet is alternating current. It has to be converted from alternating current to direct current, which is why we have to use guitar pedal power adapters.
They are literally AC to DC power adapters. They take power from the wall and then convert it to a power that the pedals can use without frying.
However, as I just said, some old-school pedals still use alternating current, straight-up. And the old Whammy is one of them. To figure out what kind of adapter you have, just take a look at its label. It’ll say right on it.
12) Use A Power Supply That’s Made For Guitar Pedals

Truth be told, you don’t have to use a guitar pedal power adapter for your pedalboard, but it’s certainly a wise thing to do.
If you go to a place like Walmart or wherever you buy electronics, you can get find DC 9V adapters, but they’re not necessarily designed for audio. This is an issue because we want to ensure we’re providing power to our pedals that don’t generate needless noise.
In other words, use a power supply that’s made by a guitar products manufacturer, like MXR, Dunlop, Voodoo Labs, Fender, etc. Don’t get a poorly-made charger off of Amazon from an unknown manufacturer.
Pedals are expensive, and we don’t want to go out of our way to make awesome pedalboards, only to mess it all up by using a noisy, low-quality power supply.

13) Use An Isolated Power Supply (Not Daisy Chained)

As I said in my article about it, I like my MXR Isobrick quite a lot because it’s sleek, it looks super cool, I love the LED lights, and it powers every pedal I own and then some. It’s called an Isobrick because that’s what it’s supposed to do.
It provides an isolated power source for each pedal that you’re using, that way you’re not piggy-backing off another power source and generating noise. This can be a problem with daisy-chaining.
I’ve never actually used daisy-chaining before, but I know a lot of people like to do it. In simple terms, daisy-chaining means we’re using one singular power adapter for several different pedals.
14) Check That You’re Using Center Negative Polarity Power
Nearly all guitar pedals use center negative polarity and not center positive polarity (my article on this). I believe there are some pedals that use center positive polarity but I’ve never come across any (that doesn’t mean they don’t exist though).
I’ve never used the wrong kind of adapter for a guitar pedal before, but I imagine that using the wrong polarity in your pedal is probably not a good vibe, and it’s something you’d probably like to avoid.
15) Use a Separate Circuit for Your Power Supply

According to this guy from Wampler Pedals, it’s possible that running all of your electronics on the same circuit as your pedalboard and guitar amplifier will cause weird noises and other issues.
The example he used in the video was a washing machine, hair dryer, and similar electronics. Personally, I’ve never run into this issue.
But it certainly makes sense considering the way power seems to travel around in this never-ending loop until it finds somewhere to go. Additionally, he states that fluorescent lights can cause similar issues as well.
16) Try Using Another Power Outlet

If you’re finding yourself running into noise issues and you’ve exhausted many different options at this point, try connecting to a different power outlet to see if there’s something wrong with the circuitry in your home, rather than the pedalboard.
I’ve never found this to be an issue, however, it did lead me to discover a more common problem which is #17 – it has to do with my surge protector.
17) Check That Your Surge Protector Is On

I have all of my electronics on a surge protector like the Furman PST-8 (on Amazon), especially my most important stuff like my guitar amplifier, my pedals, and the power supply, in addition to my computer electronics.
While I’m not sure how effective they really are in protecting your electronics from power surges, I like them for their multiport capability for sure. Because I’m in an apartment building, I find it’s not uncommon for my surge protector to switch off.
My air conditioning is also connected to it. You can see how this would be a problem for my guitar pedals.
It’s very possible that if you’re using a surge protector, something could also be switching it off, especially if you’re not the only person using the power from that circuitry.
18) Have the Patch Cables Away from the Power Cables

I shared this same tip earlier in my article on how to prevent noise in your pedalboard. The long and short of it is that you want to have the cables that connect your pedals to each other, a good distance away from the power cables.
The power and patch cables should not be entangled together, otherwise, you could run into some issues with extraneous noise. I find a good way to get around this is to use the 1/4″ inline adapters (on Amazon).
But there are other ways of doing it too. A big part of it is just paying a bit of attention to how you organize things on your board.
19) Spray DeoxIT D5 Into the Pedal Jacks (Then Work It In)

If your jacks are noisy when you plug the cables into your pedal, even when it’s turned off, it could be that the contacts inside the unit are oxidized.
To get around this, use DeoxIT D5 and spray it directly into the input/output and the power supply port as well.
Here’s the key though: you can’t just spray the liquid into the pedal. You have to immediately take the cable and then plug it in and take it out, over and over again to work it in.
Oxidizing just means that the inside has been exposed to oxygen for too long and it has caused a chemical reaction that can lead to rusting, in some cases.
20) Put A Noise Gate After Noisy Gain Pedals

Anytime you’re using a guitar pedal that increases the gain of your sound in any way, you increase the total volume of your signal, and that includes the noise floor as well. This means you increase the volume of your guitar, but also the extraneous noises.
This is an issue with my MXR 10-Band EQ (because, as I wrote in my guide, I use the older one), as it gives off an audible hissing sound.
The way to get around this is to use a noise gate right after and the 4-cable method that I talked about in my noise gate guide. Another thing I’ll quickly state is there is no harm in getting more than one noise gate pedal, by the way.
21) Ensure No Wires Have Become Lose
![Insider of Guitar Pedal - The Ultimate Troubleshooting Guide to Guitar Pedals [EASY]](https://travelingguitarist.com/wp-content/uploads/2022/06/Insider-of-Guitar-Pedal-The-Ultimate-Troubleshooting-Guide-to-Guitar-Pedals-EASY.webp)
Another thing you can do is take off the cover and then shake the pedal when it’s up to your ear, not too hard though. The idea behind this is to see if any loose wirings need to be soldered or replaced.
I’ve never actually done this myself, but I know that DIY Pedal creators will often do this when they’re troubleshooting a problematic pedal.
22) Turn Off the Bypass On Your Tuner Pedal

I’ve run into the issue before with my tuner pedal where it was low on batteries and therefore would not let any signal travel through it. I believe this means the pedal is not true bypass.
A true bypass pedal would allow for the signal to pass through a dead or otherwise faulty pedal, however, the TU-2 will stop the signal dead in its tracks if there are no batteries in it.
Kind of related to this is that there is a setting on the TU-2 where you can’t hear yourself while you’re tuning. I discussed it in my tuner pedal guide.
This is a feature they added to the pedal so the audience doesn’t have to hear you tuning your guitar. Make sure you have this turned off.
23) Maybe You Need To Download New Firmware
![Source Audio EQ2 - The Ultimate Troubleshooting Guide to Guitar Pedals [EASY]](https://travelingguitarist.com/wp-content/uploads/2022/06/Source-Audio-EQ2-The-Ultimate-Troubleshooting-Guide-to-Guitar-Pedals-EASY.webp)
According to this guy on Reddit, digital or software-based guitar pedals may need a firmware or software update in some cases. Personally, I’ve never run into this problem before, but it could be an issue.
I have the EQ2 from Source Audio in my cart and it’s a digital pedal with presets and everything on it. Some users on the Gear Page noted how it does require software and firmware updates.
24) Take Out The Battery And Use Only The Power Supply

Another problem that you could have may stem from your battery. Whenever you plug in the power jack on top of the pedal with your external power supply, whatever it may be, it automatically shuts off the battery.
You wouldn’t want the battery and the 9V battery to power the pedal at the same time, because that would cause big problems.
That said, it’s possible there may be some kind of an issue with the battery and it needs to be taken out, even though you’ve connected to a power supply and it shouldn’t be.
Additionally, it’s just not a good idea to leave batteries in pedals anyway because they leak. I’ve left batteries in devices before and it makes a big mess when they leak and explode. Real nasty stuff.
25) Ensure Black And Red Battery Leads Are Connected
![Battery Lead - The Ultimate Troubleshooting Guide to Guitar Pedals [EASY]](https://travelingguitarist.com/wp-content/uploads/2022/06/Battery-Lead-The-Ultimate-Troubleshooting-Guide-to-Guitar-Pedals-EASY.webp)
You can also take off the cover of your pedal and ensure your black and red battery leads are connected properly. You can actually buy battery connectors too and just reconnect a new one.
26) Make Sure Your Solders On the Board Are Good and Nothing’s Cracked
According to the video shown above, it’s possible to inspect for damage just by taking the cover off the pedal and then having a look at the motherboard.
Ensure no part of the board is cracked, and also have a look at some of the solders. You may need to get out your soldering gun and re-do some of them together.
27) Clean the Input, Output, and DC Jacks with Contact Cleaner (No Lubricant)

It’s also a good move to use a contact cleaner like the aforementioned DeoxIT D5 (with no lubricant) to clean some of your jacks.
This is in the case that you have noisy connectors whenever you plug cables into your effects unit. I often use an air duster like the image shown above as well.
28) Bend Up the Jacks So The Connections Are Solid

In the video shown above, the technician shows how he took the cover off and bent some of the pieces upward where the 1/4″ input jack triggers the rest of the pedal after insertion.
If for whatever reason, there is no contact between the 1/4″ jack and the metal pieces, this could be the reason why your pedal is not working.
29) Tighten All Jacks, Pots, and Switches

And finally, if you’re running into various crackling, instability, or other noises, it may be in order for your to simply tighten some of the screws, nuts, and bolts. While I’ve never personally had to do this, nuts and screws do come loose over time.
Now that I think about it though, it’s not uncommon for me to have to tighten the nut on the bottom of my guitar’s input jack.
Important Things to Note About Guitar Pedal Problems
1) You May Just Need to Buy A New Pedal
If you’ve tried every solution on this list and your pedal still isn’t working, you may have to either take it to a person who repairs this stuff for a living or just buy yourself a new one.
That being said, I’m not a pedal expert or a guitar technician. I’ve played guitar my whole life and trouble-shooted pedal problems various times, so I can’t say I’m a master at this stuff. What I can say though is that the solution is usually right under your nose.

