What many people like about the BOSS RC-1 is probably the thing that others don’t: its simplicity. There are only 6 different features of the BOSS RC-1: recording, playback, overdubbing, undo overdub, redo overdub, and the capability for an external footswitch.
But for most loopers, this is probably all they’ll ever need. That said, there is a hidden feature that not a lot of people know about, and that is the ability to change the settings and configurations. And getting this done is straightforward.
To change the settings of the BOSS RC-1 Loop Station, hold the footswitch while plugging your cable into Output A. Press on the footswitch once or twice in succession to change the order of functions, how stop/pause works, and whether the display corresponds to the length of your loops.
You know you’re in the settings mode when the LEDs on the Loop Display appear in increments of halves on the top and bottom. They oscillate between the colors, Red, for recording mode, Green for Stop, and then Red and Green for Display Mode. For a more in-depth guide on how to do all of this, let’s get into it down below.
Getting the BOSS RC-1 Loop Station Into Recording, Stop, and Display Mode
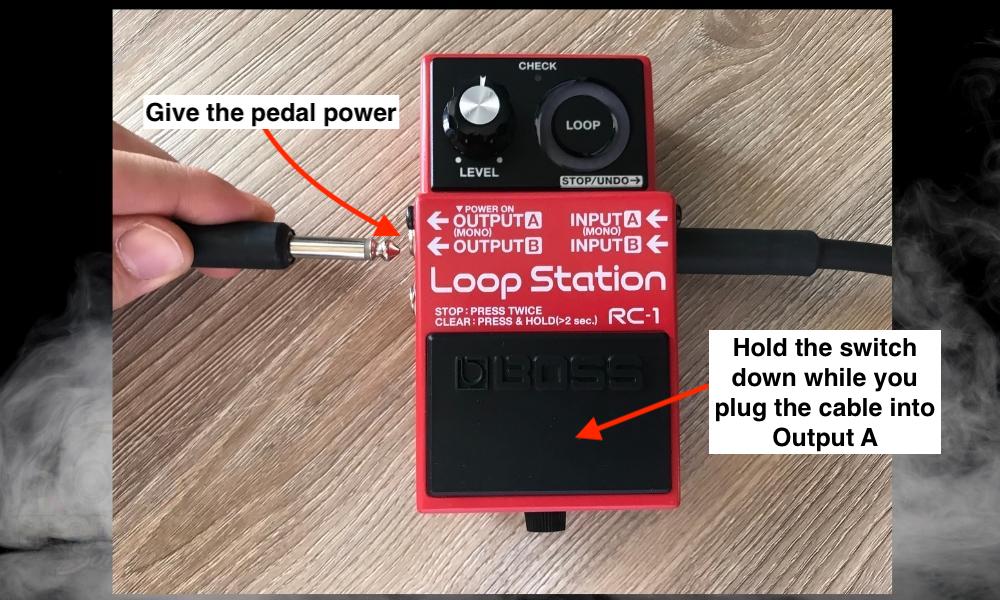
As I explained in my other guide on resetting BOSS pedals, you need to have a power source of some kind connected to the pedal (I talk about it here too).
This can either be a standard 9V battery or an isolated power supply like the MXR Isobrick M238.
Additionally, getting into the settings mode means you’ll have to hold down on the footswitch for approximately 2 seconds before putting in the cable in Output A [MONO]. If you try using the other output, it won’t work.
So you’ve got the pedal into settings mode and now you can move through the three configurations, recording, stop, and display mode. Let’s talk about what these modes do and how to change them.
Recording Mode
Explained simply, the Recording mode changes the order of functions on the BOSS RC-1. According to the BOSS instruction manual, the default setting is for the order of functions to work as follows: Recording > Overdub > Playback
The alternative recording mode is for the features to work as follows: Recording > Playback > Overdub.
Whether you like one or the other is up to personal taste, but I prefer for the pedal to go into playback after recording. This offers time to think about what I’ll play over the loop.
Upper Half – Record > Overdub > Playback [Default Settings]
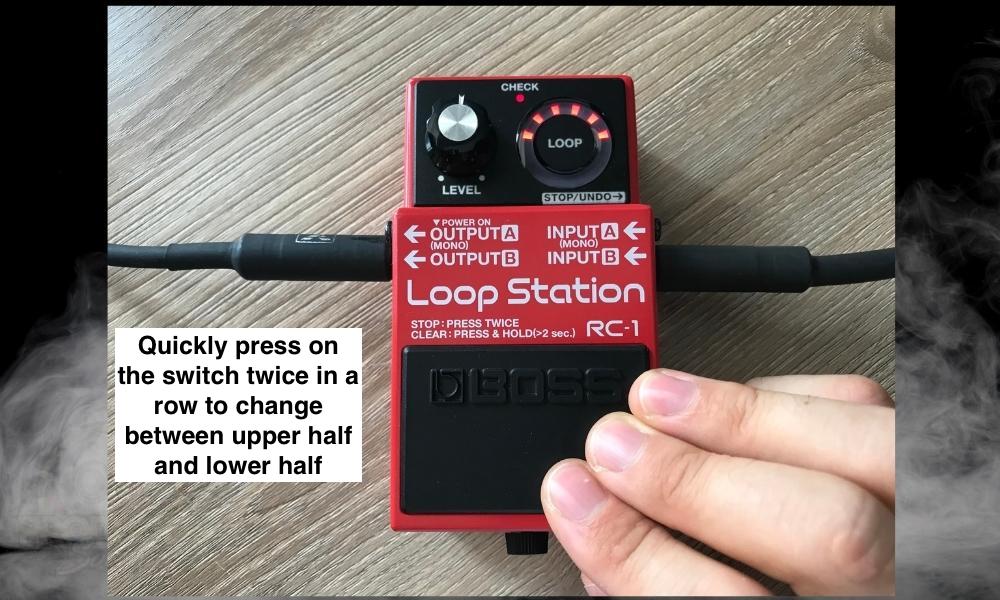
Lower Half – Record > Playback > Overdub [Alternative Settings]
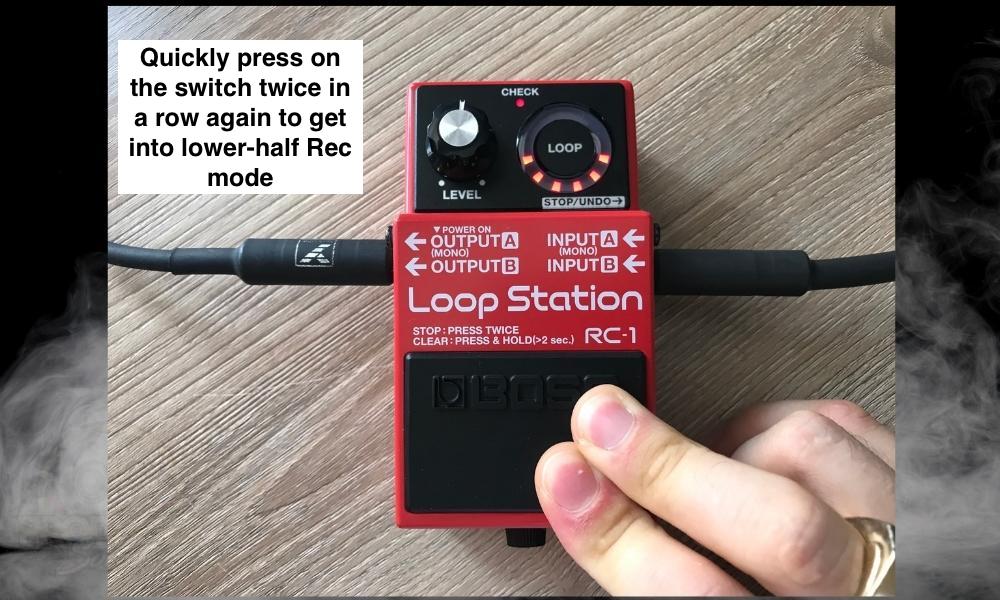
And that’s all for recording mode. Experiment with both modes and see what you like the most. Now let’s do Stop Mode.
Stop Mode
Stop mode allows you to change how the pedal stops and pauses. For example, do you want the pedal to pause immediately after you press the switch twice? Or do you want it to run through the rest of the phrase and then stop? This is the mode to change this.
Upper Half – Stop Immediately [Default Setting]
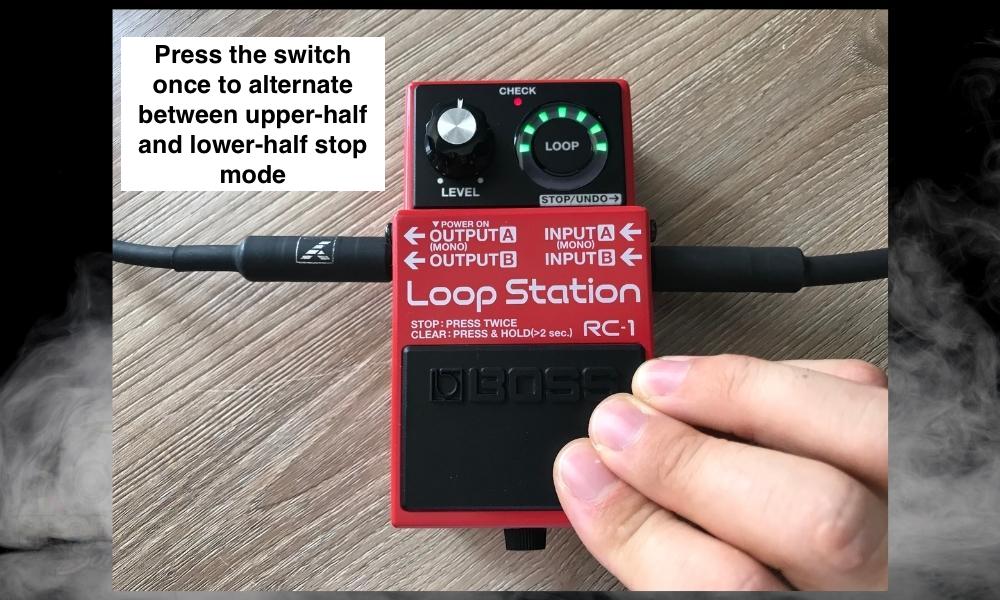
Personally, I prefer when the pedal stops immediately when I press on the switch twice. I would rather not have the pedal run through the phrase once before stopping, but you can try both.
Lower Half – Finish Phrase Before Stopping [Alternative Setting]
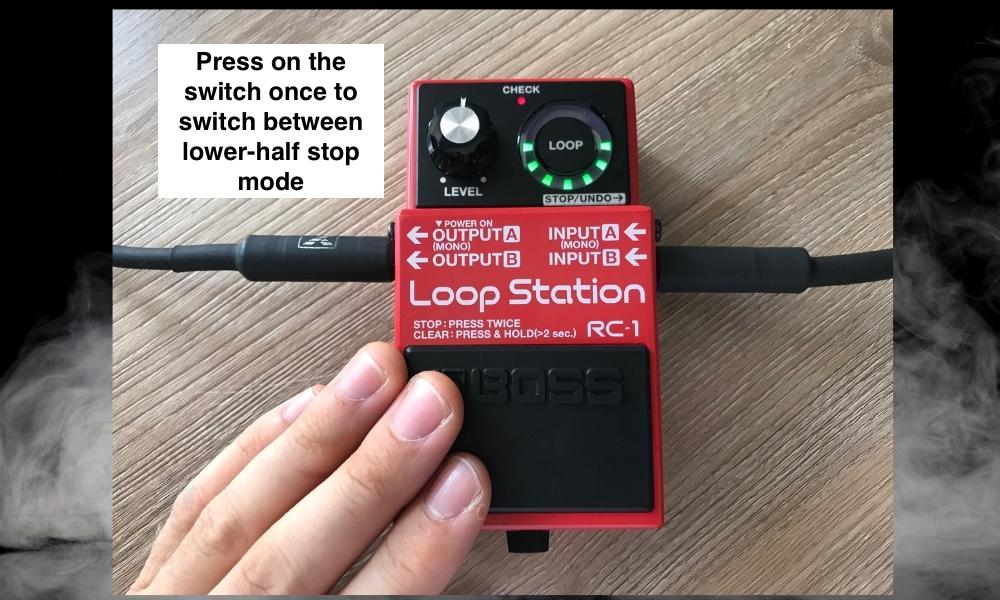
Another thing worthy of note about this setting is that not only will the pedal stop the playback of the loop after finishing the phrase, but it’ll also straight-up delete it. This is why I don’t like this setting at all.
However, you are given the ability to save the phrase from stopping by holding down on the switch for two seconds or longer. And finally, we have display mode in the next section.
Display Mode
Display mode is a cool option for the user, but again, I prefer to have the default setting. In case you don’t know, the BOSS RC-1 has a LED display that shows you how long the loop is and also when it’s about to end.
I find this feature very useful because it gives you an idea of how long you have to play and when to start overdubbing to get the timing just right. It’s for this reason that the default setting is where it’s at, in my view.
Upper Half – LEDs Correspond to Loop Length [Default Setting]
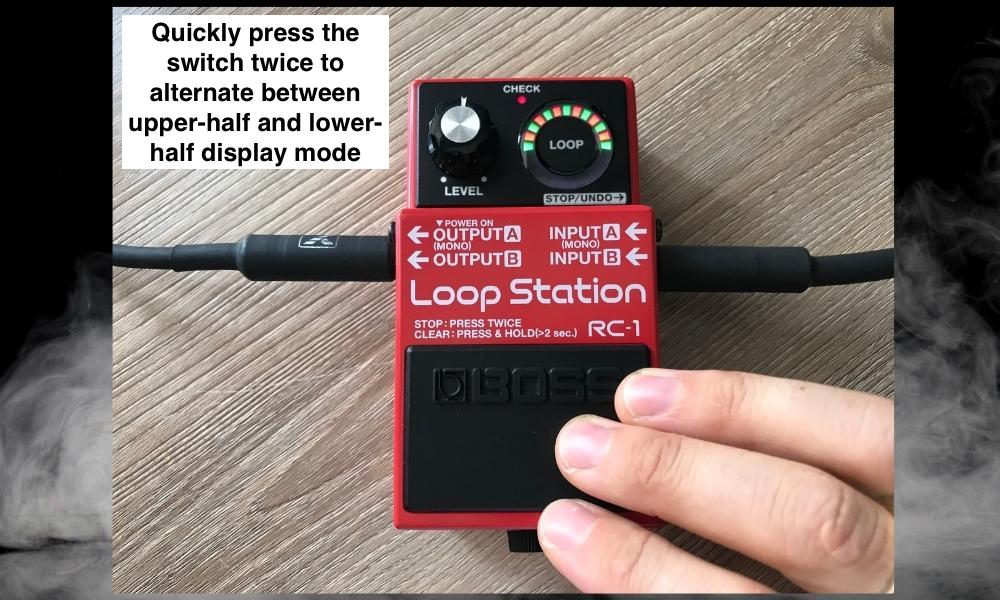
As I said earlier, this is the best mode, in my opinion, because then you know how long your loop is and when to start playing again.
This is probably the best mode to have for the beginner as well because then you’ll have a better guideline for getting your timing right. Getting the timing right is the hard part of learning how to use any looper pedal.
Lower Half – LEDs Flash At Static Rate [Alternative Setting]
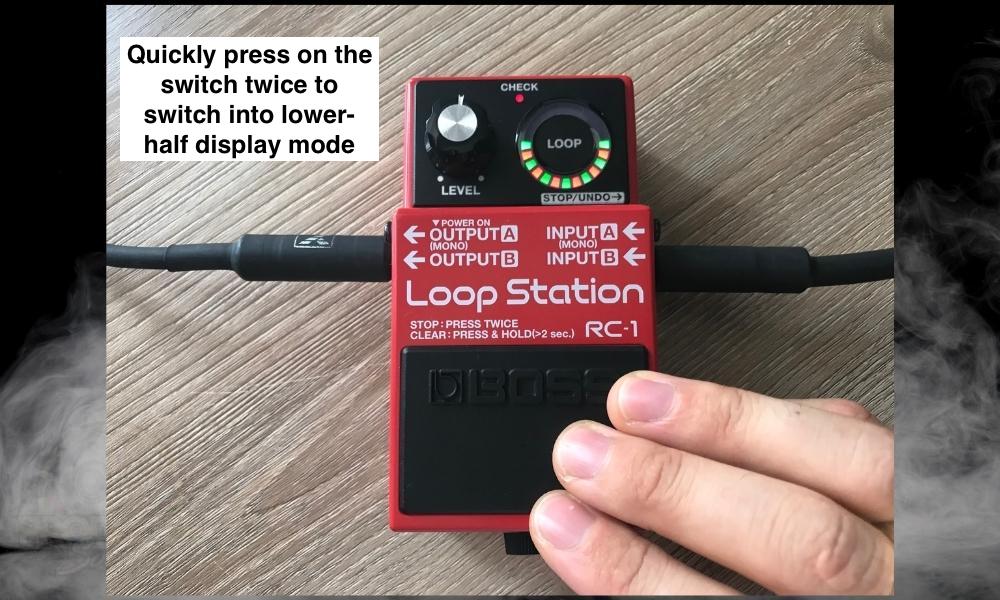
And that’s pretty much it for changing the settings of the BOSS RC-1 – a beloved looper pedal which I have a dedicated guide on here by the way.
Other Articles You May Be Interested In
- The RC-5 vs the RC-1 Loop Station – [A REAL Comparison]
- What Is The Easiest Looper Pedal? [BOSS RC-1 Loop Station]
- How Long Does A Battery Last In The BOSS RC-1? [ANSWERED]
- What Do You Need To Use A Looper Pedal? [3 Things]
- Do Looper Pedals Work With Any Amp? [ANSWERED]
Important Things to Note About the Settings of the BOSS RC-1
1) Settings May Depend On How Age Of RC-1 Loop Station
My final thoughts on the BOSS RC-1 Loop Station have to do with Display Mode. If I’m not mistaken, older RC-1 models do not have the capability to switch between the two different categories of display mode.
I say this because the instruction manual that I linked to earlier does not have this in the manual, whereas the other instruction manual that I recently got with the RC-1 purchase does include the Display Mode configuration.


 Written By :

Hey Andrew! I have read the official manual but I didn’t understand it. Your tutorial makes sense, but how do I save this settings? Because if I remove the Output A cable the changes does not save?
If I recall correctly, the settings should save automatically. I’m not sure what’s going on there, sorry.