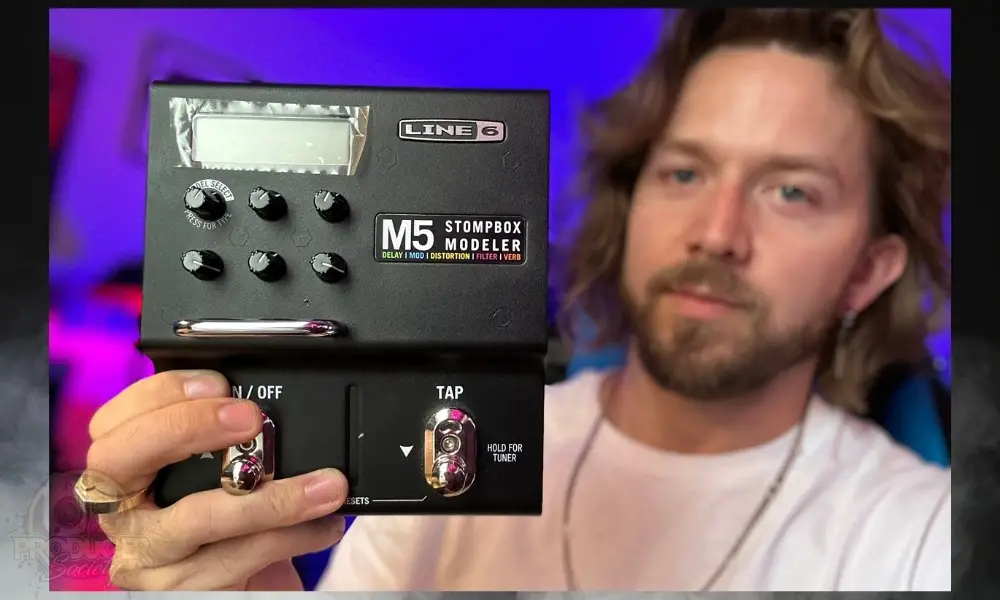
The Line 6 M5 Stompbox Modeler is one of those gems that guitarists learn about when they do a lot more digging into guitar pedals. If you go on YouTube, for instance, you’ll see a lot of players talking about how useful it is despite its age.
Even though it’s over 15 years old at this point, the Line 6 M5, M9, and M13 family are still talked about and hailed as one of the greatest things Line 6 has ever done. I was lucky enough to pick one up at an auction near Christmas time in 2022. But how do you use one?
To use the Line 6 M5 Stompbox Modeler, power it with a 9VDC power supply (500mA). Connect an instrument cable from your guitar to the M5’s input and another between the Output & amplifier. Rotate the “Model Select” knob to choose an effect, then use Tweak, Tweak 2, and Mix to adjust the parameters.
This is the basics of how you get started with the Line 6 M5 Stompbox Modeler, but truthfully, there’s quite a bit more to this very useful device. You’ll find awesome applications for it both in the studio, at your home studio, and during live shows. And it’s all in one pedal. I’ll break down some of my best tips for using it.
1) Learn The Different Model Settings
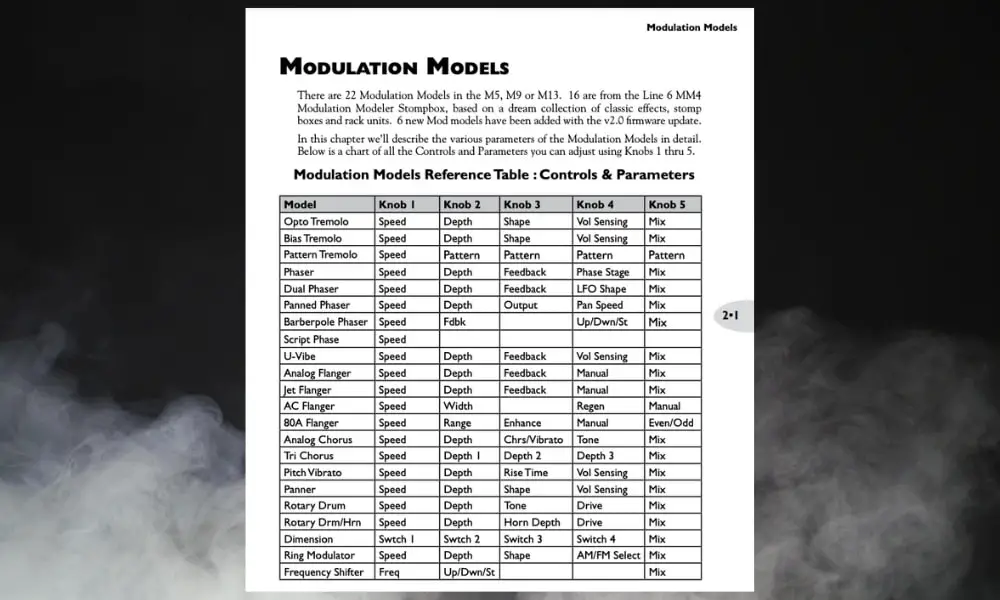
The Manual of the M5 classifies its effects into broad effect types such as Delay, Modulation, Distortion, Filter and Reverb.
Spend time investigating each Model and become acquainted with its sounds. For instance, effects like Chorus, Flanger, Phaser, and Tremolo fall under the “Modulation” effect type.
Knowing these groups enables you to find the desired effects during performances easily. If you haven’t already, take a peek at the manual and take note of all the effects that you can use on it because there are tons. It’s even a bit overwhelming.
A) Using This Tip In A Musical Scenario
Like what’s shown in the video above, Choose the “Facial Fuzz” in the Distortion models for an old-school rock track.
Adjust the “Drive” to 100%, “Bass” to 50% the “Mid” to 30% to get a nice chuggy tone. Set the “Treble” to 50% and Output to 100% to add a lot of sharpness to the tone. This effect complements the guitar part in “Purple Haze” by Jimi Hendrix.
B) Follow These Steps To Execute This Tip
Press the “Model Select” button to enter the effect selection mode. Use the navigation buttons (On/Off for Up & Tap for Down) to scroll through the presets for each effect.
Once you’ve selected a Distortion model, press the “Model Select” button again to access the effects within that category.
Once an effect is selected, use the corresponding “Parameter knobs” (labelled on the M5’s display) to adjust its parameters.
For example, if you’re using any of the Delay effects, you might have controls for the labels named “Time,” “Feedback,” and “Mix.”
2) Get Familiar With The MIDI Capabilities
The M5 can be controlled through MIDI, quickly incorporating it into a more extensive setup. To move between presets, manage effect parameters, and sync the M5 with other MIDI-capable devices, use MIDI controllers.
A) Using This Tip In A Musical Scenario
Connect a MIDI foot controller to the M5 to perform music that incorporates different effects. Toggle between various effects and turn on/off the various preset effects at specified points in the song by programming the foot controller.
Play “Know Your Enemy” by Rage Against the Machine, which has at least three different patches. You can save the different patches for the Intro, Chorus, and Solo so that you may switch between these patches with a single click.
B) Follow These Steps To Execute This Tip
I learned how to set this up with this video, the “In” and “Out” ports, using 5-pin MIDI connections on the left side of the M5.
Connect the “In” port of the MIDI controller to the “Out” port of M5 and the “Out” of the MIDI controller to the “In” of the M5.
On the M5, select “MIDI Channel” by pressing the “Tap” button and “Model Select,” and you enter the MIDI setup mode.
To connect with your MIDI controller, select the relevant MIDI channel by turning the parameter knob below the ”Model Select” knob. This will be the channel you want your MIDI controller to go on.
Program the ‘Banks’ on your MIDI controller as per your desired patches or as per the order of your songs.
3) Try Out The Stereo I/O
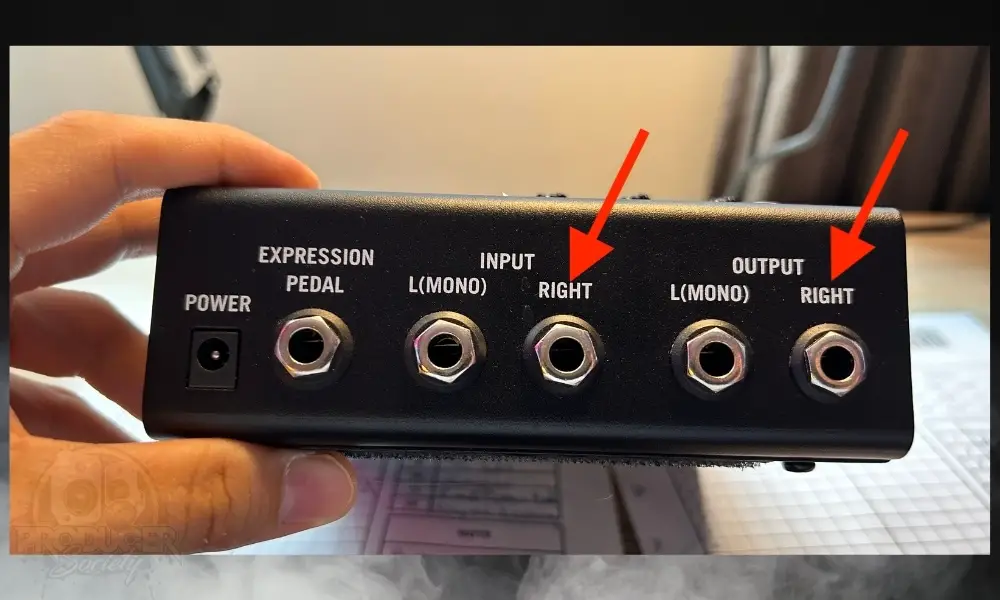
The M5 has stereo inputs and outputs, enabling you to produce really cool sounds. Explore the stereo effects to give your guitar tone more width and depth. The video down below from Alexander Martinez is a must-watch for this.
A) Using This Tip In A Musical Scenario
Connect two amplifiers to the stereo outputs of the M5 to create a post-rock composition. Explosions in the Sky’s “Your Hand in Mine” sounds best in this environment.
B) Follow These Steps To Execute This Tip
Connect the stereo outputs of the M5 to two different amplifiers. Press “Model Select” and select the “Ping Pong Effect” within the Delay Model on the M5.
Use stereo effects to produce spatially immersive audio by turning the Param Knob 1 for the Delay time of the Left Channel. Param Knob 3 controls the “Offset” of the Right Channel.
This sets the right channel delay time as a proportion of the left channel delay time in percentage. For example, if the Delay time is 256ms, then half of it would be 128ms which will be heard through the right channel.
Create a captivating stereo effect by applying a “Ping Pong Delay” stereo with various delay times on each side.
4) Use An Expression Pedal
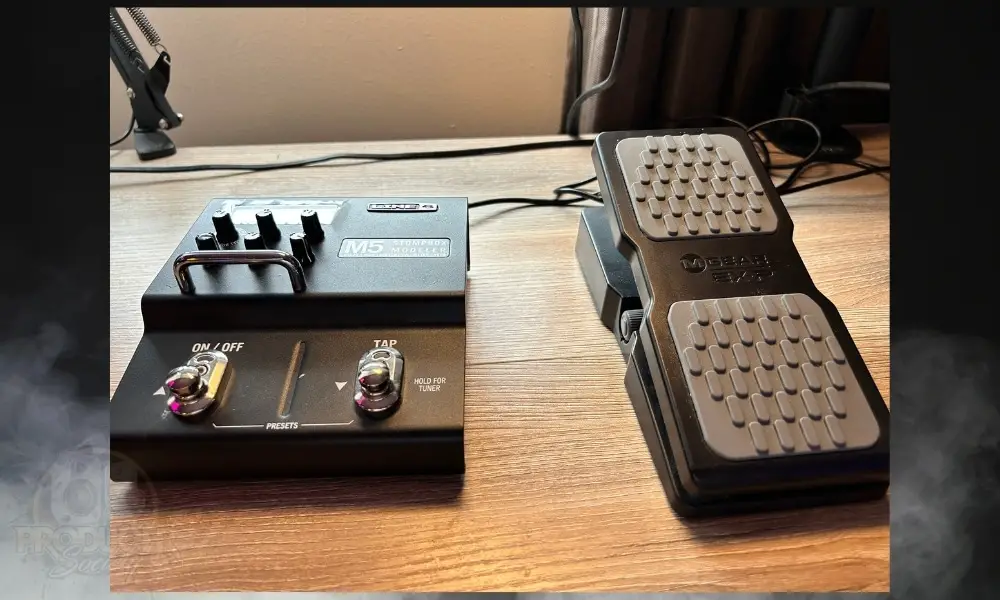
The M5 has an expression pedal input that enables real-time control of various effect parameters. This gives your performances a fresh perspective and enables expressive and dynamic playing.
A) Using This Tip In A Musical Scenario
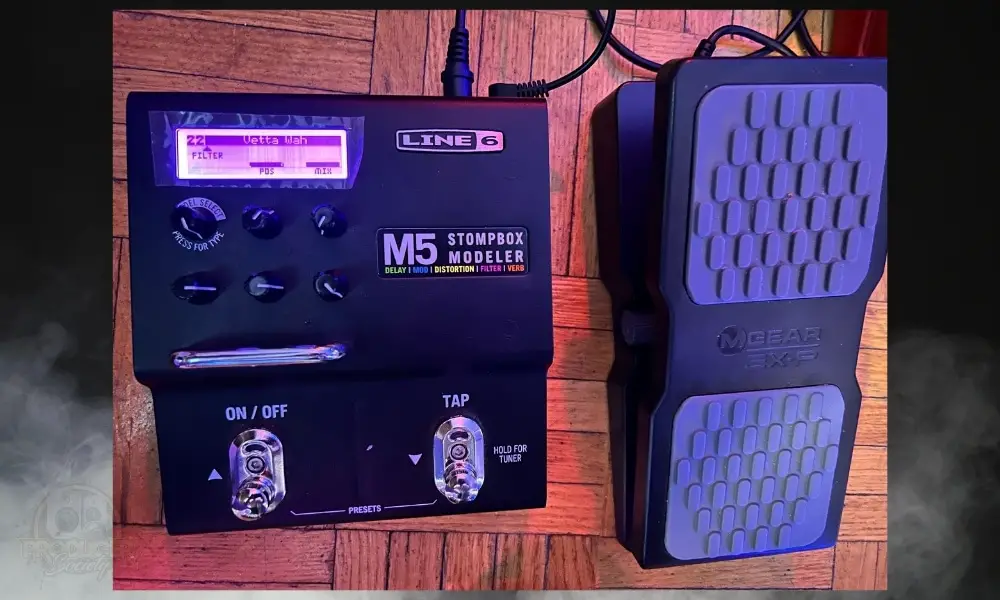
Assign the expression pedal to regulate the “Wah” effect frequency during a blues solo. You may manually control the wah effect with the pedal, giving your phrases dramatic wah accents.
You can perform Jimi Hendrix’s famous guitar intro from “Voodoo Child (Slight Return)” with this configuration.
B) Follow These Steps To Execute This Tip
The M5’s expression input can connect to an external expression pedal.
- Once connected, set the expression pedal “Heel” and “Toe” values.
- Follow the on-screen instructions to assign the parameter you want to control to the expression pedal.
You might designate the expression pedal to regulate the frequency of the “Wah” effect or the feedback of the “Delay” effect, for instance.
5) Leverage It Within Signal Chain Placement
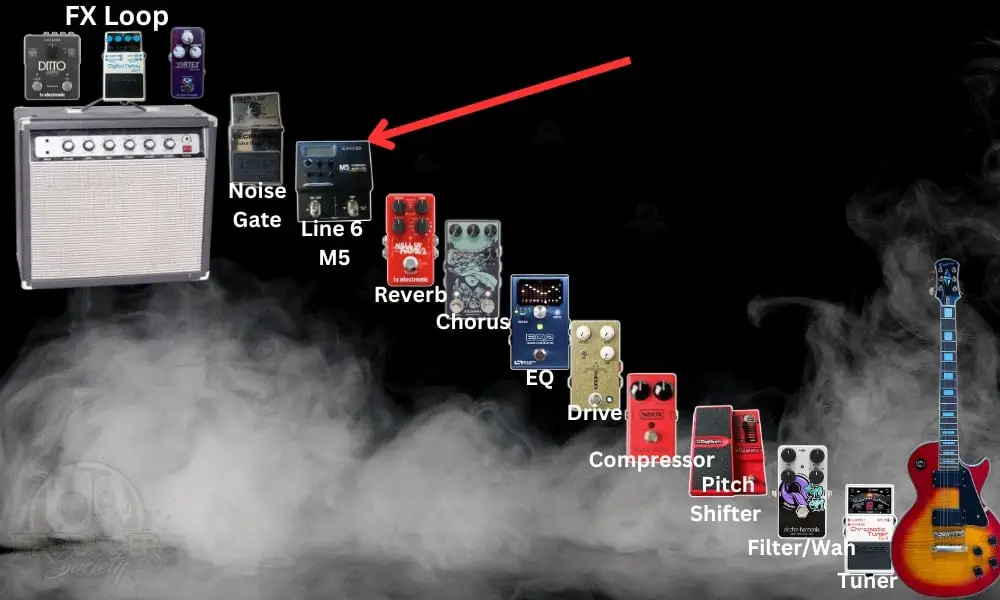
The Line 6 M5s can also be used onboard a pedal board. Its placement in your signal chain can significantly impact how well it works with other pedals and how loud it sounds.
Try positioning the M5 at various positions along your chain to find the best configuration for your desired tones.
A) Using This Tip In A Musical Scenario
Try using the M5 before a reverb pedal and after a fuzz pedal in a Rock band. The effects will produce various audio textures and reactions as a result.
B) Follow These Steps To Execute This Tip
To modify the M5’s sound Output, switch its positions in the signal chain.
Depending on the effects you plan to use on the M5, you must place it accordingly for optimum use.
If using the M5 for Tuner/Wah/Fuzz, you can put it ahead of Dynamic-effects, EQ and modulation pedals, and Reverb. It comes last in the chain if you’re using it for Modulation and Reverb.
You can view the Pedalboard of U2’s guitarist, The Edge in this video. It includes the Line 6 M5. He places it before the overdrive and hi-pass pedals.
6) Use The MIDI Clock Sync Feature
Using an external MIDI clock, the M5 can synchronize its time-based effects, like Delays and Tremolos. By doing this, you can be confident that all your MIDI devices and time-based effects are entirely in sync.
A) Using This Tip In A Musical Scenario
In a solo performance, sync the “Ping Pong Delay” effect with a MIDI sequencer playing backing synthesizers using MIDI Clock Sync. This keeps the delay effect on your guitar precisely in sync with the synthesizer’s timed performance.
B) Follow These Steps To Execute This Tip
I learned how to set this up from the member, Leo Stokes, on this forum. It’s a cool tip so consider using it.
- Connect the M5 to a MIDI sequencer as an external MIDI clock source.
- On the M5, choose the “MIDI Clock Sync” menu and turn synchronization on.
- Accessing the “Settings” section, make sure that the pedal is in the “Tap Tempo” mode and that the MIDI send/receive option is set to “Omni” in the settings.
- You can enter “Tap Tempo” mode by fully turning the Param knobs to adjust the milliseconds of your delay, Reverb, and mod effects to the right (or entirely to the left, for some mod effects).
So that the pedal “knows” what note value to sync to, the millisecond value is substituted with a note subdivision (16th note, 8th note, quarter note).
The Line 6 pedal automatically syncs to the incoming MIDI clock or signal while in “Tap Tempo” mode.
The red flashing “Tap” light on the M5 will speed up or slow down when you change the Tempo on the midi clock source, depending on the value.
7) Use The Gate Feature
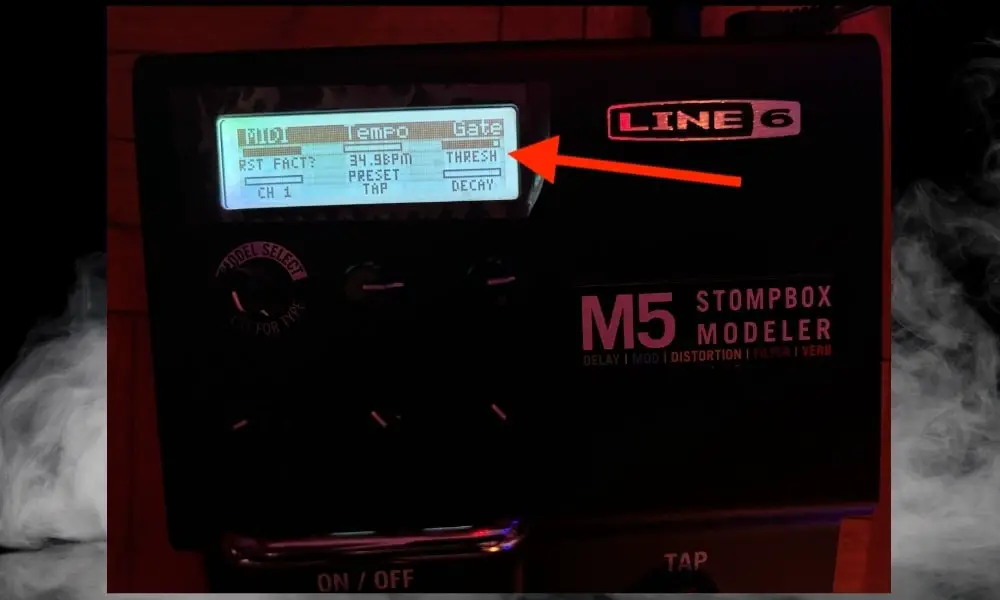
As mentioned in the Line 6 M5 Manual, the noise gate on the M5 can help reduce unwanted noise when utilizing high-gain effects.
This is useful for controlling some of the more erratic distortion and fuzz effects, or you can use it to eliminate the hum that a guitar with single coils produces. Keep your signal clear and with less disturbance by using the gate in M5.
A) Using This Tip In A Musical Scenario
Your palm-muted chugs will be tight and articulate. Apply high-gain distortion when activating the noise gate during a metal performance.
B) Follow These Steps To Execute This Tip
For the desired outcome, enter page 2 of the “Additional Setup” mode by pressing the Model Select Knob once.
- To lessen distracting noise, find the “Gate” setting.
- The top right, “Param Knob,” sets the Threshold, and the bottom right, “Param Knob,” sets the Decay of this effect.
A footswitch cannot control this effect, so only use it if you always want the gate to be open.
8) Utilize Dual Effects Through Saved Presets
You may save and use two effects simultaneously on the M5, one for each footswitch “On/Off” for Up and “Tap” for Down. This expands your tonal options during performances by allowing you to rapidly engage in two separate effects.
A) Using This Tip In A Musical Scenario
- Assign the “Tap” footswitch a “Phaser” effect and the “On/Off” an “Opto Tremolo” effect when playing progressive rock.
To provide dynamic textures and rhythmic changes to your guitar parts in a song like “Throw Away the Television” by Red Hot Chilli Peppers, toggle between the two effects.
B) Follow These Steps To Execute This Tip
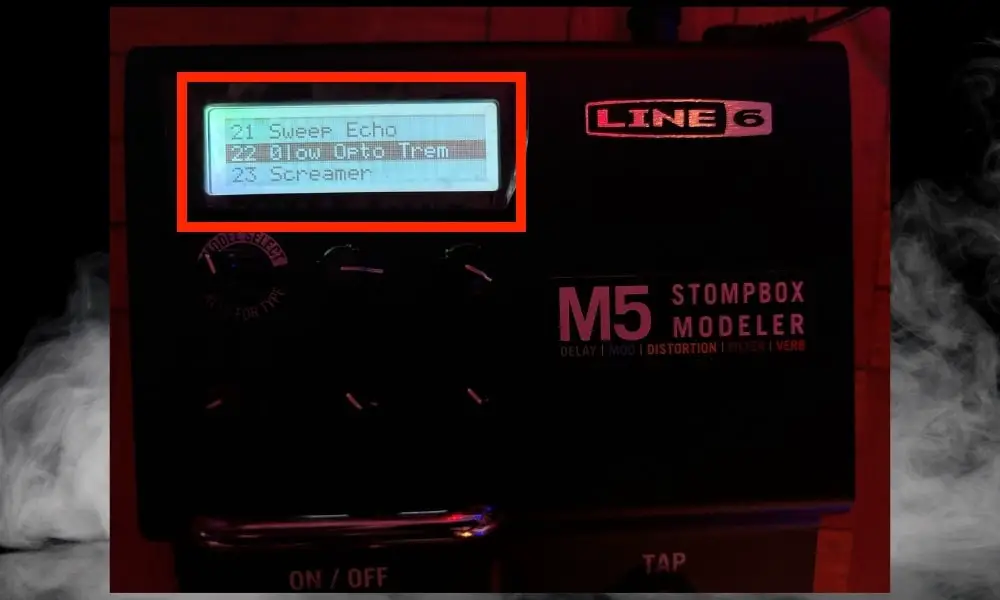
- Press the “Tap” while holding the “On/Off” to activate preset mode.
- Set the “Phaser” to any of the 24 effects and the “Opto Tremolo” right after this preset.
- Using the corresponding “Parameter Knobs,” change the parameters of both effects and save them ahead of one another.
- Use the Phaser for the verse and “Opto Tremolo” in the chorus.
This is best demonstrated in this video. You can see the tone switch between the “Spring” Reverb effect and the “Analog Flanger” Modulation effect between the verse and chorus of the song.
9) Use A Reverse Delay To Create Swells
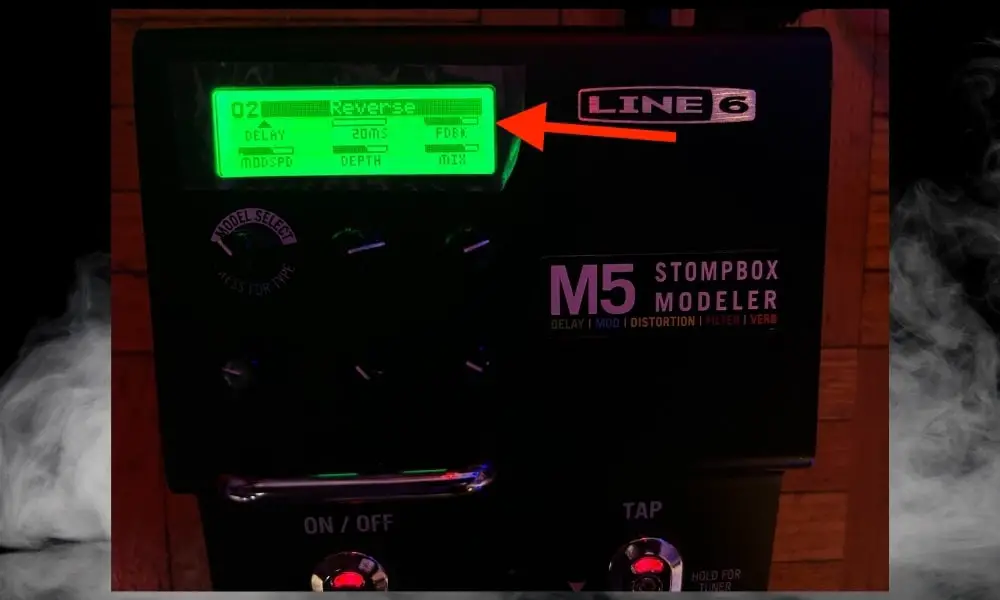
To produce swell-like, ethereal sounds, creatively employ the “Reverse Delay” effect. Your notes are played back in reverse via the reverse delay, giving your guitar sections a mesmerizing and atmospheric feel.
A) Using This Tip In A Musical Scenario
Play sustained chords or notes while using a post-rock or cinematic composition’s “Reverse Delay” effect. The effect creates eerie, swollen sounds that complement the music’s evocative and atmospheric qualities.
B) Follow These Steps To Execute This Tip
- Press the “Model Select” to choose the “Delay” model effect
- Scroll and select the “Reverse” effect.
- To get the appropriate length of the reverse playback, change the “Time” option.
We can hear the potential of this effect here. The effect sounds more pronounced as soon as the mix goes from Dry to Wet at the 5.42 mark. Add a bit of modulation in there, and you have a melancholic soundscape.
10) Try The Screamer Distortion Effect
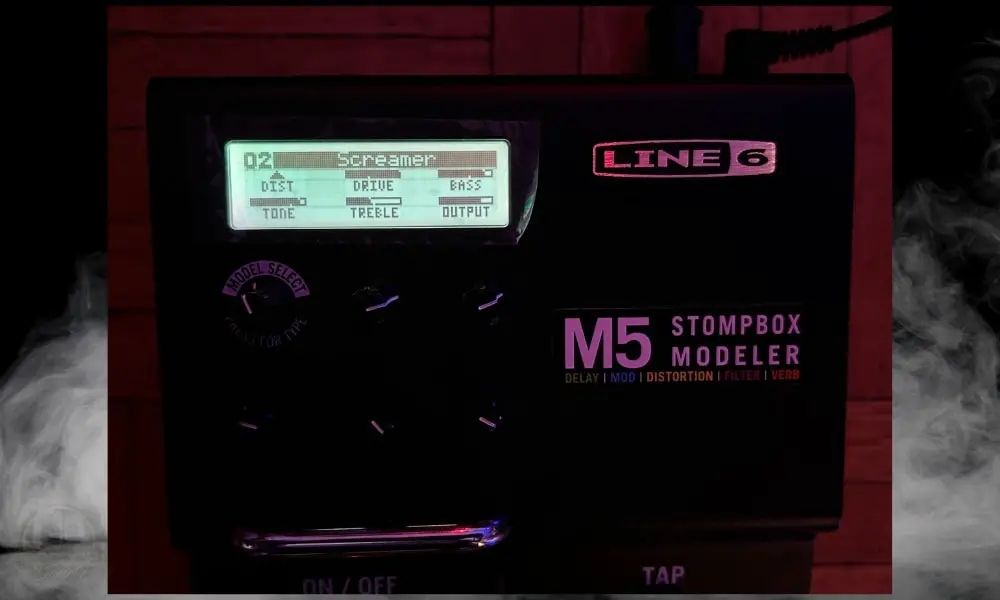
This overdrive setting is called the Screamer within the M5. It emulates the overdrive pedals used by many famous musicians. It can very well sound much closer to the Maxon OD 808 pedal.
A) Using This Tip In A Musical Scenario
As shown in the video above, we can hear a blues rock guitar sound like that of John Mayer. This setting would be ideal for playing the solo in his song “Slow Dancing In A Burning Room.”
B) Follow These Steps To Execute This Tip
- Press down on the Model Select switch and select the Distortion Model effect.
- Scroll down to the second one and select the “Screamer” setting.
- Set the Drive to 30%, Tone to 50%, Treble to 50%, Bass to 65%, and Output to 80%.
Param Knob 3 controls the tone in the M5 as well
11) Save And Backup Your Sounds
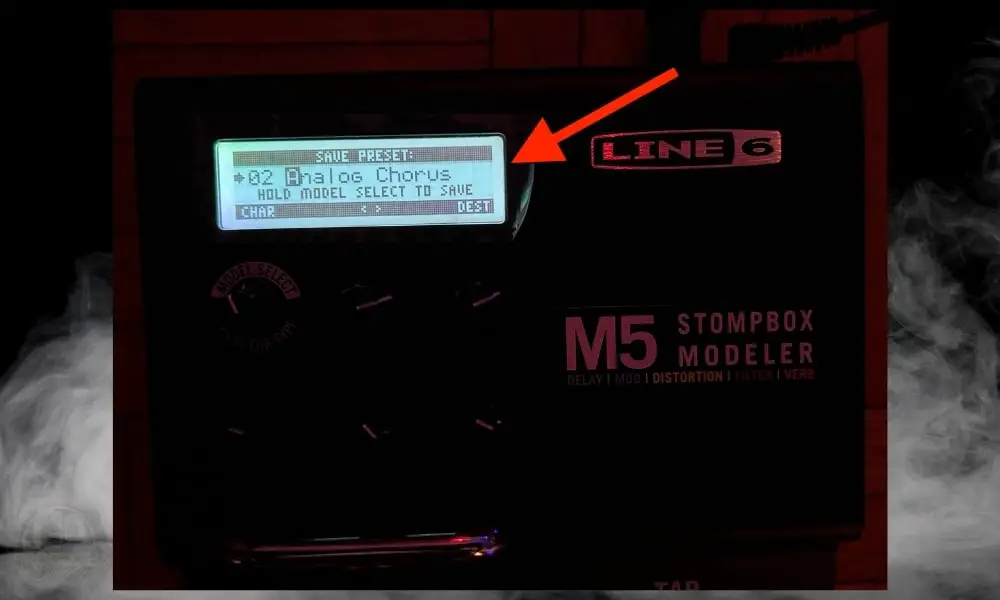
As per page No. 6 of the Line 6 M5 Manual, MIDI In and Out is also available to save preset changes and SysEx preset data, which you can save as backup onto your computer.
Saving presets of the Line 6 M5 to a computer can be done by using a MIDI interface and the SysEx program.
Not only does this enable the creation of a unique preset library but also makes it easier to exchange the preset files with other musicians, if needed.
Follow These Steps To Execute This Tip
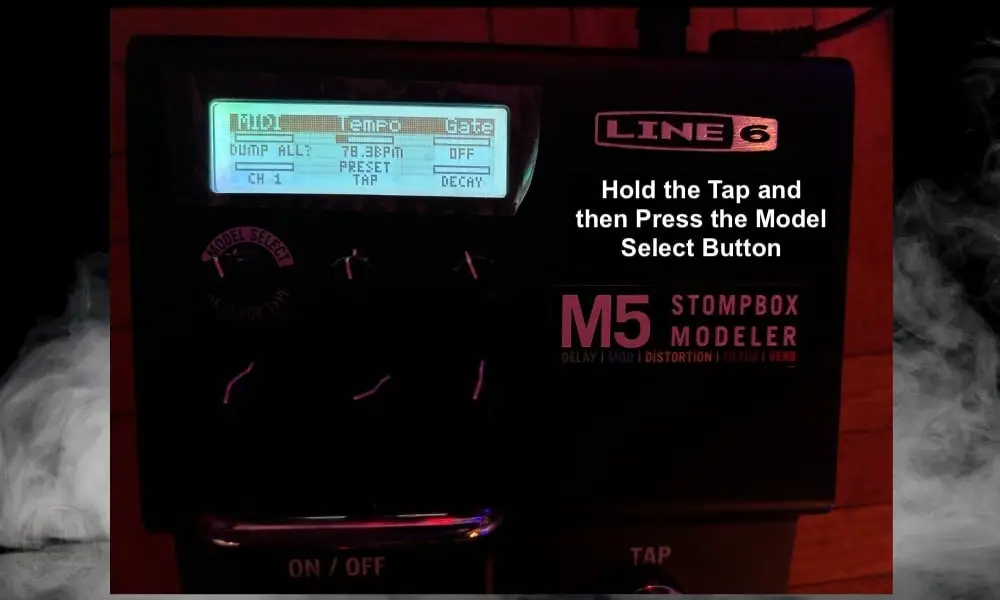
- Step one is to change the MIDI Channel, and rotate the “Parameter Knob” on the bottom left. It will appear within the Ch. 1-16 or Omni; Ch. 1 is the default.
- Next, the “Model Select” knob will need to be revolved.
- When it displays “DUMP ALL?” Press to commit.
- This will back up all 24 presets.
- To back up just the current preset select “DUMP PRE?” instead.
- Pressing the “Model Select” knob and the “Tap” button simultaneously will set up the computer to record SysEx.
- The SysEx file will be transmitted to the computer by the M5. This will create a backup of your presets which will be accessible anytime.
- Simply send the SysEx file from your computer into the M5 using MIDI to reload presets into your M5. The current location of M5 will be loaded with a single preset.
Other Articles You May Be Interested In
- Where to Put the Line 6 M5 In Your Signal Chain [ANSWERED]
- How to Use The Ibanez TS9 Tube Screamer + (5 Cool Settings)
- How to Use The TC Electronic Vortex Mini (+ 5 Cool Settings)
- How to Use The Dunlop Crybaby Wah (And 7 Cool Tips)
Important Things to Note About the Line 6 M5
1) There Are 3 Models of the Line 6 M Series
As I briefly alluded to earlier, there is more than one version of this pedal. There is the Line 6 M9 Modeler and the Line 6 M13 Modeler as well, which are expanded versions of the same thing.
The M5 is actually the smallest one with the least amount of features. Personally, I’ve never played with any of the other ones, but it may be something that I look into in the future.
As I said earlier though, these aren’t new pedals, so you’ll have to get them used. I’ve included those links below.


 Written By :
