There’s a reason why the Ibanez TS-9 Tube Screamer is found on so many legendary pedalboards. It’s a versatile overdrive with both warm and bright vibes, making it a surefire way to inject some vintage character into your tone.
But I’ve seen many guitarists struggle to use it effectively; they’re not sure about where to place it or how to dial in the right tone. So here’s how you can get started with the TS-9 quickly:
To use the Ibanez TS-9, power it with a 9V battery or DC power supply. Plug it straight into your guitar, or early in your signal chain (after pitch and filter pedals). Start with the knobs at the middle point, and adjust the Drive, Tone, and Level one by one. Activate it with the footswitch.
This little green box can do a lot though. So whether you’re new to using it or looking to get more out of this iconic pedal, keep reading. I’ve shared some practical tips to make the most of the TS-9, as well as some popular settings for legends like SRV and Gary Moore.
How To Set Up The Ibanez TS-9 Tube Screamer In Your Signal Chain
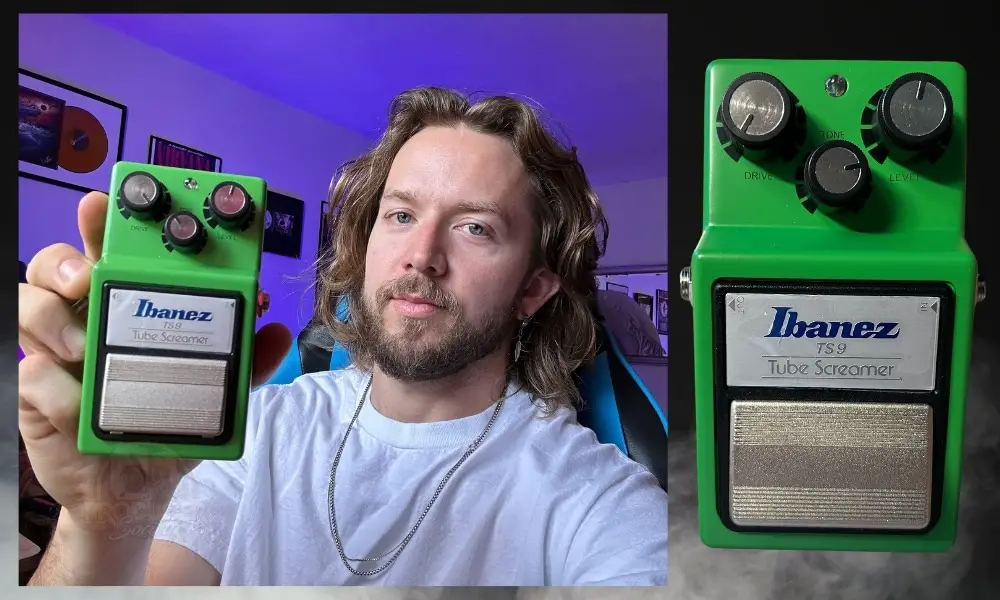
I think the TS9 sounds particularly good with the MXR Dyna-Comp before it in the signal chain. Something tells me I’m not the first person to have ever done this.
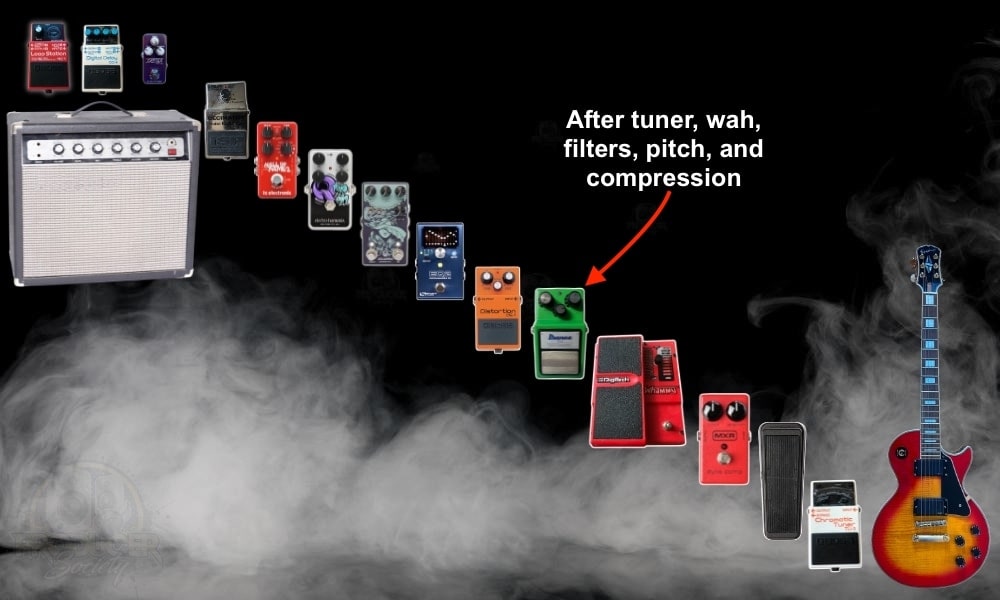
Setting up the TS-9 in your signal chain is pretty easy; it works just like any other overdrive pedal. As I alluded to a moment ago, I like to place it near the start of my chain; after my compressor and EQ, but before everything else. So my chain usually looks a bit like this:
Tuner > Enveloper Filter > Compressor > EQ > Drive > Distortion > Chorus > Reverb
If you’re using the FX Loop on your amp, you can put these pedals there.
Flanger > Delay > Looper
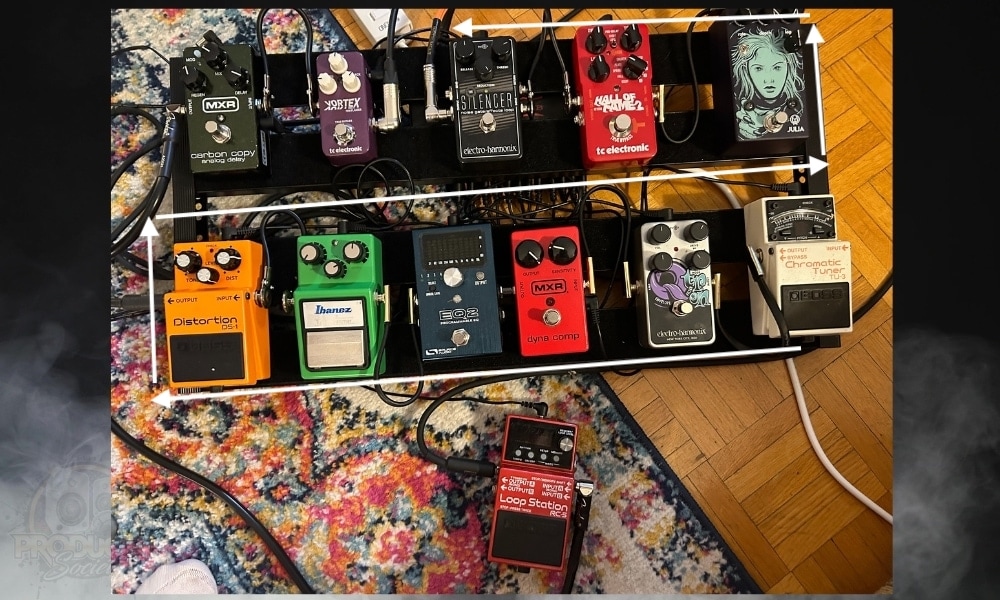
Guitar > Tuner > Filter > Compression > EQ > Drive > Distortion > Chorus > Reverb > Noise Gate [FX Loop: Flanger > Delay > Looper]
See how I placed the TS-9 before the distortion pedal? That’s because the natural order of gain pedals is from lowest to highest.
If you reverse it, you’ll probably experience more noise and tonal artifacts, plus it’s a bit weird for the next pedal in the chain to lower the gain.
Placing the EQ before the TS-9 lets me modify my clean guitar signal; you can get rid of muddy bass frequencies, boost the treble, and check the mids to make it sit with the rest of the band. Then, the TS-9 adds some sweet saturation on top.
My signal chain is always a work in progress because I love buying new guitar pedals. The one you see above is my current set-up at the time of writing.
How to Power The TS-9 Tube Screamer
1) Using A 9V Battery
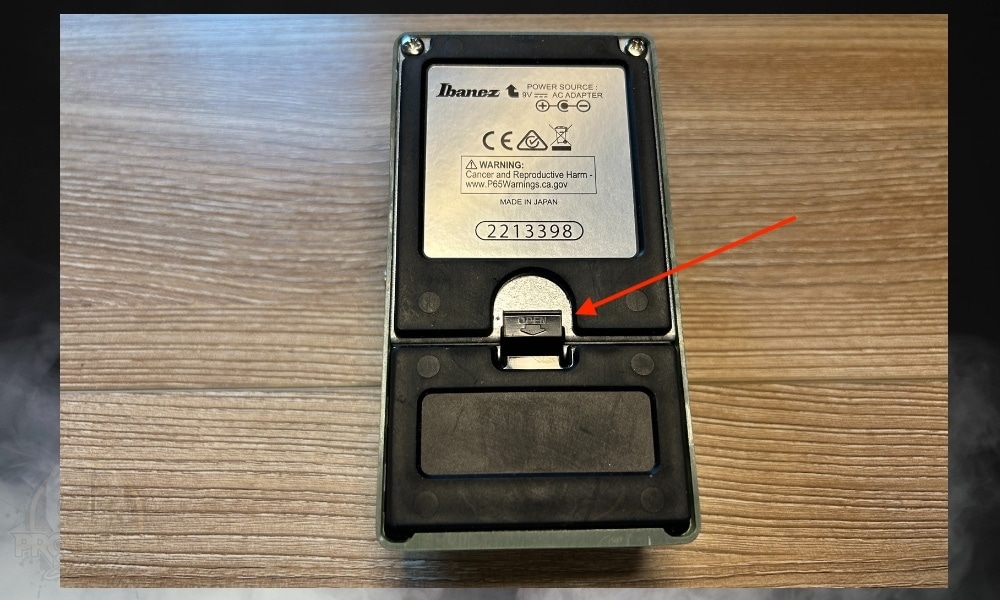
There are two ways you can power your Ibanez TS9 Tube Screamer: with a 9V battery or a 9V DC power supply. If you’re going the battery route, you can use a standard 9V alkaline battery. Installing it is straightforward:
1. Lift up the small notch at the back of the pedal to open the battery compartment.
2. Remove the old battery, if there is one, and replace it with the new one. Make sure it’s properly aligned with the positive and negative terminals. Be careful not to tug too hard on the battery cable; it’s known to come loose in some cases.
3. Place the battery neatly back in, and pop the cover back on.
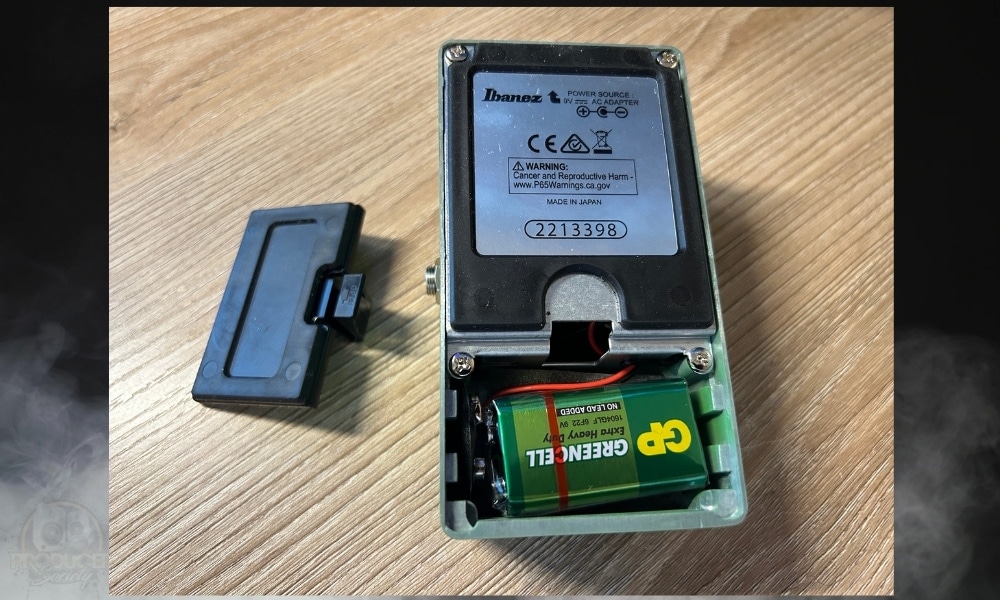
An important note: like every other guitar pedal, the battery gets turned on the moment you plug your cable into the input jack. If you leave it plugged in, it’ll keep draining the battery.
So if you’re using it only on batteries, be sure to disconnect the input jack each time. The TS-9’s power draw is a measly 8mA, so it can last a long while on good batteries.
2) Using A Dedicated and Isolated Power Supply
However, if you’re like me and don’t fancy the idea of constantly changing batteries or unplugging the cable, then a power supply is your best bet. You’ll need a standard 9V DC power supply.
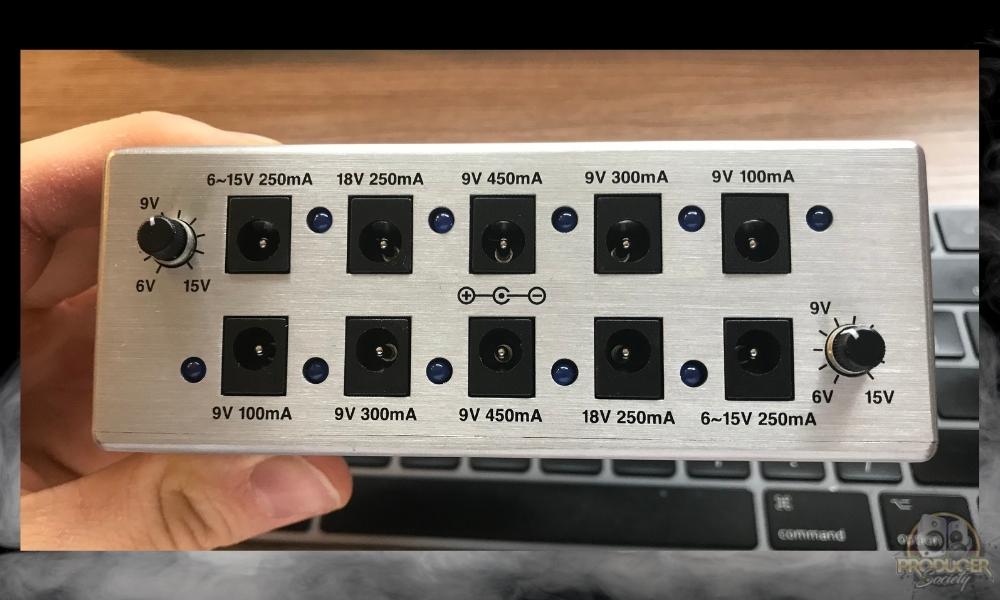
I like to use my MXR Isobrick as it provides clean power to all my pedals. However, these days, I’m using the Voodoo Labs Pedal Power 3 + which is a bit of an upgrade from the Isobrick. It handles all of my pedals’ needs.
You’ll find the DC power input at the top of the pedal. Simply plug the power supply into the DC input, and the other end into a power outlet.
As per Ibanez’s official manual, the moment you plug in the DC power jack into the top of the unit, it switches off the battery, so you can still leave a battery connected inside for portable jams.
This is how pedals have to operate, either way, you’ll flood the pedal with too much power and fry it. I learned this from The Gear Page, and while it’s just a forum, something tells me it’s 100% correct.
Features Of The TS-9 and How to Use Them
1) Drive Control
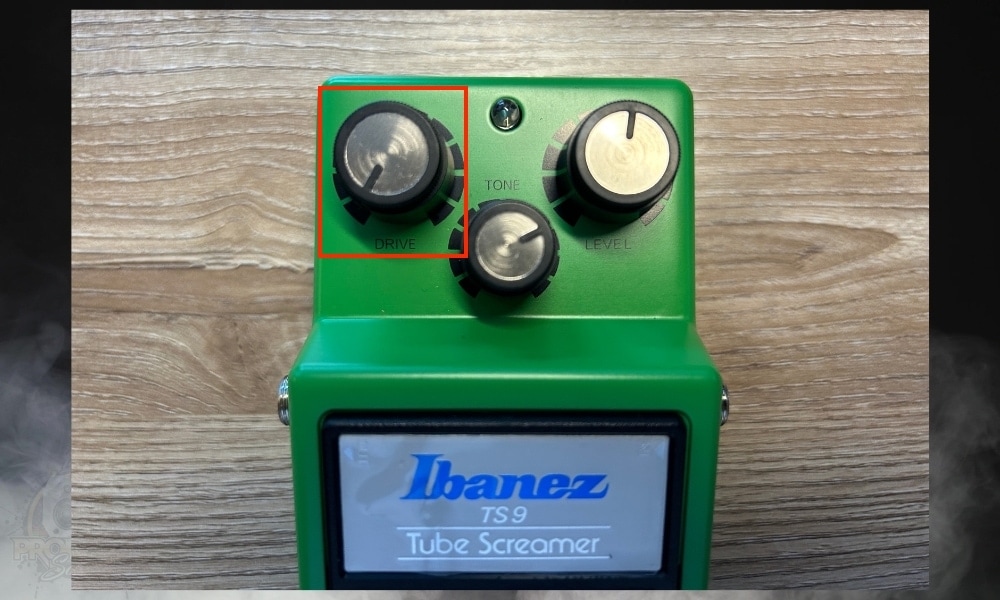
The Drive control adjusts the amount of overdrive. Turning it up increases the gain, which results in a more distorted sound. Turning it down reduces the gain, giving you a cleaner tone. This is your main knob for how “dirty” or “gritty” your sound is.
Setting the right Drive is the heart of the TS-9. At lower values, the pedal provides a mild, transparent overdrive that subtly colours your tone.
It’s perfect for blues, country, and classic rock, where you want to add a touch of grit without losing the natural character of your guitar.
Cranking up the gain introduces a more aggressive, heavier distortion. This is great for harder rock and even some metal genres, where a more saturated and ‘dirty’ sound is sought after.
Although it’s not as much gain as a distortion pedal like the Boss DS-1 offers, it’s still punchy. However, the increased gain can sometimes make the pedal sound a bit harsh, though not bright enough for heavy metal. And that’s where the Tone control comes in.
2) Tone Control
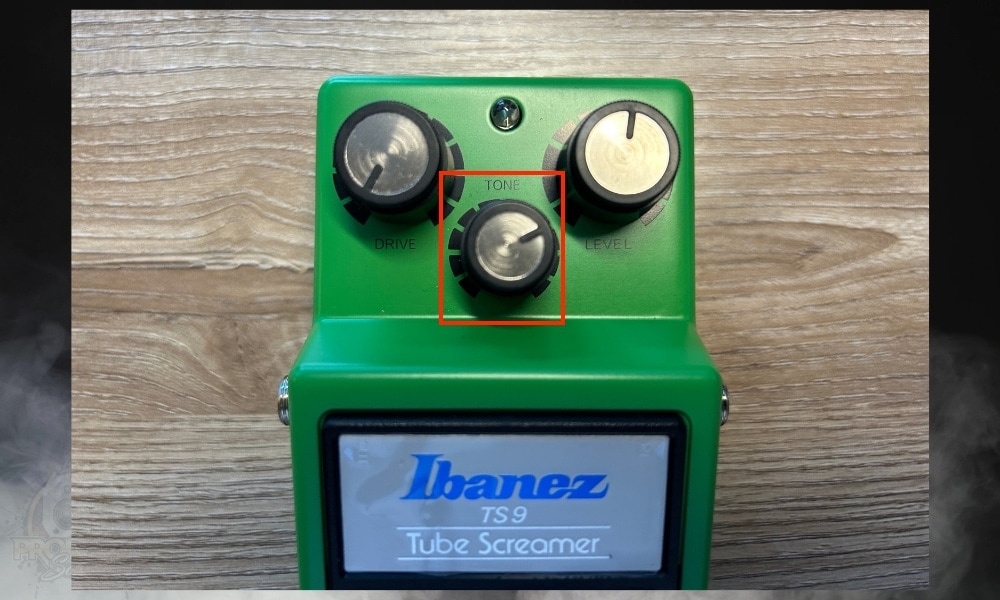
The Tone control adjusts the treble content of your sound. Increasing it will add brightness and sharpness while decreasing it will create a warmer, more mellow tone. The default is 50% (12 o’clock), which has a neutral effect on your guitar.
This knob is essential to shaping the pedal’s sound to suit your guitar, amp, and the style of music you’re playing.
A lower setting (less than 50%) can be useful for taming overly bright guitars or amplifiers, or for creating a smooth, vintage-style sound that’s perfect for jazz or blues. Especially if you’re on active pickups since those are naturally bright.
A high Tone setting (more than 50%) can help your guitar cut through the mix in a band setting, especially for lead playing or solos. It’s also great for styles like rock, metal, or even funk, wherever a sharp, articulate tone is ideal.
Remember though, the Tone and Drive knobs interact with each other a lot, so changes to one may call for tweaks to the other to maintain your desired tone.
3) Level Control
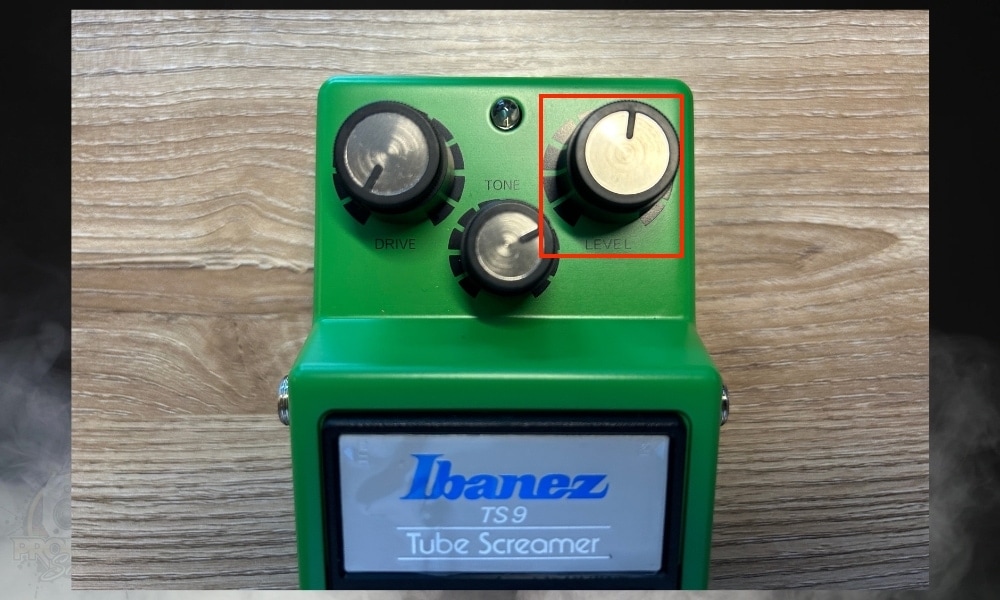
The Level control adjusts the output volume of the pedal. Use this to match the volume level when the pedal is on with the level when it’s off. Or, crank it up to use the TS-9 as a boost for solos.
To match the volumes between your clean and overdriven sounds, just play a riff with the pedal on/off, listen for the level changes, and tweak the Level knob accordingly. This helps prevent any sudden loud spikes when you engage the pedal.
However, Level control can also be used more creatively. By setting the Drive control low and the Level control high, the Tube Screamer can act as a clean boost pedal.
This pushes your amplifier harder, leading to a natural, amp-driven saturation. It’s a beloved trick of many blues and rock players for achieving a dynamic, responsive tone. I like this because it pairs well with my tube amp.

On the other hand, setting the Level lower and the Drive higher gives a more pronounced overdrive effect without a significant volume boost.
This is useful when you want the distorted tone without necessarily being louder, like when you’re playing rhythm parts in a song. It’s also a good setting for home practice when you want the tone without the high volume.
The key to getting a good tone with the TS-9 is developing a feel for how all 3 of these knobs interact with each other, plus how the pedal works with others on your pedalboard. So be patient, and experiment a bit.
4) Footswitch
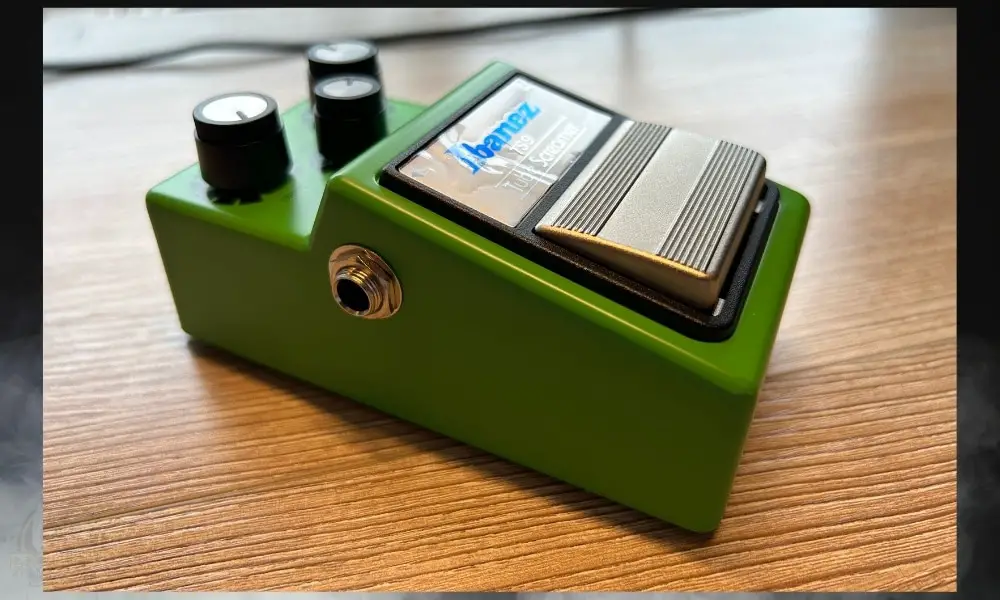
The footswitch turns the pedal on and off as a toggle. Pressing it the first time will engage the pedal, and pressing it again will bypass it, so your clean signal will pass through. No fancy functions here.
What I like about the TS-9’s footswitch is that it’s a very durable design, with a wide area to stomp on. Perfect for carrying it around and gigging. Plus, I haven’t noticed any ‘pop’ noises when engaging/bypassing the pedal amid a performance.
5) Input and Output Jacks
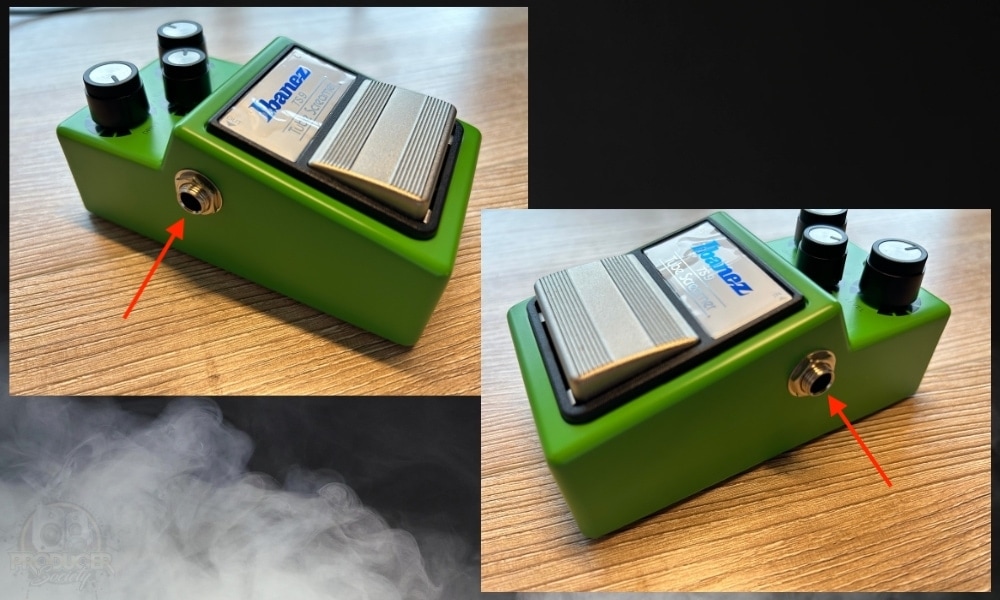
The input jack on the right is where you plug in your guitar, and the output jack on the left is where you connect to your amp or the next pedal in your chain. Both of these are mono, 1/4“ connectors.
6) DC Power Input
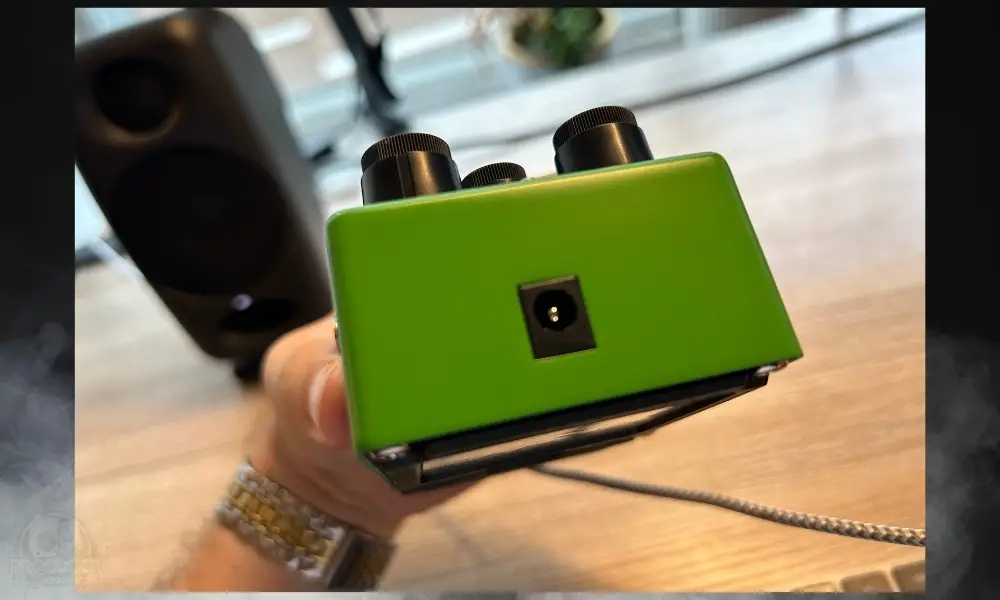
The TS-9’s DC input is at the top of the pedal. This is where you plug in a 9V DC power supply if you’re not using a battery. The power supply is not included with the pedal, so you’ll need to buy one separately.
7) LED Indicator
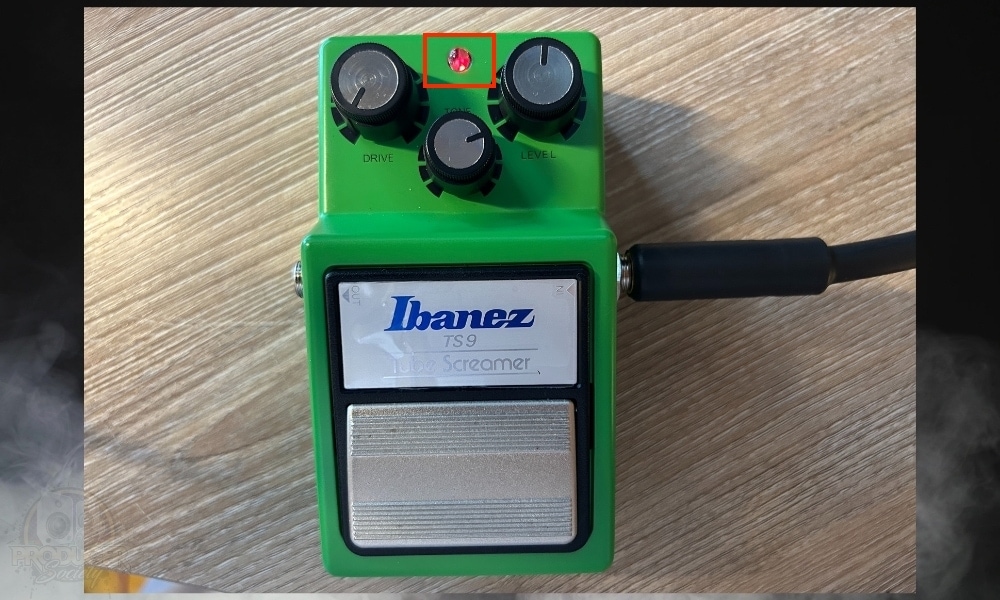
The LED Indicator shows whether the pedal is on or off. When the pedal is active, the LED is lit.
If the pedal is active, but the LED is dim, it’s also a sign that the batteries are low on power. So you should replace them. Unless you like the low-voltage fuzzy tone from dying batteries.
Although, I’m not entirely clear if that works on the TS9. I’ll have to do an experiment one of these days to see if the TS9 responds well to dying voltage which is something I talked about in this article.
8) Battery Compartment
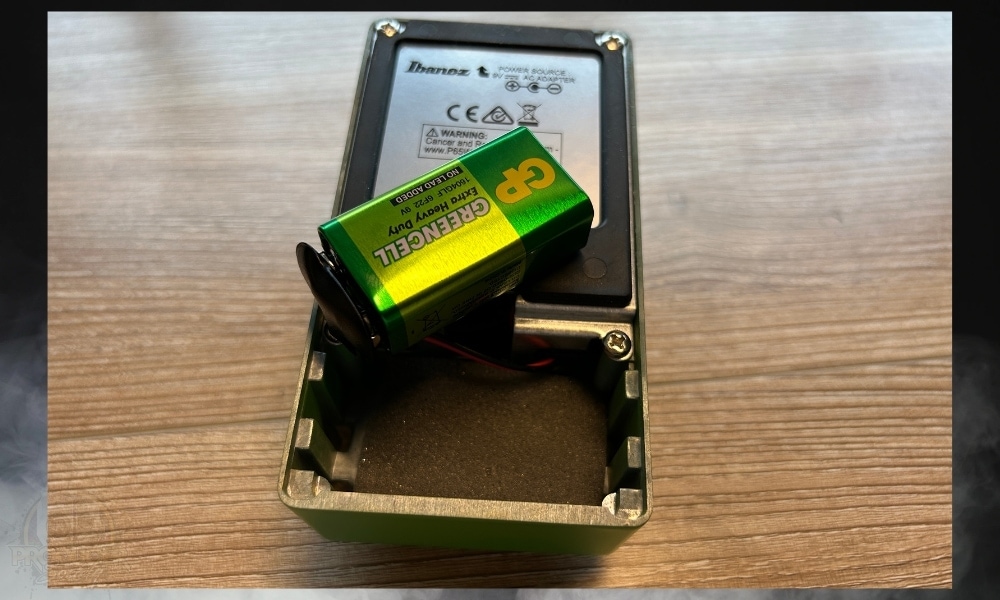
The battery compartment is located on the back of the pedal. If you’re using a 9V battery to power the TS-9, this is where you’ll insert it. It’s a simple clip-on cover, so it’s easy to change batteries when they run out.
9) Buffered Bypass
The TS-9 features buffered bypass, which means when the pedal is disengaged, your signal may be slightly altered. A buffer helps maintain the strength and quality of your guitar signal over long cable runs. It can prevent high-frequency loss too.
But the true bypass purists don’t need to worry. If you’re adventurous enough, the TS-9 can be modded to have a true bypass switch.
In my setup, the stock pedal sounded great, and I didn’t notice any significant difference with the Tube Screamer being bypassed.
It’s also important to note that having too many buffered pedals in your signal chain can cause signal loading, potentially leading to an over-processed, ‘artificial’ type sound.
This is not common, but you should consider each pedal in your pedalboard and the overall chain.
5 Cool Settings for Using The Ibanez TS9 Tubescreamer
The TS-9 is really versatile as an overdrive pedal, so you can use it in a variety of genres. Here are some popular songs and their pedal settings you can try out.
Of course, this depends a lot on your guitar and the rest of your gear, particularly your amp, but this should help you get started.
One thing I should mention is that I’ve set the Level to 6 approximately on all pedals because that’s the level it needs to be at in order to stay the same volume after having engaged the pedal (at least on my set-up).
1) “Pride and Joy” by Stevie Ray Vaughan
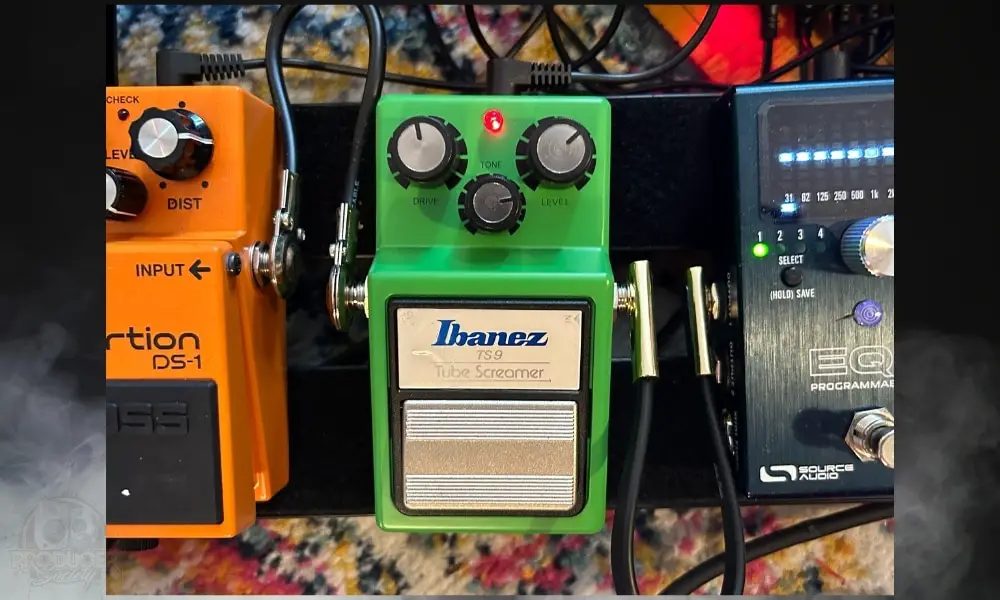
Stevie Ray Vaughan’s Pride and Joy is probably one of the best examples of what the Tube Screamer can do. To get a similar crunchy tone, set the knobs to the following parameters:
Drive: 5
Tone: 8
Level: 6
If you find there’s not enough grit, you can try increasing the Drive a bit. Your amp can stay clean or on the edge of breakup, so it’s easy to transition between the different parts. SRV used the TS-9 extensively on many of his songs, so check out the others too.
2) “The Loner” by Gary Moore
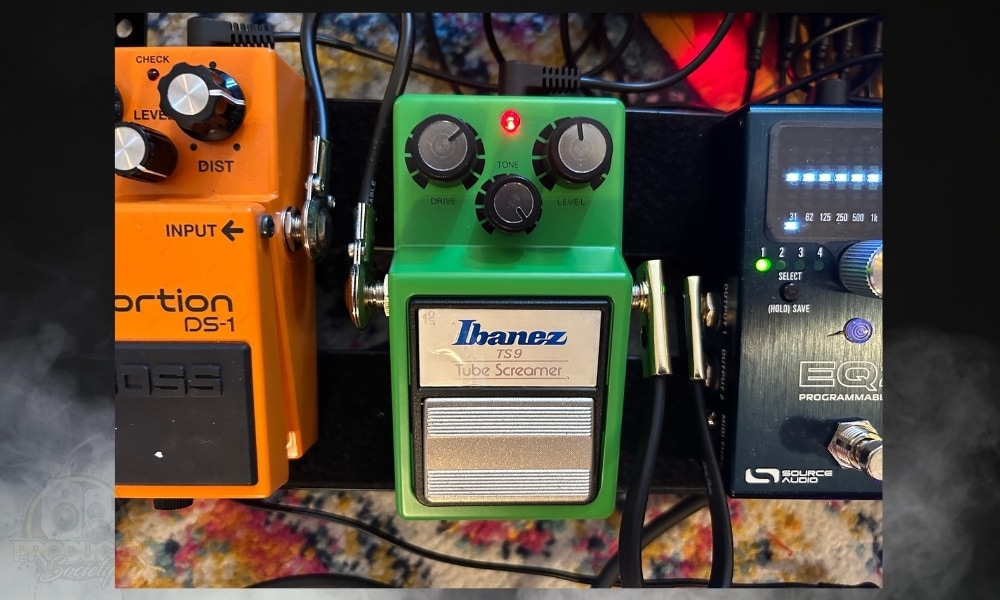
Gary Moore is a blues legend with one of the best guitar tones I’ve ever heard. And the TS-9 was a big part of his secret (along with magical fingers, of course). These settings should help you get close to his heavy sound on “The Loner”:
Drive: 7
Tone: 7
Level: 6
You might also need some gain from your amp to really get that saturated feel. And don’t forget to use a nice delay to make it thick and lush.
3) “Loving Cup” by Phish
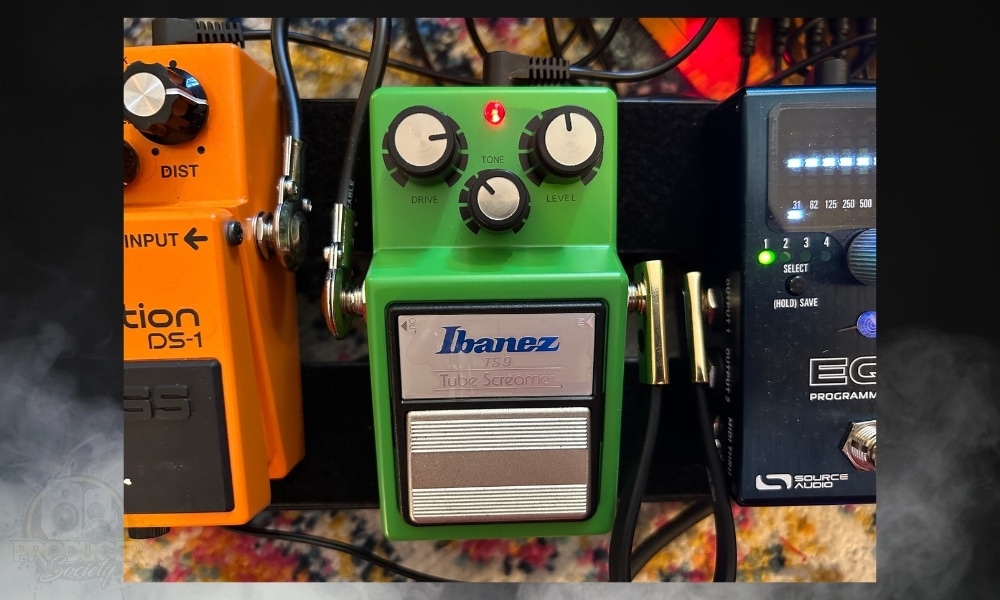
Trey Anastasio, the guitarist for Phish, uses a Tube Screamer to get a beefy but mellow sound that perfectly suits his solo in this song.
Drive: 8
Tone: 4
Level: 6
Trey’s also known to stack two TS-808’s (which are very similar to the TS-9), with one set to a low-gain setting and the other to a higher-gain one.
This is a pretty cool concept that you can use in other ways too. For instance, I own an EHX Soul Food, Ibanez TS9, and the Morning Glory V4, and I imagine 2 (or maybe even 3 of them) could be used together in a cool way.
4) “505” by Arctic Monkeys (Alex Turner)
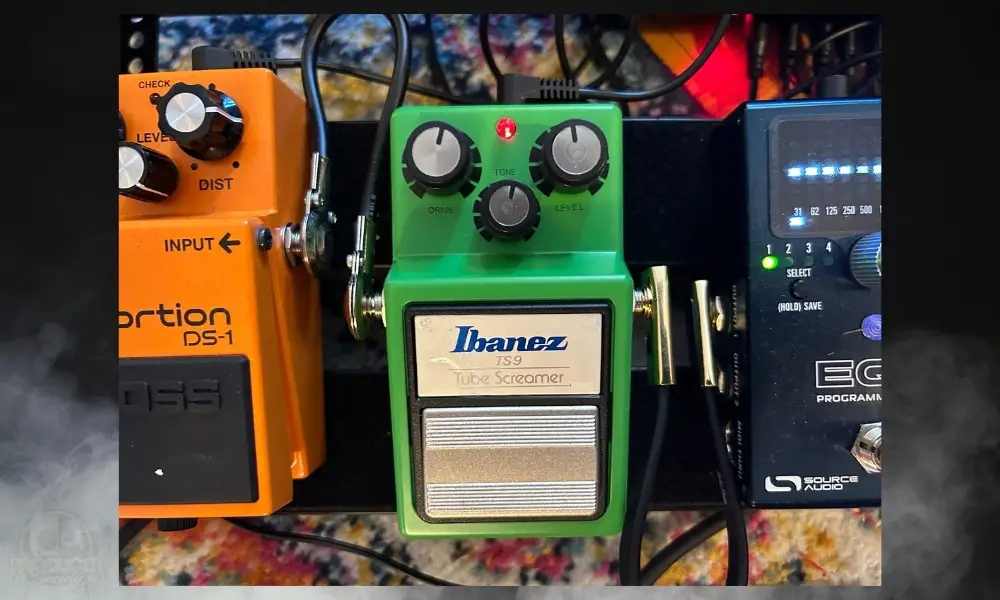
Arctic Monkeys’ Alex Turner also used a Tube Screamer on their Favorite Worst Nightmare album. On 505, there’s a lot of switching between a clean rhythm, crunchy melodies, and a distorted solo. You can get close to that sound with these settings.
Drive: 6
Tone: 6
Level: 6
Consider adjusting the Tone if the treble frequencies seem sharp; you want it to cut through the mix but still feel mellow.
5) “Fade to Black” by Metallica (Kirk Hammett)
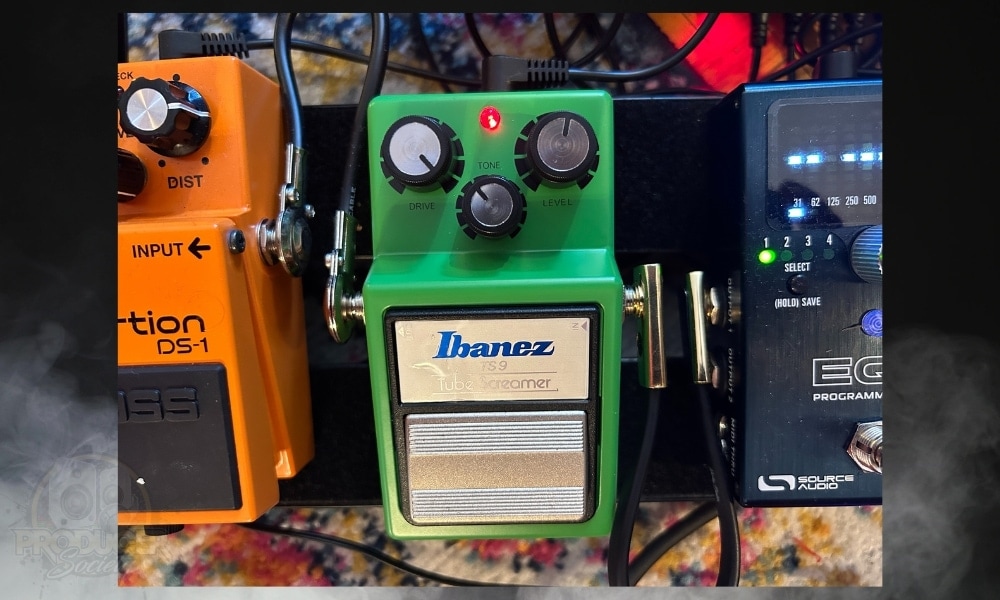
Kirk Hammett has used the TS-9 across Metallica’s discography. For the most part, he uses it as a boost to tighten up his high-gain tones. But on Fade to Black, you can get close to his lead tone (from the intro solo) with these tweaks:
Drive: 10
Tone: 4
Level: 6
This should make your guitar sound thick and fat, but still warm. And if you pair this with a high-gain amp or a distortion pedal, you’ll nail that thrash metal scoop. The TS9 is surprisingly capable of many heavy tones, even though it’s just a drive pedal.
Other Articles You May Be Interested In
- How to Use The TC Electronic Vortex Mini (+ 5 Cool Settings)
- How to Use A Volume Pedal As An Expression Pedal [SIMPLE]
- How to Use A Tremolo Pedal [A Step-By-Step Guide]
- How to Use A Vibrato Pedal [An Illustrated Tutorial]
- How to Use A Noise Gate/Suppressor Pedal [Dead Simple]


 Written By :
