I love modulation effects, and Flangers are probably some of my favourites. I recently picked up the TC Electronic Vortex Mini flanger pedal. I’ve been getting to know how it works over the last while.
To use the Vortex Mini, connect it to your pedalboard before delay and reverb and after distortion and overdrive effects. Dial in the speed, depth, and feedback controls to 50% and slowly change the parameters until you get the sound you want. For more control, put the Vortex Mini in your FX Loop.
Everything The TC Electronic Vortex Mini Can Do & How to Use It
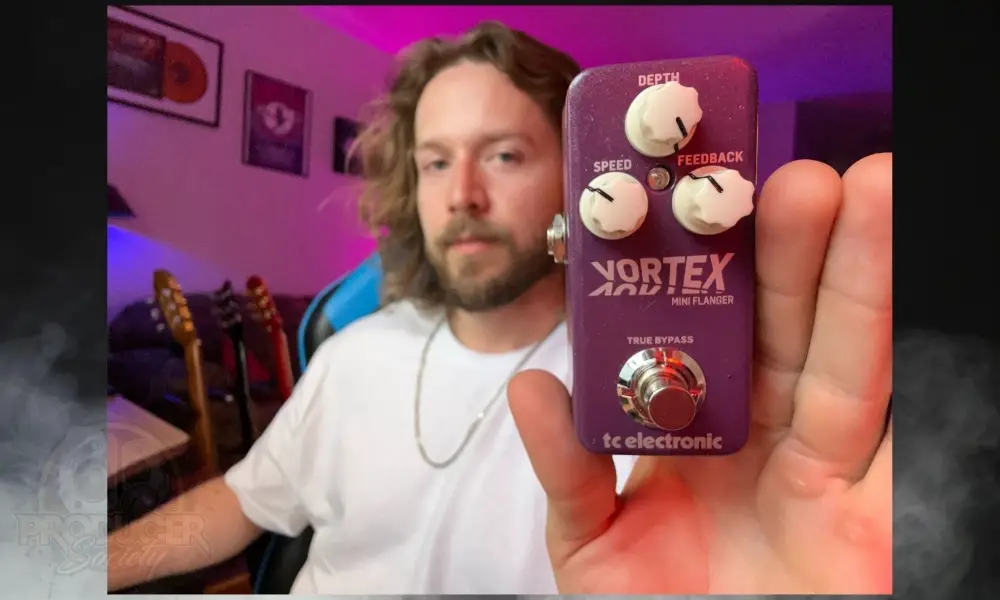
I’m so far very impressed with how powerful the Vortex Mini is for its size. And I really couldn’t emphasize enough how small this thing is. It’s an incredibly mini pedal. You can see a comparison between the BOSS pedals and the Vortex below.
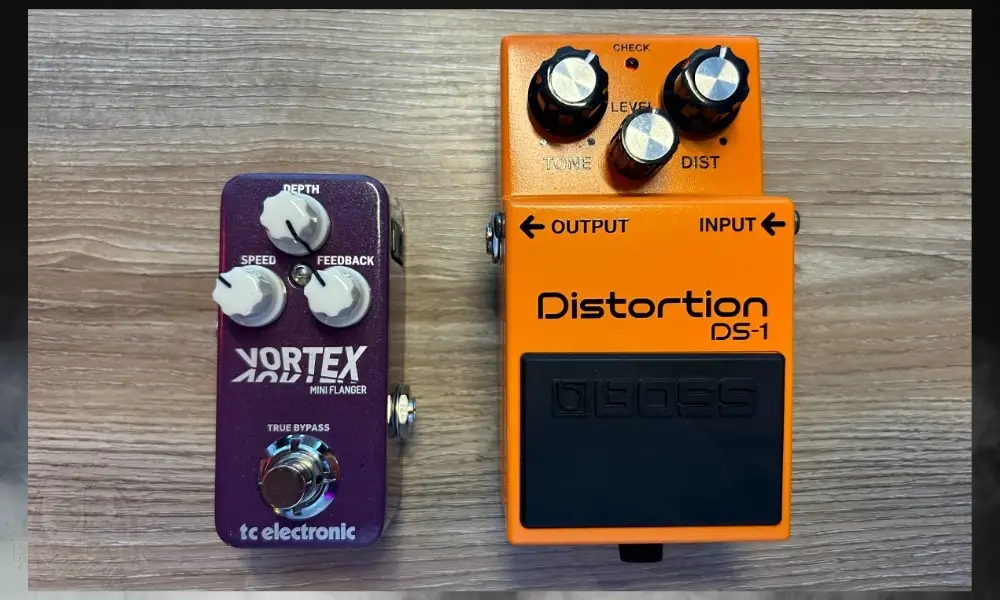
Considering this is a ‘mini’ version of a larger flange pedal (the TC Electronic Vortex is the original model), you may think there would be some compromise on control options or tone quality.
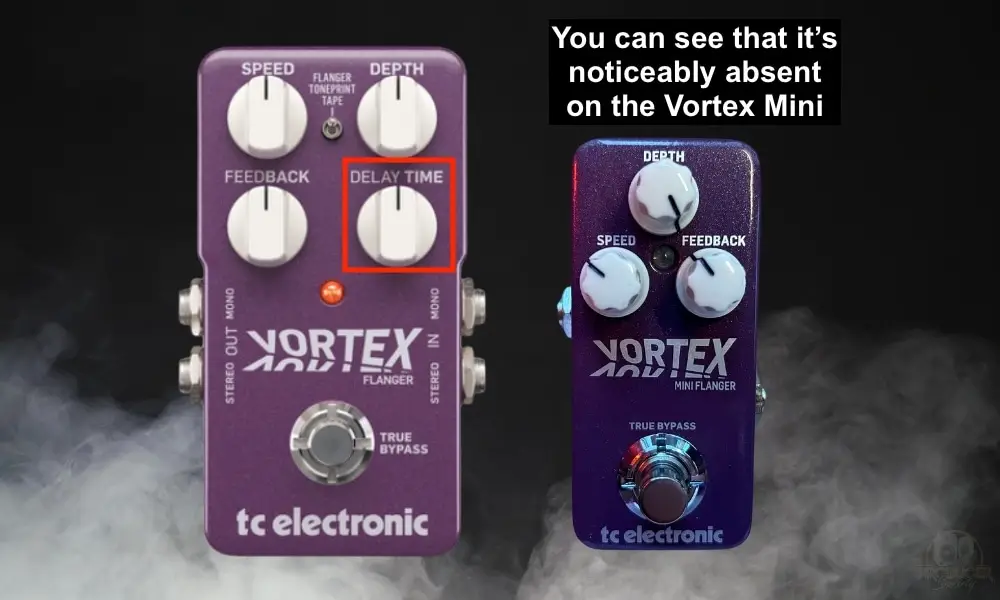
I haven’t found that to be the case at all here in terms of tone, but the Mini is sadly missing the Delay Time parameter that its predecessor had. You can still access this parameter through the included software, but it isn’t included on the front panel.
You also can’t switch between Flanger, Toneprint, and Tape Flanger with the switch that you can see between the 4 knobs, but I don’t really miss it.
As I said a moment ago, the Vortex Mini is tiny and compact and has only three knobs on the front panel. It’s super simple in its setup and equally as easy to use.
All of its parameters can be pushed to the absolute limit. It gives you loads of scope for experimentation and control in crafting sounds. Let’s take a quick look at the knobs and what they do exactly in the following section.
1) The Main Controls of the TCE Vortex Mini Flanger
A) Speed
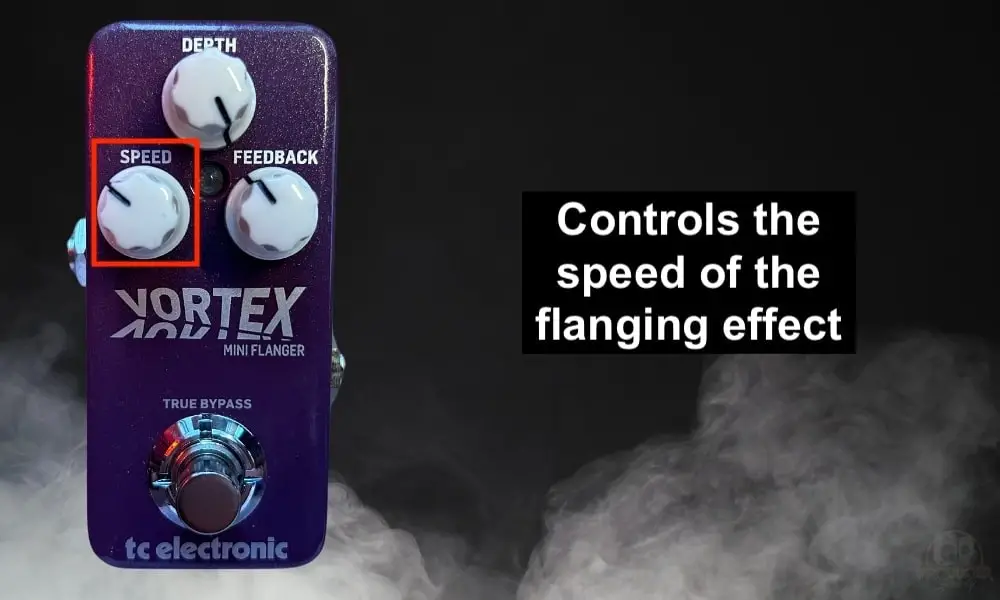
The speed knob adjusts just that – the speed of the flanger modulation. At slow speeds, you get long sweeps, while higher settings give more of a wobbling, fluttering effect, which can be intense if you dial it up all the way.
I like to have the speed higher for lead playing and slower for playing or recording rhythm parts, but you can play around to see what works best for your style.
Probably the best example of a slow flanger speed in a rhythm guitar part is “Unchained” by Eddie Van Halen – arguably one of the greatest Mr. Van Halen ever did, at least if you ask me.
(I’ll show you how to get this sound at the end of the article, just for fun). You can hear Eddie switch it on right around the 10-second mark.
B) Depth
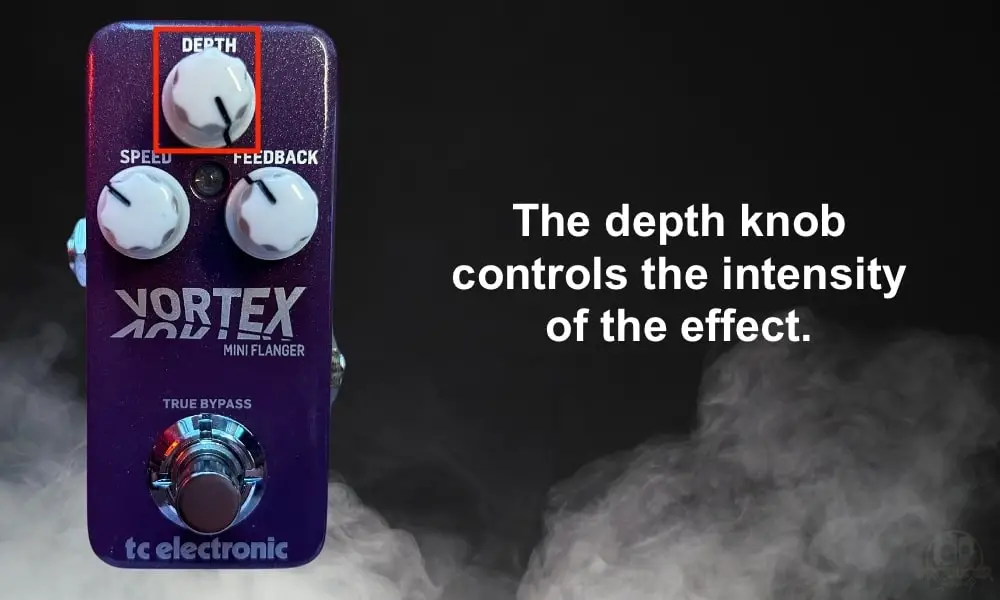
The depth control adjusts the intensity or ‘size’ of the modulation being applied. It does this by varying the Delay time of the flanging effect.
If you think of the flange effect as a wave, the speed knob controls the frequency, while the depth knob controls the amplitude.
The larger the depth setting, the more intense the sweeps or flutters you dial in with the speed knob will be.
It’ll increase the “off-key” part of the sound. The official manual describes it as an “out of tune” sound.
I rarely dial the “Depth” past the halfway point because anything beyond that and it sounds too psychedelic for me. Additionally, I find that most of the songs whose tones I try to imitate almost never use a strong “Depth” effect.
C) Feedback
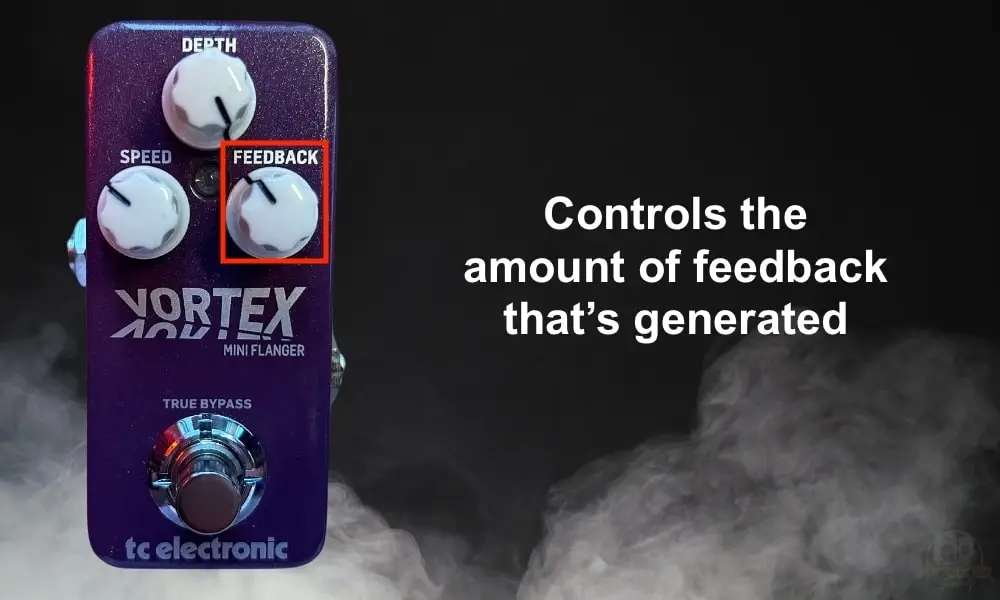
Finally, the feedback knob adjusts the amount of modulated signal being fed back into the pedal.
In other words, increasing the Feedback to the maximum will amplify the amount of “flanging” sound you get because it’s feeding the flanger sound back into the input.
Having the knob at noon is zero feedback. Turning it counter-clockwise gives you negative feedback which tends to sound more wild, and turning it clockwise is positive feedback. Positive feedback is more of a standard flanging sound. I prefer positive feedback.
You can push things far with these settings, with some extreme results on either end. Negative feedback will tend to sound extreme whereas positive feedback will give you a more traditional sound.
I would say that the feedback knob acts just like the Depth knob on the Behringer Tremolo pedal (my guide on it here, but I digress. Let’s talk about the Toneprints.
2) How to Download and Use The Toneprints
A) How to Connect The TCE Vortex Mini To Your PC
For me, what makes the Vortex Mini really stand out from other flangers, and what also makes it a good value for money, is the Toneprint feature.
This feature lets you access dozens of settings hand-styled by top guitarists, bassists and even a few key players.
Other than the size, I’ve found this to be what makes the Vortex Mini special. Not only do you get access to these sounds, but you can see how top pros create them by seeing the parameters they’ve chosen inside the Toneprint Editor.
I’ll show you how to do this in a minute.
I) Download the Toneprint App to your PC or macOS Device
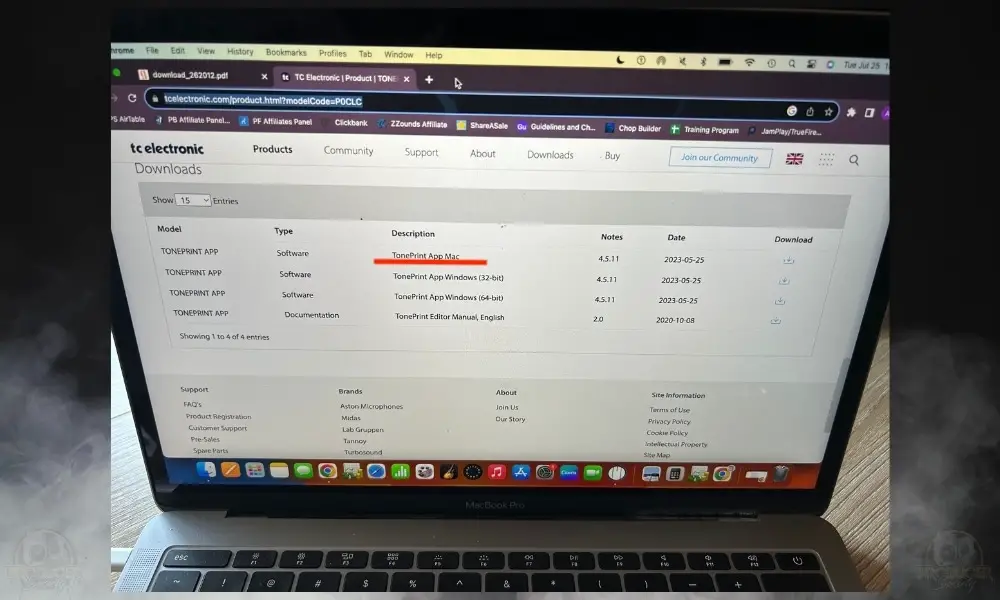
The first thing you have to do is actually download the Toneprint Editor from TC Electronic’s website.
Once you’ve done that, just go through the regular steps for downloading applications and you’ll have it on your computer.
II) Connect the USB Cable From the Vortex Mini To Your PC
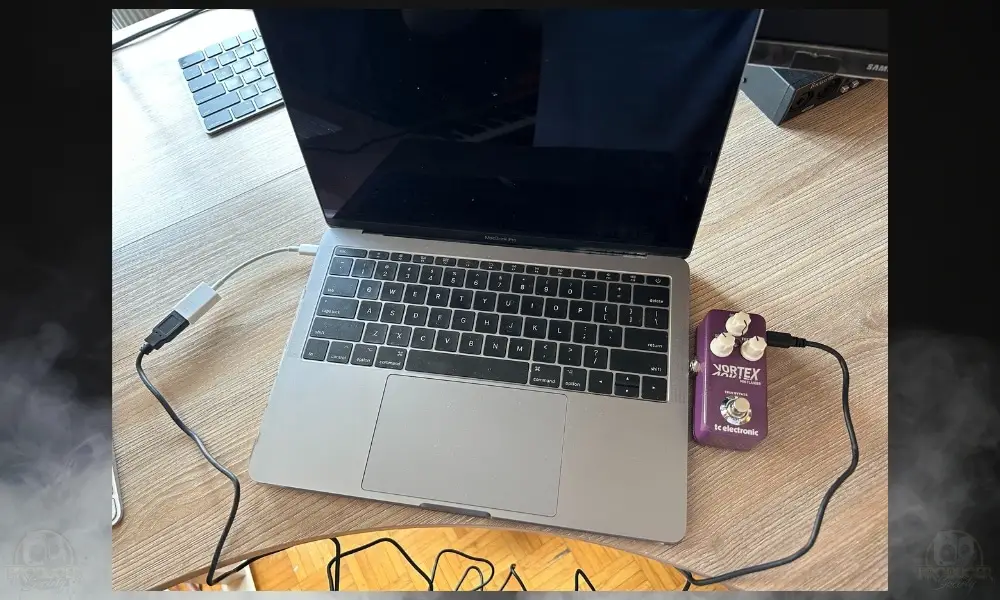
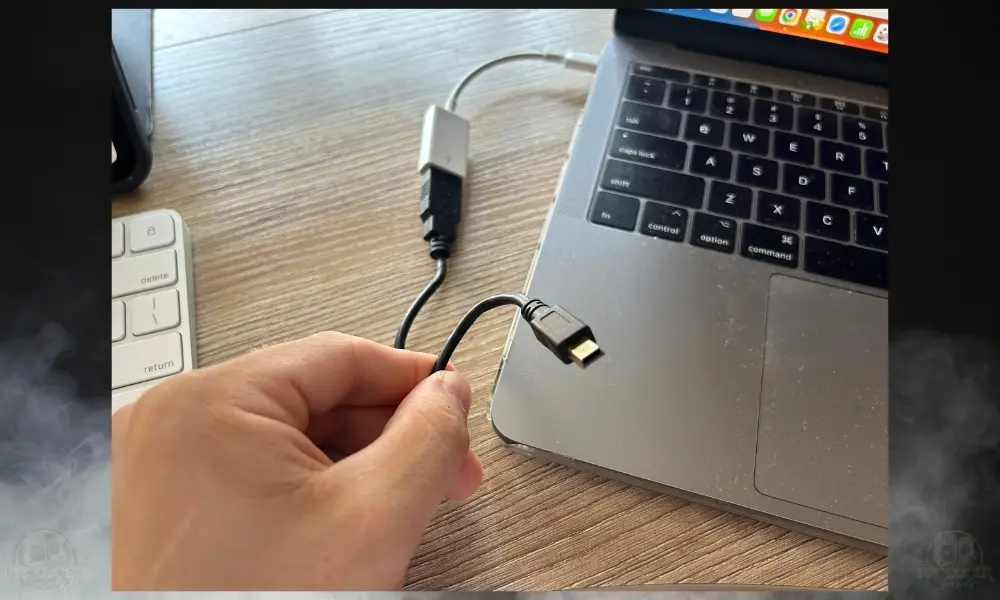
After you’ve downloaded the app, you’ll need to connect the Vortex Mini to your PC with a USB to micro-USB cable.
If I recall correctly, the Vortex Mini didn’t come with one in the box, so I had to use another one that I had lying around. If you don’t have one, here it is on my Page as well.
III) Connect Your Pedal To Power (Power Supply)
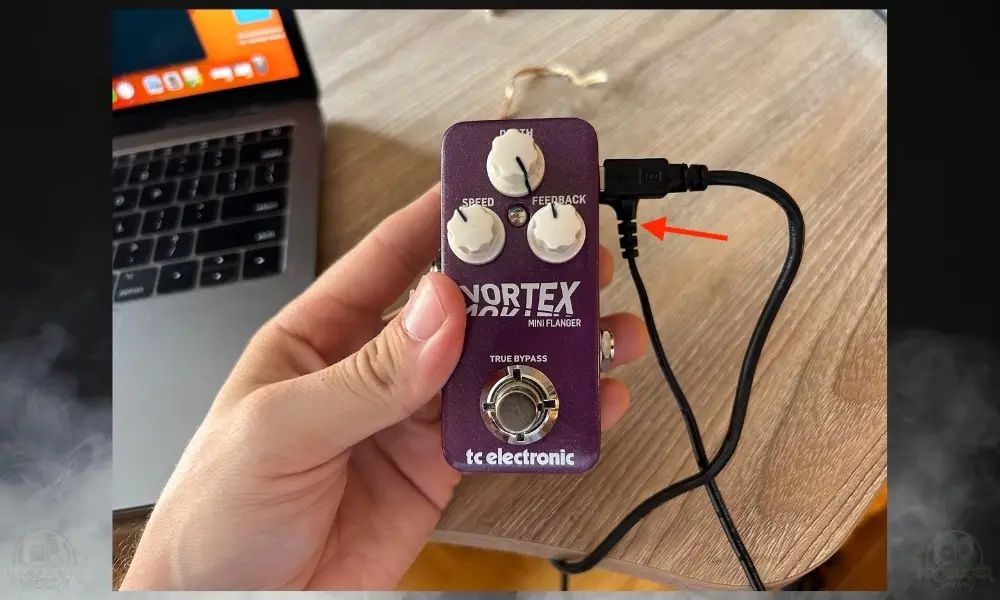
Pretty much any 9VDC power supply will work just fine. Just don’t use anything above 9V. The Vortex Mini uses 100mA of current, in case you’re wondering.
If you’re having problems connecting the devices at first, try plugging in the power supply first, and then connect it to your PC via the USB to Micro-USB cable.
IV) Go to the Toneprint App and Download Your Favorites
Open the Toneprint App and go to Library to select one of the Toneprint Pedals. You’ll see all the options.
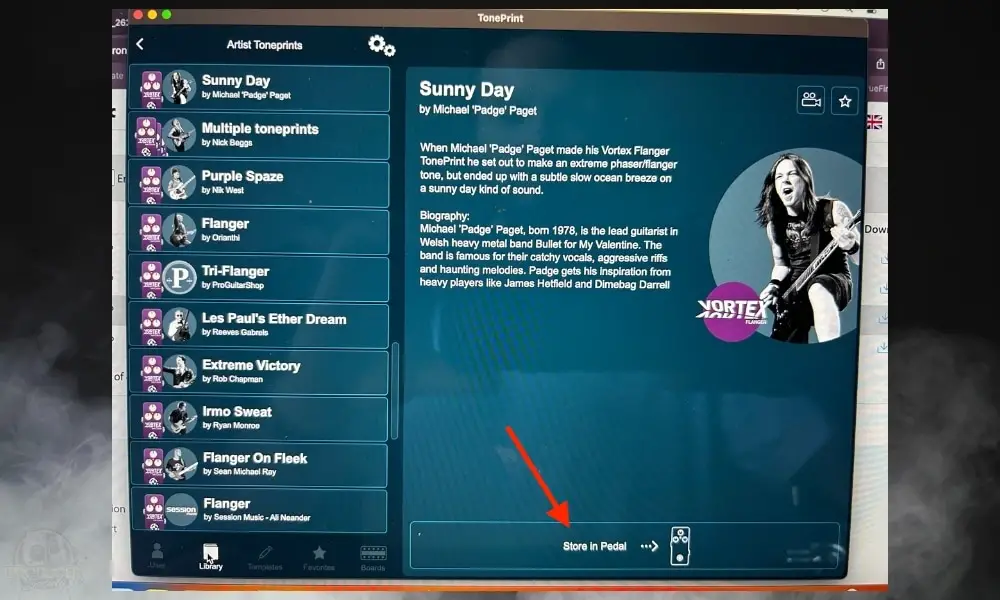
Choose the Vortex Mini and then select one of the artists whose setting you’d like to use. From there, you can click the “Store in Pedal” button.
This is the one way of doing it. It’s way better to use your Mobile Toneprint app instead though because you can beam it straight to your pickups. It’s probably one of the coolest features I’ve ever seen.
B) How to Use the TonePrint App On Your Smartphone (Pickup Beam)
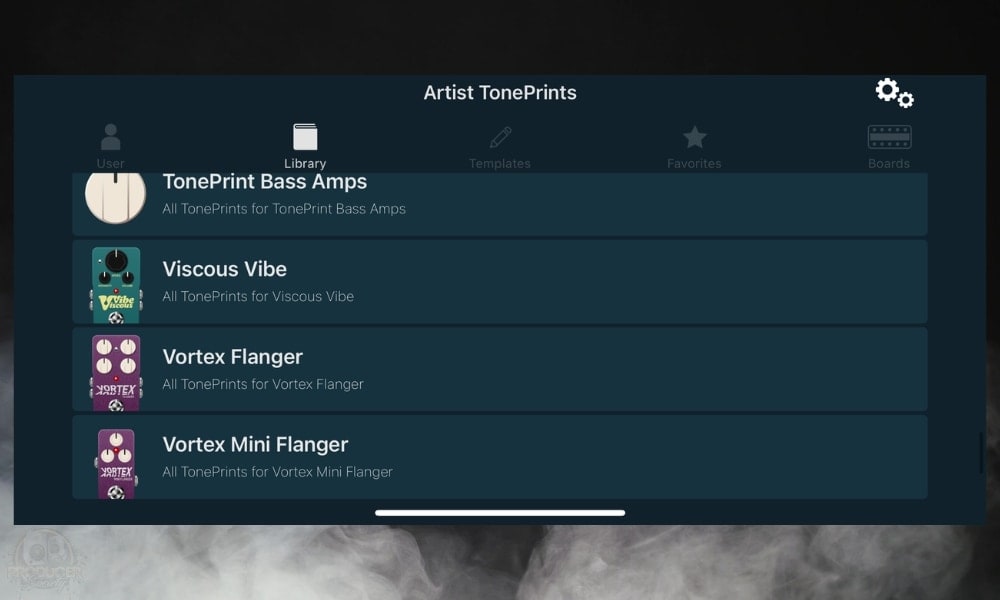
The second, and for me the coolest, way of loading up Toneprints is to install the TC Toneprint app onto an iPhone or Android. You can then download the prints you like and hit ‘Beam to Pedal’.
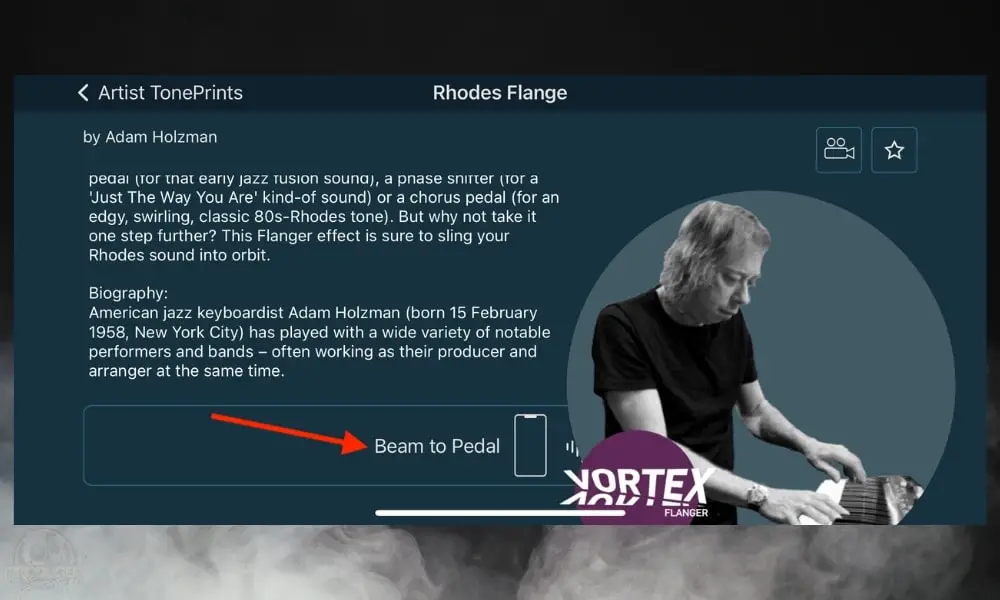
To make sure it works every time, the first thing I do is ensure the flanger is actually turned on.
Select the “Beam to Pedal” and then go through the Beam Wizard on the device which walks you through the process.
This includes turning up the volume on your phone and pickups (you have the option to disable the Wizard once you’ve figured it out and no longer need it).
In my opinion, there is a way of doing it correctly every single time. I press the phone’s microphone right up to the pickups as close as I possibly can, pressing right down on the strings while ensuring that the guitar’s strings have been muted.
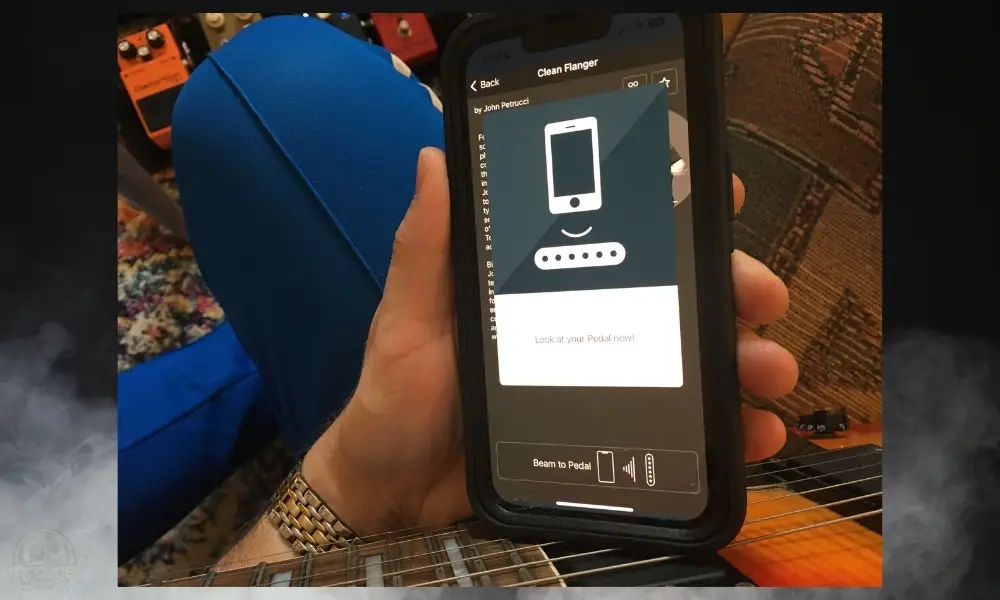
It’ll make a screeching sound that isn’t very pleasant (the one downside). You’ll know it has done it correctly if it flashes green a few times slowly and then rapidly at the end. Ensure you’ve read the Toneprint description that goes along with it.
All-in-all, this is cutting-edge stuff from TC Electronic. The Danish company has been spearheading groundbreaking technology like this for a while, and I was impressed by how slick and easy this method was. It actually works.
C) How to Edit The Toneprints in the Toneprint Editor
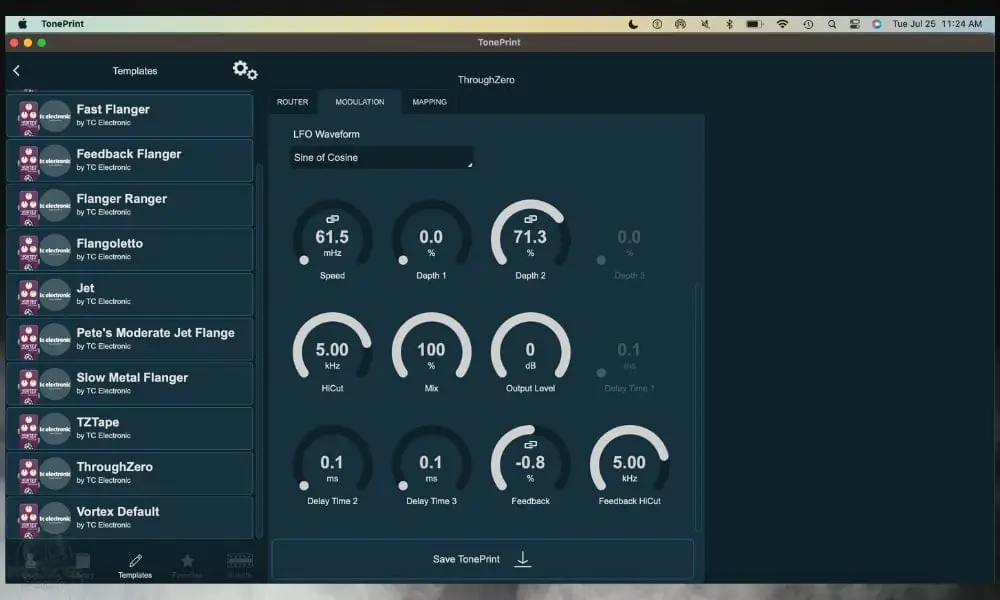
You can also create and save your Toneprints using the Toneprint editor software either on your PC or in the mobile app. Here you can go in-depth by fine-tuning a ton of parameters on the screen, again by attaching your pedal to your computer by USB.
Open the Toneprint app, select the Mini Flanger, and then bring up one of the settings. You can click on the pencil on the top-right to edit the Toneprint, or you can create your own.
This is basically like opening up the pedal and tweaking its internal settings, and you can go a lot further than you can with just the front panel controls.
For instance, you can adjust the Speed, Depth 1 & 2, Hicut, Mix, Output Level, Delay Time 1 & 2, Feedback, and Feedback Hicut. In other words, whatever knobs are left off the Mini Flanger are actually present in software form in the Toneprint Editor.
3) True Bypass
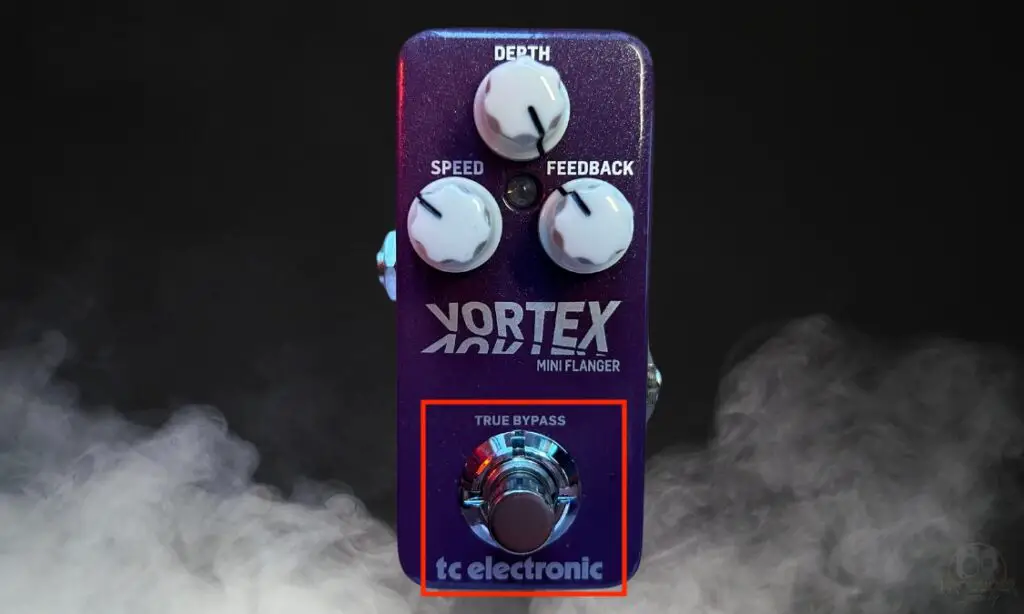
According to their manual, the Flanger is off when you hit the switch and it doesn’t have any effect at all on your dry tone. It sounds great when you’re using it and it’s completely absent when you switch it off.
This is something that would be great on BOSS pedals, but I don’t foresee that happening anytime soon. You never know though.

4) How to Update the Firmware on the TC Electronic Vortex Mini
If you want to update the firmware on the TC Electronic Vortex Flanger, understand that there doesn’t appear to be any for the Mini yet.
However, there is a firmware updater available for the regular Vortex Flanger that I showed you earlier. I’ll show you how to set it up for the Vortex Flanger instead of the Mini.
I reached out to TCE to ask why there is no firmware update for the Mini and they had the following response for me.
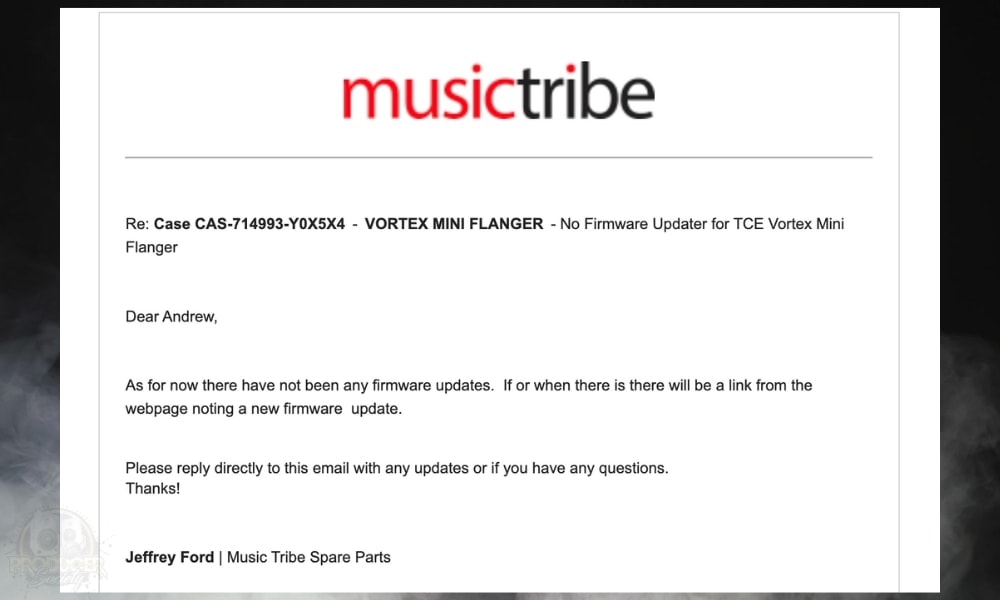
With that in mind, I’ll show you how to complete the process for the regular-sized Vortex Flanger instead that way you have a tutorial to go by when the Vortex Mini finally does get a firmware update available.
A) Download the Firmware Updater From The Website
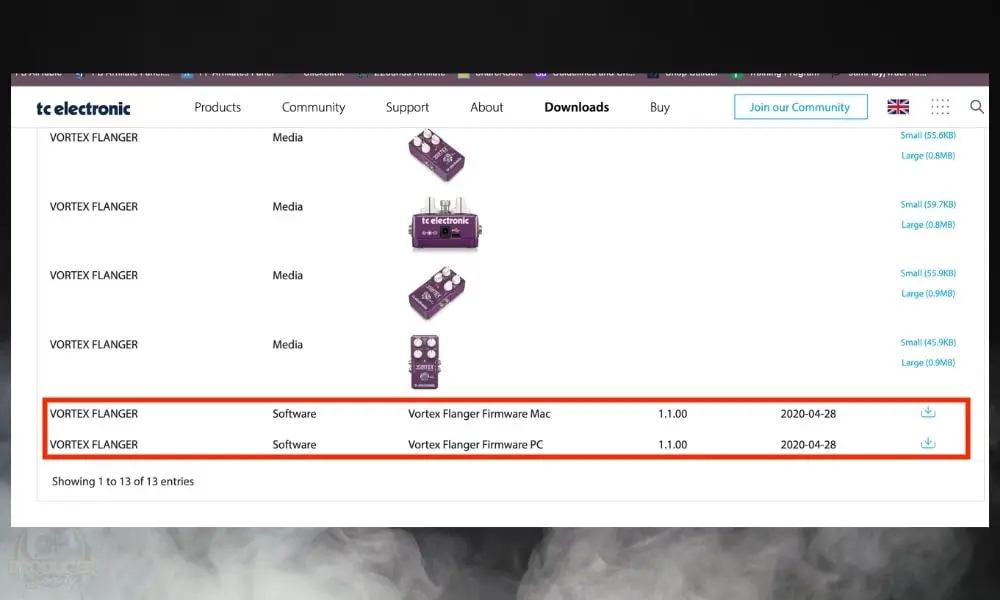
B) Connect the Pedal To Your Computer Via USB

Follow the same step as shown before.
C) Hold Down The Footswitch While Connecting the Power Supply
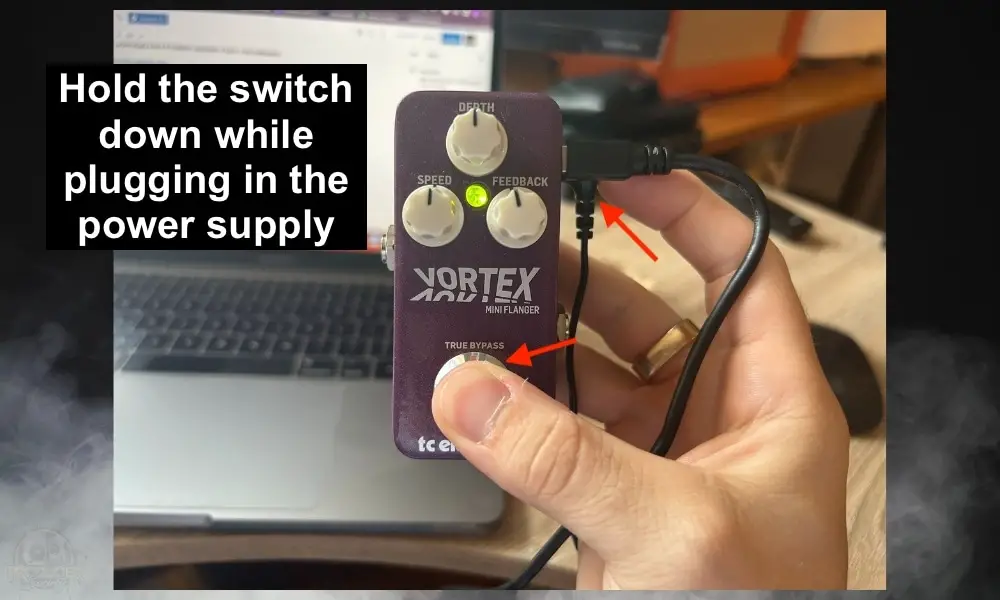
D) After the LED Turns Green, Release the Footswitch
E) Quit All Applications Then Open the Firmware Updater
F) Select Your Pedal From “STEP 1” and Then Choose “Update” from “STEP 2”
Where To Put The TCE Vortex Mini In Your Signal Chain (And Why)
There are a couple of general rules for where to place your Vortex Mini in the signal chain. Of course, it’s completely up to you, and I recommend experimenting to see what you like best, but I’ll explain what I like to do and a couple of other guidelines.
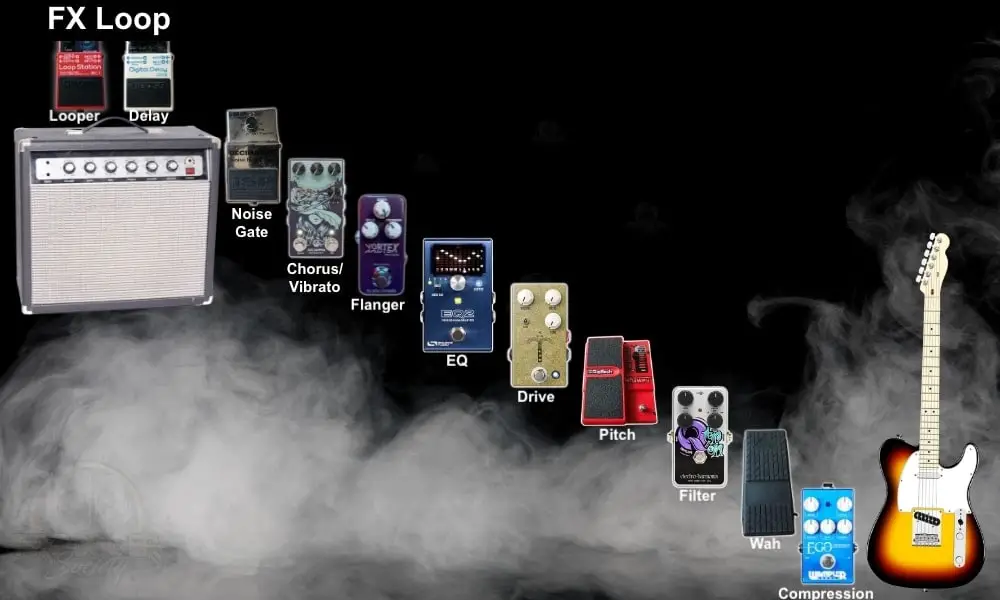
1) Putting the Flanger in Your FX Loop
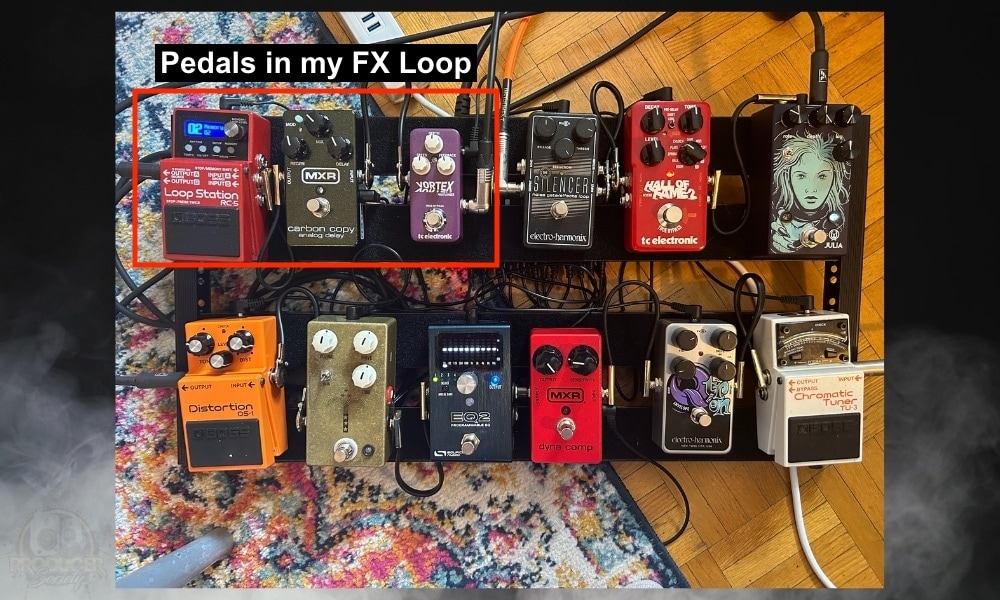
My favourite place for all kinds of modulation and time-based effects is in the FX Loop. I put everything here in the FX Loop, including my delay, my flanger, and my Looper Pedal. It’s also a great place to put your 2nd noise gate if you have one (my guide on this).
The reason I do this is because it gives me control over how my loops sound compared to my regular playing.
As I’ve explained before in my looper pedal guide, this means you can record a loop with effects on it, turn the effects off, then jam over it with just a clean tone or overdrive.
If you ask me, this is the best place for putting your flanger and modulation/time-based effects but not all amplifiers have this feature.
If that’s the case, put it after your drive/distortion, or if you don’t have that, put it before reverb, delay, modulation, and time, which almost always go near the end of your chain. More on that now.
2) Putting the Vortex Mini After Overdrive/Distortion
By setting it up this way, the Vortex will be modulating the signal that has already been beefed up by the overdrive effects.
The flanger will have a more harmonically complex signal to work on, and the flange effect will come out sounding richer and more prominent.
If you put the flanger before these effects in the chain instead of after them, the flange effect will come out sounding cleaner but less pronounced.
3) Putting the Vortex Mini Before Delay/Reverb
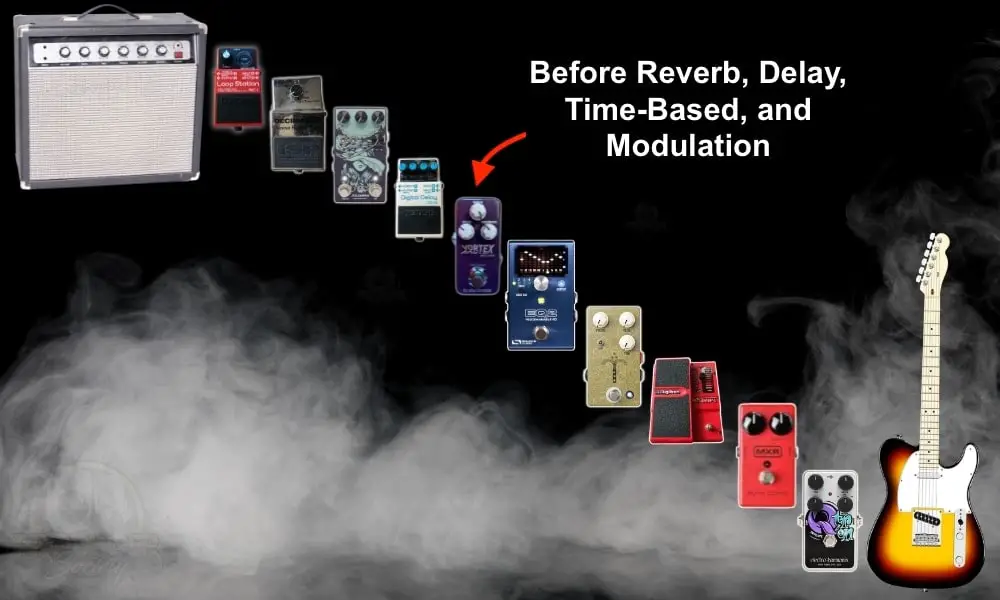
By placing a flange pedal after time-based effects like reverb or delay, these pedals will receive the signal from your guitar after the flange has been applied to it.
This means that each delay repeat coming out of your delay pedal will have its flange effect. This can result in some great atmospheric swirls which are great for lead playing.
Use the controls on your delay unit to adjust how dynamic the delay signal is. Combine it with a flanger and you can get some really impressive results.
I use an MXR Carbon Copy Analog Delay and I have a lot of fun using it with the Vortex Mini. You can dial up the feedback settings on both to get some really interesting and weird sounds.
The same goes for reverb. Placing the Vortex before reverb units and pedals means the echoing decay of the reverb will itself be flanged. This also gives some cool results, which you can tweak by adjusting the intensity of the flanger and the volume and decay of the reverb.
You can also of course try things the other way around, by placing the Vortex AFTER these effects in the chain. This way, delay repeats and reverb will come out ‘unflanged’, and then the whole combined signal will have the flange applied to it.
I find this can be better for rhythm playing, and building walls of sound and texture, but it loses some of the detail needed for lead playing that you can get by putting the flanger in front of time-based effects.
5 Cool Ways to Use the TC Electronic Vortex Mini
1) Van Halen’s “Unchained”
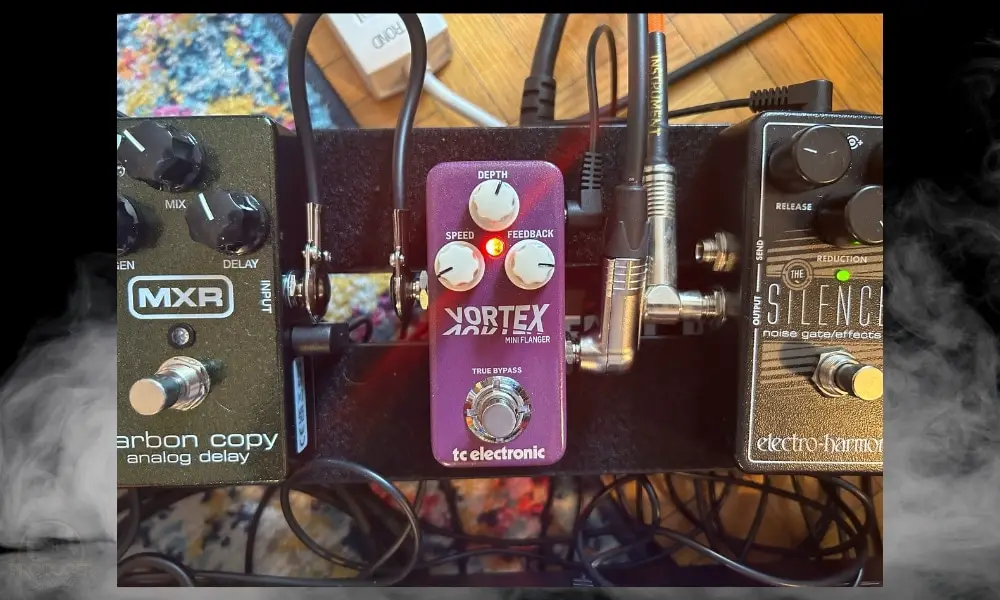
If you want your “Unchained” tone to be as close to the real thing as possible like what Jake Tanis has shown in his great tutorial video, it would be best to put the flanger in front of your amp, not in your FX Loop, as well as at the start of your chain.
Personally, I just left mine in the FX Loop. Going to all that work just for one riff isn’t worth it to me. For the distortion pedal, I used the BOSS DS-1 which has plenty of gain for the “Unchained” tone and I used my bridge pick-up.
2) Rage Against The Machine’s “Wake Up”
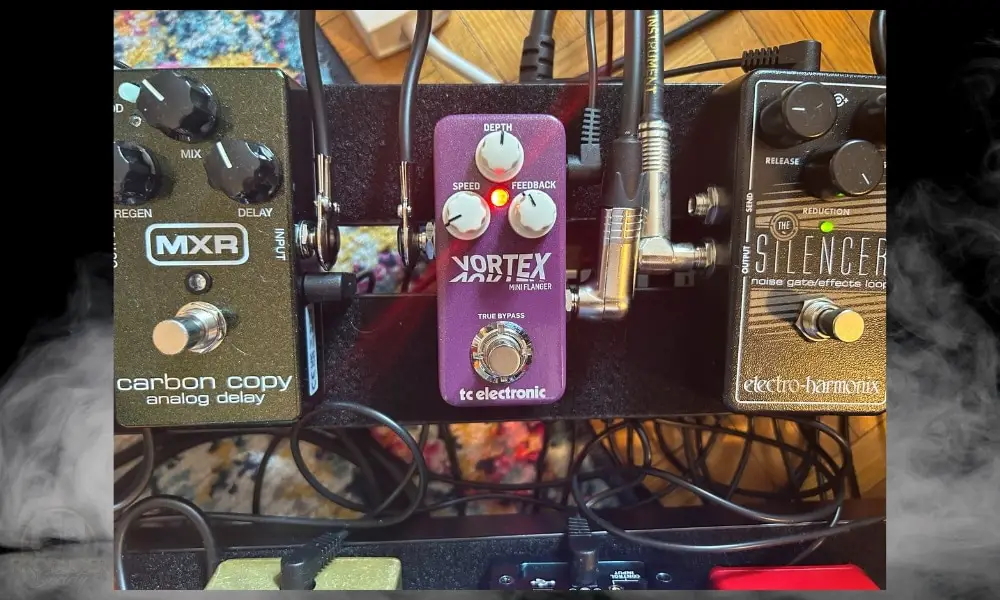
Tom Morello has a light flange setting on the riff after the intro guitar riff which you can check out in this video.
For the DS-1’s distortion, I dialled it way down, almost to 0, and I also had to slowly pull back the flange Feedback to 11:00 pm because it has quite a bit less than “Unchained.”
The flange is probably even lighter than what I’ve shown here, however, I had the most fun playing the riff with the flange set like what’s shown above.
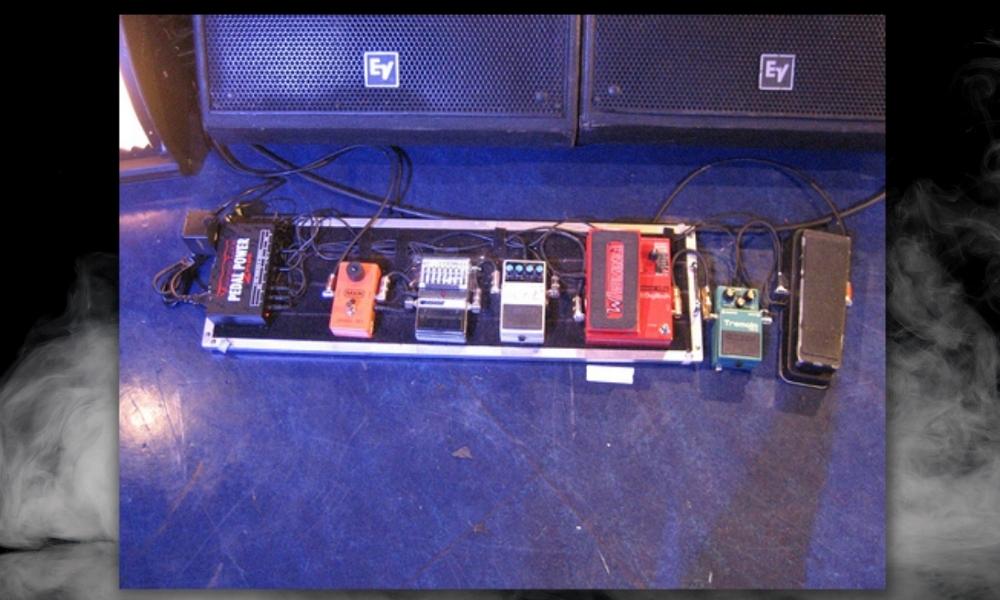
Similar to the “Unchained” setting, I had the flange in my FX Loop which sounds just fine. Tom’s pedalboard is easily found online though in case you wanted to see how he organizes his signal chain.
From left to right, there is the flanger/phase, EQ, delay, whammy pedal, tremolo, and wah. The power supply is on the far left side.
3) Heart’s “Barracuda”
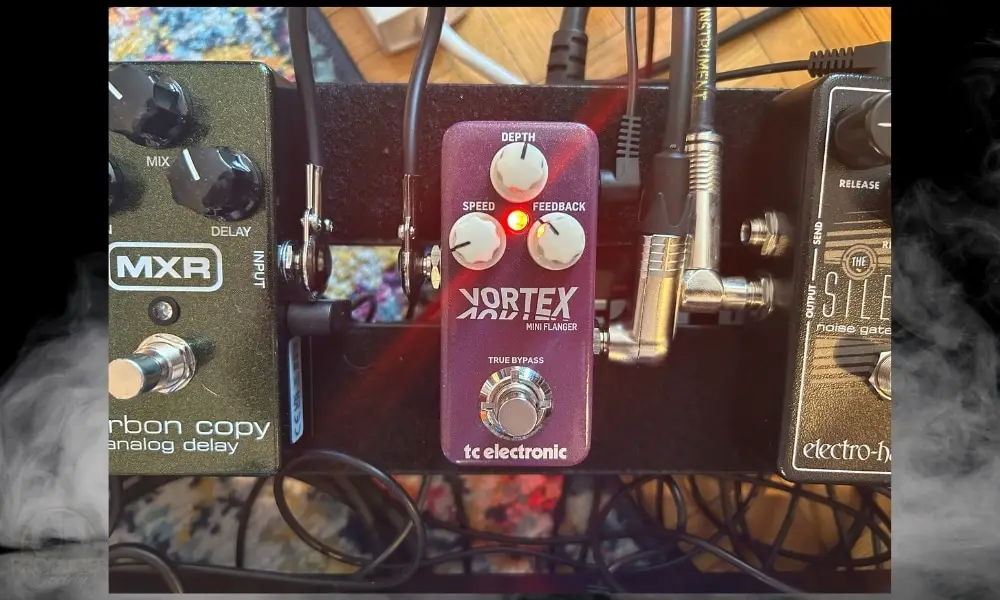
The flange setting on “Barracuda,” isn’t terribly different from “Wake Up” from Rage Against the Machine. Additionally, the overdrive is about the same as well, with both guitars avoiding heavy distortion.
The flange on “Barracuda” certainly isn’t heavy. It’s just strong enough to hear a bit of oscillation between the low and high frequencies.
4) Pantera’s “Cowboys from Hell”
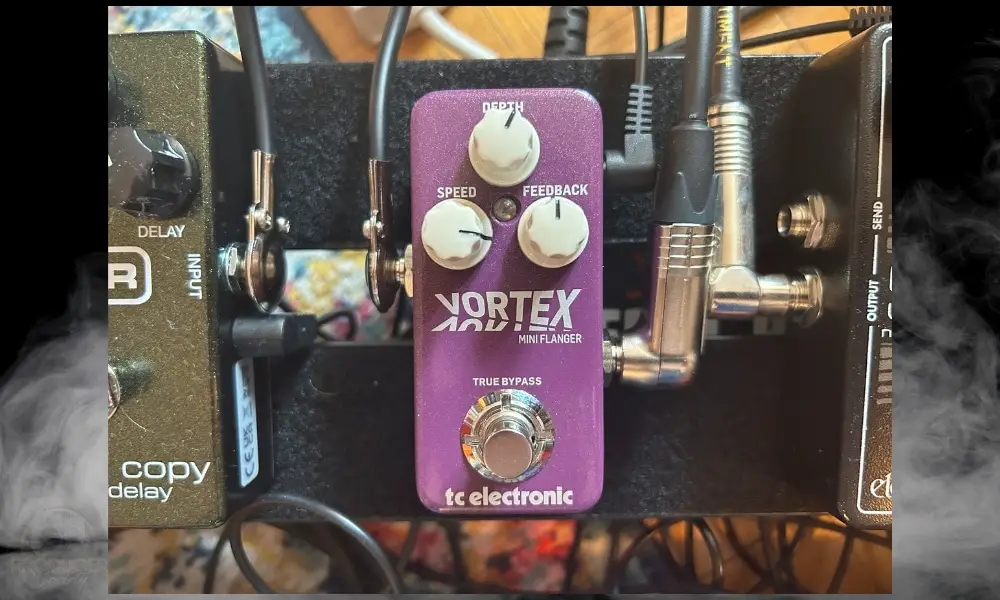
Obviously, a big part of getting the tone from the beginning of “Cowboys from Hell” is high-gain distortion, in addition to a lot of low-end. You can achieve this by turning up your amplifier’s bass EQ and your distortion pedal’s gain/drive setting.
Dimebag always had that characteristic buzz-saw tone that comes from a solid-state amplifier and scooped mids.
It’s worth mentioning that the beginning of that song features a bunch of 16th notes but there is an accented note on every third note. Added with the flanger and the distortion, and you get close to the sound that he had on the record.
5) Rush’s “Spirit of Radio”
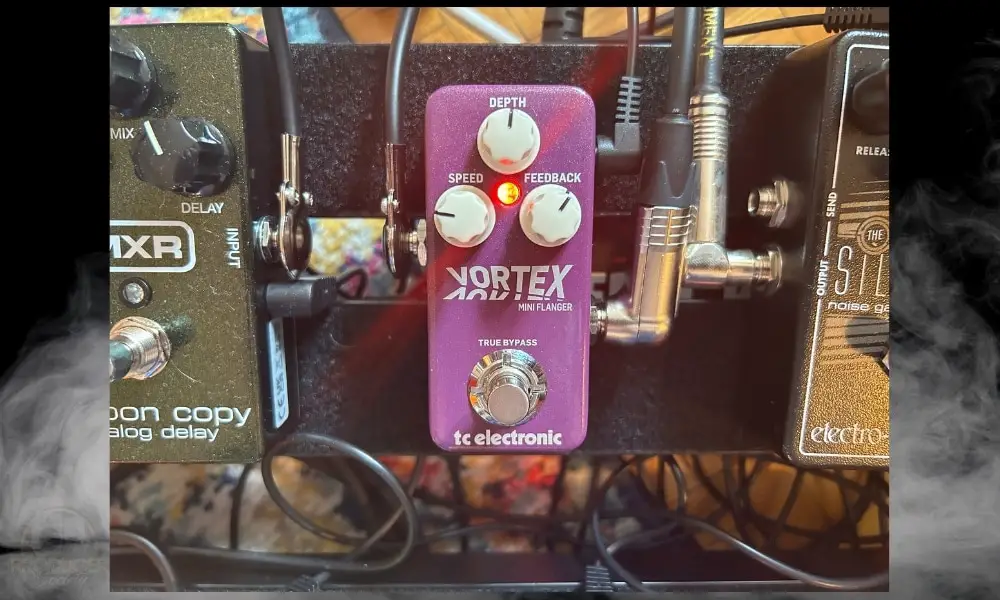
The “Spirit of Radio” flange setting is probably the strongest flange out of any of the guitar riffs mentioned thus far, with the exception of “Cowboys from Hell,” which is a similar setting but much faster.
The “Spirit of Radio” setting also has a fairly thick overdrive/distortion tone which you can easily get with a DS-1 by setting the Distortion a bit below 12:00 pm.
This YouTube video shows how to get the tone with a Mesa Boogie Express, a Strymon Big Sky Reverb, a Strymon Mobius Flange, and then an Orange Pre-Amp pedal. You don’t need anything else for that song.
Other Articles You May Be Interested In
- How To Use A Digitech Whammy Pedal [The Ultimate Guide]
- How to Use A Vibrato Pedal [An Illustrated Tutorial]
- How to Use A Tremolo Pedal [A Step-By-Step Guide]
- What Are The Tremolo Settings for “How Soon Is Now?”
- What Are The Tremolo Settings for “Like A Stone?” [SIMPLE]
Important Things to Note About The TCE Vortex Mini
1) The TCE Vortex Mini Also Has Analog Drythrough
When you set up the Vortex Mini in your signal chain, you don’t have to worry about the pedal converting your dry signal into digital when the pedal is turned off.
This is what’s called “analog dry through.” In other words, you don’t want the pedal to convert it to digital even though it’s switched off. That would be an issue for a lot of people. There’s also no latency either.


 Written By :
