 Written By :

With the popularity of platforms like Instagram, Facebook, and TikTok, artists can access potentially millions of people if they have the right work ethic and determination. Guitarists have their own little ecosystem on these platforms, but not all of them know how to make a video.
To make guitar videos for Instagram
- Mount your phone or camera in a ring light
- Connect your guitar to a DAW to record high-quality audio
- Record with your camera, and in your DAW simultaneously
- Export the audio and video files and match them in iMovie
- Upload the finished recording to Instagram
The Easiest Way to Make Guitar Videos for Instagram
There are a few ways of recording guitar videos for Instagram. You can use a ring light like what I just suggested, you can use a DSLR camera rather than an iPhone; you can use ScreenFlow Editor instead of iMovie.
You can also use your phone to record the audio and video directly. The last method is undoubtedly the fastest way of making content, however, the audio won’t be nearly as good.

There’s no question that using a smartphone and a ring light is the easiest way of creating guitar videos quickly, efficiently, and effectively. The greatest advantage to this method is that it’s incredibly easy and quick to set up so it doesn’t get in the way of your creativity or inspiration.
It’s not uncommon for me to use this method if I just want to lay down a quick idea but then expand on it later.
When looking at what other people are doing on platforms like Instagram and TikTok, I’ve found that a lot of players are using this method occasionally, or sometimes it’s the only method they’re using. However, many are recording higher-quality audio, and for that, you’ll need to use a DAW.
First, I’m going to walk you through what you need to make guitar videos for Instagram using the least amount of equipment possible. This is the quick and dirty way that only involves your phone and a ring light.
1) Use an iPhone or Smartphone Camera

I use an iPhone 7 Pro and I find it’s more than enough for recording audio and video. I also own an iPhone 6s but I find the gap between these two devices is big in terms of quality.
The iPhone 7 does a much better job of recording audio and video, although, I still use the 6s because it has more storage space.
That brings me to my next point which is that if you’re going to use this method, you either need to have a big iCloud Drive to accommodate all of the content that you’ll be creating, or you need a phone with a lot of storage space on it.
2) Mount Your Phone in a Ring Light

I recently bought 2 ring lights from Amazon and I’m glad I did.
I have a massive Softbox light which I’ll use on occasion, but the problem with it is that it’s another piece of gear that has to be set up and played with to get just right, whereas the ring light is small and it takes far less time to get working properly.
Like I’ve said already, when it comes to making creative content, especially for music, you’ll need to go about things in a way that doesn’t interrupt your workflow.
Or at least that’s what I have to do anyway. If it takes 15 minutes to set up all your equipment every time, you probably won’t even bother after a little while.
I think it’s worth mentioning though that I use a Manfrotto Stand that I bought from Amazon rather than the stand that the Ubeesize light came with.
The ring light, itself, works great on the Ubeesize ring light but the stand isn’t great.
The head is detachable and camera mounts are usually universal, so I just had to screw it into my Manfrotto stand.
Setting your camera and ring light up for making guitar videos is easy. Find the right spot for your ring light and phone to sit, and hit record on your phone whenever you’re ready to start playing.
You can edit the footage in Instagram’s video editor, and then upload it the way you see fit.
The Better Way to Make Guitar Videos for Instagram
Using a Phone, Ringlight, DAW and Amp Simulator

Connecting your instrument to a DAW and recording audio while also recording video with a ring-light-mounted smartphone will improve the quality of your recordings significantly.
The reason is that you’re capturing high-quality audio in addition to video at the same time. You won’t just have a solid-looking video. It’ll sound good too.
This is the way that I prefer to do it, however, If I don’t feel like hooking up all of this equipment (which really takes only 2-3 minutes) then I’ll use the first method. As I said, it only takes 2-3 minutes to do this, but 2-3 minutes is an eternity when it comes to creativity and inspiration.
Additionally, the thought of setting up a bunch of stuff before you start playing might discourage you from playing at all, and we want to avoid that.
Some people, including myself, are totally fine with a 2-3 minute set-up and I imagine you are too if you are interested in using a Mic’d amplifier which is what we’ll talk about now.
With a Mic’d Amplifier Instead of an Amp Simulator

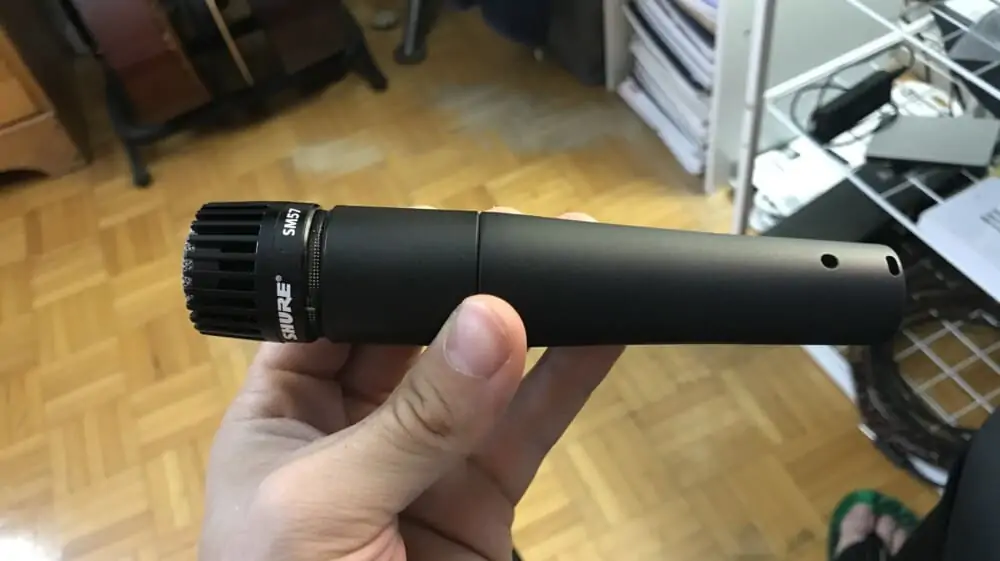
I’m sure there are other ways of recording guitar videos, but this is the last way of doing it that I’m aware of. Essentially, rather than using an amplifier simulator like BlueCat Audio’s Axiom, you’ll have your amp mic’d with a Shure SM57 or something similar.
I also use this method sometimes, in fact, I have a Shure SM57 (on my Product Page) sitting directly in front of my Mesa Boogie cab at all times.
The key to all of this stuff is to have your gear set up in a way where it can sit like that all of the time, that way you don’t have to go through a rigorous set-up whenever you want to play.
What You Need to Make High-Quality Guitar Videos for Instagram
1) Smartphone – iPhone (7 and Beyond)

One thing I haven’t said already about the iPhone or a similar quality device is that it’s very possible the video and audio capability of these devices will get so good one day that we’ll hardly even need to record the audio externally.
2) Computer – MacBook Pro

I’ve been using a 2017 Macbook Pro ever since I bought it brand new, and it’s not enough for what I need. If you plan on making high-quality video content for streaming platforms, you’ll probably need a more powerful device with way more storage space like this one.
My computer only has 120 GB of space, 8GB of RAM, and a 2.3 GHz processor and it’s not enough. However, the way that I get around this is by having an external hard drive connected to my computer all of the time.
Additionally, I’ve set up my Screen Flow Editor so that whenever I create footage, it records directly onto my external hard drive, rather than my computer’s hard drive.
This is how I free up space. A better way of doing this is to use a Solid State Drive like the Samsung 2TB rather than an external hard disk drive because SSDs are built for retrieving software whereas external HDDs are made for file storage.
Put simply, SSDs are significantly faster and much better suited to this kind of thing.
3) Audio Interface – Focusrite Scarlett 2i2

The Focusrite Scarlett 2i2 is an incredibly popular audio interface that people have been recommending forever. It’s cheap, it works great, and it looks cool.
This is the device I also recommend to people because I know it works and I know you’ll probably get it.
In simple terms, this is the device that converts your guitar’s language into a language your computer can understand.
It’s how you’ll connect the two devices for recording higher-quality audio than just your phone’s microphone.
There are other audio interfaces as well that you could get, including the iRig HD 2 which is made for guitar and bass, the iRig Pro I/O, which is for guitar, bass, and vocals, or if you’re serious about recording, you could get something from Universal Audio like the Apollo Twin.
Other companies to check out include Apogee, Behringer, and M-Audio.
4) Ring Light – Ubeesize with Manfrotto Stand

I use the head of a Ubeesize Ring Light that I got from Amazon on top of a much higher quality Manfrotto stand that I’ve had for a few years now.
This works very well for what I need, however, I imagine there are companies out there where you could just pay good money straight upfront for the ring light and get a really high-quality product.
Manfrotto probably has something like this, but I wasn’t able to find it, so what I’ve been using for the last little while works just fine as its replacement. You can find the Manfrotto stand that I own on Amazon and I also bought another ring light although I don’t recommend it.
The one thing that is really nice about these ring lights is that, while the stand itself isn’t great, the light works exceptionally well. It also includes a Bluetooth remote as well as a small switch where you can change the strength of the lighting and the colour of it too.
5) Digital Audio Workstation – Garageband

You can use pretty much any DAW that you want, but I’ve been using Garageband for years and I find it works great for stuff like this. I do not doubt the other more popular DAWs like FL Studio 20, Logic Pro X, and Pro Tools are better or just as good.
Garageband is free, however, so a lot of users may decide on that factor alone.
The nice thing about Garageband and Logic Pro X is the Logic Remote which works with both software, as well as the fact iPhone and macOS devices are compatible. Garageband makes it very easy to transfer files from macOS to iOS.
6) Amplifier Simulator – Blue Cat Audio’s Axiom

I’m always singing Blue Cat Audio’s praises because it seems like everything they produce is awesome. The Axiom which is an amplifier and effects modeler, has everything you could ever want and need including a plethora of amplifier models, effects, and a whole litany of awesome presets.
If the presets aren’t enough for you (which is practically impossible), there are more than enough controls to make this thing shine. More importantly, Blue Cat Audio’s Axiom makes me feel inspired whenever I turn it on which is great for creating content.
7) Video Editing Software – iMovie/ScreenFlow

For the video editing software, you can use iMovie which is free for macOS and iOS devices from the App Store. I think using iMovie in the beginning stages is just fine because it at least gets you started with no barrier to entry.
That said, using premium software like ScreenFlow Editor is ideal.
And it’s better for a couple of reasons, mostly because the editing functions are more advanced and the user interface is more streamlined and easy to use.
For instance, you can’t drag and drop files around in iMovie as easily as you would in Screenflow.
Optional – (For People Who Would Rather Use an Amp)
These are the other pieces of gear that I would recommend for people who are trying to mic their amplifier with a traditional dynamic mic. If you plan on using Amplifier simulators, you won’t need to bother with this stuff.
8) K&M Mic Stand

I bought this K&M Mic Stand around 4-5 months ago and I was incredibly impressed by it. It’s very sturdy, reliable, and adjustable in a way that works.
Ironically, the guy at the shop tried talking me out of buying this and choosing a cheaper one instead. I’m glad I didn’t cheap out.
One of the tell-tale signs that a stand is high-quality is the material that it’s made out of and the length of the legs on the bottom of the stand. If It’s made almost entirely out of steel and the legs at the bottom are long, you’ve got yourself a decent stand.
9) Shure SM57 with XLR Cable
The Shure SM57 is kind of like the classic microphone that people get when they first start micing instruments. Every recording studio on earth likely has at least one Shure SM57 (probably more like 6-8 of them); they’re an industry standard at this point.
Like the Shure SM58 which I’ve talked about at length before on Producer Society, the SM57 is sturdy, reliable, and it sounds good. As explained in another way, you don’t have to worry about bumping these mics and breaking them as you would with a more sensitive condenser mic.
How to Set Up Your Gear For Making IG Guitar Videos
1) Connect your Scarlett 2i2 Audio Interface to your Computer

Connect your Scarlett 2i2 to your computer via the USB to Thunderbolt cable that it comes with. If you don’t already have one, grab a 10-footer like this one.
I find that the longer ones always come in handy. It’s better to be too long than to be too short. You may also need to get a USB to USB-C adapter as I showed in the image above.
A) Open Garageband and Configure the Settings

B) Go into the Preferences and then configure the Output Device and the Input Device so it says “Output Device: Built-in Output,” and “Input Device: Scarlett 2i2”
- The input has to be your audio interface and your output has to be either the built-in output, which could be speakers connected via a headphone jack, or it could also be an audio interface if you’ve connected speaker monitors to your audio interface.
- I prefer using the built-in output because I have my iLoud Micro Monitors connected to my laptop underneath my desk.

C) Turn on the Monitoring Button so you can hear yourself playing
D) Turn on the Feedback Protection and the Noise Gate
E) Turn off the metronome unless you want to play with a click track (my guide on this).
F) Keep your guitar’s VU meter below -5dB
2) Connect Your Guitar and Choose an Amp Simulator

- Select the INST option on the Scarlett
- Have the Gain set to between 6 and 7 o’clock
- Test the audio interface gain levels by strumming hard on chords. If It’s still green when you’ve strummed hard, you’re all gucci.

A) Mic Your Amp If You Don’t Want to Use An Amp Simulator

If you don’t want to use an amplifier simulator like Blue Cat Audio’s Axiom (the one I use), mic your amp instead like what’s shown here. It’s quite simple.
Just put your Shure SM57 in a stand and then put the mic head at the center of the speaker inside the cabinet.

For the audio interface settings, I’ll turn up the gain to around halfway and then I turn off the “INST” option on the Scarlett.
The “INST” option is meant for instruments, not mics. The settings are pretty much the same inside Garageband, although, turn the monitoring off, because you’ll hear the amp anyway.
3) Put Your Phone in a Ring Light Mount

- Filming with the Phone Upside Down
If you’re using an iPhone, you have a couple of options for how you want your recording to turn out. For instance, I sometimes like to film with the camera phone turned upside down.
This means the camera lens is at the bottom of the phone and it’s facing upward to me, rather than with the phone flipped the right side up. I find this puts greater attention on the fretboard.
- Have Your Phone Connected to a Charger
Another thing that I commonly do is I have a charger on an extension cord and up to the iPhone, that way if it starts to run low on battery, I just have to plug it in. Having a charger nearby is a great way to avoid problems, because nothing is more annoying than having to stop and charge your phone. This can totally destroy your workflow.
- Avoid Natural Light While Using A Ring Light
Using natural light is a great way to efficiently and cheaply get a high-quality video, however, it can sometimes mess up your lighting if it’s coming from the wrong angle in combination with your lighting set-up. Try closing your windows and turning off other lights and see how this affects your footage.
- Try Different Lighting Tones
Assuming you purchased the Ubeesize ring light I told you to get, you’ll have access to more colors including a hard white, a soft yellow, and colors in between. If you don’t like the way one looks, you might like the other.
4) Test Everything Once
How I test everything is that I set up my recording gear for my practice session, and then when I’m done, I take a look back at the footage and see how it looks. I’ll make any changes, and then I’ll hit “Record” again, both on the phone and in the DAW.
The key is to always be recording whenever you’re playing. This is the best way to capture ideas, riffs, ideas, concepts, and more, without impeding your regular process. And I couldn’t stress this enough. The purpose of all this, this entire set-up, is to have things organized so that you can always record yourself playing as a habit.
This is a win-win because not only do you get a constant stream of content all of the time for your social media and Youtube channels, but you also get to see how your playing really sounds (which is a crucial part of the learning process as I’ve explained before).
A) Use Logic Remote if You’re Using Garageband/iPhone

If you want to use a Logic Remote while you’re recording, you have to be either using a second iPhone or smartphone, or you need to be using an actual camera rather than your primary phone.
The Logic Remote is a crucial part of this process for me because it saves me from having to constantly get up and go to my computer to hit Record, Play; turn up the volume, or turn on the looping function. I’d recommend getting this from the App Store.
It’s worth mentioning that you can actually use it to program all kinds of controls, including the Monitoring button which I just had to do the other day.
The four dots in the middle of the interface mean that you can swipe it over to the right four times. Do that and you’ll see there are spaces for you to program whatever controls you want.
B) Mark the Camera Mount With Tape for Next Time

Calling back to the idea of having things set up so it’s good for next time, you may want to mark off where the tripod sits on the floor that way you know where to put it for next time.
There was a time when I would disassemble my ring light and put it under my desk, so using tape was great, but this became too cumbersome.
These days, I leave the ring light and my tripods up all of the time and I never take them down. I do this because if I don’t, it’s just too much work to record myself playing, and then it’s no fun.
C) Keep Your Gear In An Accessible and Easy Place

What you see here in the image shown above is how my set-up looks all of the time now when I’m not using it. In fact, when I turn my head around and look at my place, this is how it still looks.
I have my Hughes and Kettner/Mesa Boogie cabinet mic’d with a Shure SM57 and sitting in a K&M stand in case I want to use that method; I have my ring light in the right spot and it’s plugged in and ready to go, and my audio interface is sitting on my desk with the guitar cable connected to it at all times.
I take this a step further too. I have Garageband open for much of the day with my audio interface connected and all of my settings configured. That way if I want to start playing, it’s as simple as plugging my guitar in, sitting on the couch, turning my phone and lighting on, and then playing.
Additionally, I utilize Garageband’s Last Project feature and patches by making it so that my amp settings and jam tracks are the last things that I have open, so when I open Garageband, I don’t have to configure settings again. It’s all about making things easy on yourself.
D) Use Multicolored Smart Bulbs for a Different Effect

Get creative with the types of lighting you have in your recording space. If you’ve bought a Philips Hue Set like this one, you can change the colour scheme of some of the lights in your place.
Just having one or two of these in the background of your videos will introduce a different element to your content. Check out Channelmaker’s YouTube video about this (at 6:53).
How to Record Yourself Playing Guitar for Instagram
Once your gear is all setup, you’ve done the hard part. Now you just have to start recording and make the recording process a regular part of your routine.
Eventually, having this all set up will just be a normal part of your playing and you’ll soon have enough content for 10 IG accounts (assuming you play a lot).
1) Set Up Your Phone/Camera in A Ring Light
Follow the setup process I showed you earlier. Make sure your angle and lighting are good and that you’ve tapped on the screen where you want your phone camera to focus (this is how the iPhone works).
2) Start Recording with your iPhone/Camera and your DAW Right Away
- When you first sit down to start playing, make sure you’ve hit record on both your DAW and your phone at roughly the same time. This is going to make matching your audio and video much easier later. It doesn’t have to be exactly the same, but the closer you are together on your phone and in your DAW, the easier it will be.
Leave 3-4 seconds of space between when you hit record and when you start playing. This allows for breathing room when editing. Explained another way for clarity, hit record on both devices, wait 3-4 seconds, and then start playing.
- If I’m sitting on my couch away from my computer, I always, and I mean always, use the Logic Remote. It just makes everything easier. Another thing that I’ll do is I’ll make sure I have enough space on my desktop in case I record something really long in Garageband macOS.
- I usually have Garageband open and everything ready to go as one of the first things I do in the morning. That means all I have to do is plug in my guitar and press play on my phone camera and I’m ready to go.
3) Turn Loud Appliances Off If You’re Not Recording Direct

If you plan on recording your guitar with a microphone/amp combination, or if you intend on recording with your iPhone, you’ll need to shut off loud appliances as I’ve explained elsewhere on the site.
Otherwise, you won’t get a very good sound. For a rough draft, it’ll be just fine, but a loud air conditioner, for example, will be a nuisance.
4) Record Continuous Footage, Rather Than Different Clips
I find that recording footage all as one continuous clip is far easier than having to sort through 8-9 different videos just to find one clip of myself playing. Maybe this is counterintuitive, but at one point, I found myself making many different videos because I thought it would be easier this way. It is not.
5) Make Sure You Have Enough Space and Battery On Your Camera
- This might be the most important point because running out of space on your camera or iPhone is incredibly annoying and it will drive you nuts. Make sure you’ve purchased an iCloud subscription or you have ample space on your device. I try to make sure I have 15GB available at all times.
- I actually have two iPhones, one for recording guitar videos and one that is my main everyday phone. Not everyone has two, so you can either use a separate camera for recording or you can ensure your device has plenty of space.
- One advantage of using a second phone for recording is that you can use your main phone for the Logic Remote which I talked about earlier. It’s also important to have your phone charged.
- The best way is to just leave the phone on the charger the entire time you’re recording (extension cords like this one from Amazon are your friend), but if this isn’t available, you’ll just have to make sure it’s charged beforehand.
How to Upload A Guitar Video to Instagram
One of the advantages of recording audio directly in Garageband is that you’ll then have a high-quality recording to mix, master, and manipulate in whatever way you choose.
You could pitch correct, time quantize or add effects in post-processing to increase the overall quality of your recording.
Another advantage of this is that while many people are doing a similar thing, not everyone is. Take pride in the fact that you’re going the extra mile. So let’s get into it.
1) Mix and Enhance the Garageband Audio in Your DAW (Garageband)
One of the first things I like to do in this case is pan the two tracks: the backing track (if you’re using one as I did for this tutorial): and then my playing. By the way, I have a guide you can read about playing with backing tracks.
Panning

When panning the two tracks for an IG post, I’ll pan one to the left and the right by 20-25 approximately.
You don’t have to get fancy with this. The point is to just create a bit of breathing room for both tracks to co-exist. It might even sound better to have them both just ever-so-slightly off-center.
Mixing the Volume

As the image suggests, when I’m playing and recording, I’ll have the VU meters turned up (not above +0 dB though), that way I can hear what’s going on. But when it comes time to add a compressor and EQ, I’ll drop the VU meters way down to around -15dB or less.
For the next few subheadings, we’ll talk about the changes that I’ve made on the Master Track and not the individual tracks.

Master Track – Channel EQ

Because it’s only for a quick social media post, I won’t take the time to do any nuanced EQ changes. I find the presets work well enough on their own for this. In this case, I used the Final Mix – Rock preset because there wasn’t one for Jazz.
Master Track – Compressor

On the Master Track compressor, I’ll throw on the trusty old Platinum Analog Tape preset which is the same one I’ve used for years. It’s a great way to equalize everything and also bring up the volume. I find this preset also gives it some much-needed punch.
Master Track – AUPeakLimiter

Both the Compressor and the AUPeakLimiter working together is how we get the total master volume way up. It’s also the reason why we have to put the VU meters way down to around -15dB. If they’re any higher, it’ll sound like everything is being squashed and warbled.
What I like to do is increase the pre-gain setting on the AUPeakLimiter until it sounds loud enough when the computer’s master volume is around halfway. This makes it so the song is loud enough at a reasonable master volume, so it can be lowered by a lot or increased by a lot if the listener needs it.
2) Export Your Recorded Garageband Track as an AIFF

Before exporting the recording, I’ll ensure:
- my metronome is turned off
- the Master Volume is set to +0.0dB.
Hit Share in the toolbar, then Export Song to Disk, and then select AIFF. Choose a name for the project and export it to your Desktop. This will make it much easier to find. Once you’ve done that, your recording is now is ready and we can move on to the iPhone video footage.
3) Airdrop Your iPhone Footage to Your Desktop

The best way to get your video files to your desktop is to simply AirDrop them. This will save oodles of time, and I’m so grateful for this feature because of that. At one point, you actually had to get a USB cable to import files but thankfully those days are behind us.
4) Drag and Drop Your Video and Audio into iMovie/Screenflow

You have both your AIFF Garageband recording and the video footage on your desktop, so just open iMovie or ScreenFlow Editor and then drag and drop the files into the interface. Normally I would use Screenflow Editor for this, but ScreenFlow costs money so I chose the free and more accessible software instead.
5) Match the Video and Audio in iMovie/ScreenFlow
Matching the audio and video footage is the difficult part, at least when you first start. Zoom in on all the files with the zoom feature on the right-hand side or by using (Shift + Command + =), or both.
You’ll be able to see how the Garageband file can be matched up with the audio file from the video footage. This makes it much easier.

You’ll need to separate the audio from the video footage by right-clicking on it and selecting the option, Detach Audio, which can also be done with (Option + Command + B). You can see both the Zoom and Detach Audio functions in the image above.

Once you’ve separated the audio, drag the exported Garageband audio up to the video footage from the iPhone, rather than the other way around, that way they match. You may have to delete some footage at the start of the video/audio recordings because iMovie doesn’t always make it easy.
You’ll know that they perfectly match by hitting Play and noticing if either file lags behind the other.
For whatever reason, iMovie connects the three files so that if you make a change to one of them, it’ll sometimes change all of them. I get around this by moving the files around and seeing if it disconnects.
Also, you can use the automatic (Shift + Command + E) function to see if it improves the sound or video footage automatically. Sometimes it works great, and other times not so much. Once your video/audio is matched up, it’s time to move on.
6) Turn the Video On Its Side for Instagram Reels

Like I showed you how to do on my other site, Producer Society, you’ll have to select the “Crop to Fill” function and then turn the clip to the left and export it that way.
It’ll become a vertical video by doing this which means you can use it for TikTok as well. We’ll talk about cropping and Instagram dimensions in a second.
7) Share the iMovie File to Your Desktop

Hit Share, name the file, and choose 720p resolution (or more if you want better quality), and then click Next to send it to your desktop.
8) Turn the Video Sidewards In Quicktime Video Player

When the file is on your desktop, you’ll notice it’s on its side which it’s supposed to be. Go into the Quicktime Video Player’s menu and select, “Rotate Right,” from the Edit menu, and it’ll make it straight.
9) Airdrop the File to Your Phone

Airdrop the file to your phone and then wait for it to upload. Quicktime will ask you if you want to save the changes that you just made to the file, and I usually do save those changes, because who wants a sideways video?
10) Upload it to Instagram

Your completed video is now on your phone and it’s ready to upload. Depending on how long it is, you may have to upload it to IGTV if it’s longer than one 1-minute, but if it’s less than 1 minute, it can just go on your profile as a regular post.
Also, you’ll find that Instagram might want to crop out some of your videos to fit it in their frame, however, I find that IGTV is kind of misleading in that way.
The cropping feature will make it seem like your video won’t fit, but then when you post it to IGTV, it’ll show the entire video without losing anything.

If you do need to change things though, you may have to do so, or you can do a few other things:
- Turn your phone/camera sidewards rather than upright when recording
- Leave plenty of headroom above you in your video recordings to accommodate for Instagram’s cropping feature
There is a lot we can say about Instagram. Talking about the nuances of Instagram and how a person would become successful on it would probably take another 5000 words, so we won’t go there.
But a few things I will say is that you just want to add a long description and then some relevant hashtags.
Can You Post Guitar Covers On Instagram?
While it is possible to post guitar covers on Instagram, it’s the copyright owner’s discretion as to whether or not you have the right to use their material.
I’ve posted videos of myself playing guitar along to popular rap beats before and one of my videos was actually blocked from spreading because of a complaint filed by a record label. I don’t remember which label it was, but it was a song from Lil Uzi Vert.
How Do I Record Guitar Videos On My Phone?
Plain and simple, if you want to record guitar videos on your iPhone, you just have to put your phone in a mount of some kind and then press Record. Using a ring light will help you a lot because it provides you with the mount and lighting you need. Don’t expect the best audio quality from this, however.
How Do I Sync Guitar Videos?
The best way to sync guitar video and audio is with Telestream’s ScreenFlow Editor. This allows you to analyze the peaks and troughs of your audio recordings, match them up visually, and then drag and drop the files in whatever way you choose.
This tutorial focused primarily on iMovie because it’s free and accessible to all iOS and macOS users, however, if you’re looking for something a little better, ScreenFlow Editor is a great choice and you can get it cheaply from their site.
Tips for Posting Guitar Videos to IG and TikTok
1) Keep Your Raw Files If You Want To Cross-Post
As I said in my TikTok video tutorial on Producer Society, keep your raw video files because you can’t just download your post from IG or TikTok and then post it on the other platform. You can do this, but it could hurt your reach.
It would be better to keep the raw footage and then upload it directly to the platform, that way you don’t get punished algorithmically for promoting businesses other than Instagram. Plus, you don’t want a TikTok logo on your IG content.

