 Written By :

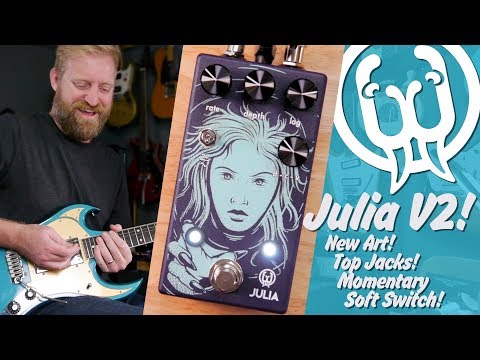
The Julia V2 from Walrus Audio is an update of the super popular Julia chorus/vibrato pedal. I recently acquired one and I’m impressed by its wide range of sounds and the in-depth control it offers over modulation.
To use the Walrus Audio Julia V2
- Run a standard 1/4″ instrument cable from your guitar to the Julia’s input.
- Run another cable from Julia’s output to your amp’s input, or the next pedal in your chain.
- Power with a 9V DC power supply, and dial in your desired settings using the four control knobs.
How To Set Up The Walrus Audio V2 In Your Signal Chain

I’ve recently become interested in pedals that marry chorus and vibrato effects. These effects are similar, as both involve an LFO being applied to your dry signal and modulating it.
For this reason (and others), the guidelines for signal chain placement for both are practically the same. Here are some general rules I like to follow when setting up a modulation pedal like the Julia V2 in my signal chain, and the reasoning behind doing it this way.
Placement After Distortion & Overdrive, Before Reverb & Delay

Generally speaking, I prefer placing modulation effects like chorus and vibrato after units like distortion or overdrive in my signal chain.
This way, the signal being received by a modulation pedal like the Julia has already been beefed up and harmonically enriched by distortion and overdrive, giving it a fuller and more interesting signal to modulate.
In my view, it makes sense to have chorus and reverb units before time-based effects like reverb or delay in the chain, again for reasons regarding the signal flow.

With things set up this way, the signal first gets beefed up by distortion and overdrive (as I just mentioned), then modulated by chorus and other modulation effects, and then finally the signal reaches these time-based units.
This means that every delay repeat and reverb tail will have all of the character provided by these effects, giving a richer, more interesting sound in my opinion.
As always, however, there is no hard science to pedal placement and it really just depends on what sound you’re going for, so try out different things to see what works best for your style.
How to Power The Walrus Audio Julia V2

The Julia V2 doesn’t have a battery compartment but can be powered by a standard 9V DC power supply.
I’d recommend using a supply specifically designed for guitar pedals, or a 9V power brick. Make sure that the power supply provides a minimum of 100mA current.

Features Of The Walrus Audio Julia V2 & How to Use Them

The Julia V2 has four control knobs on the front panel, one flippable switch and one footswitch. I go through all of them in the YouTube video above, but I’ll do the same thing down below including what these controls do, and how best to use them.
1) Rate

The Rate knob controls the speed of the modulation applied to your signal. Turn it clockwise to increase the rate for a faster, ‘fluttering’ effect, or counterclockwise for slower chorus sweeps.
The results you get with the Rate knob, as with the other control options, will vary dramatically depending on what other settings you have dialled in, especially whether you are using a Chorus or Vibrato setting (more on this difference shortly).
2) Depth

The Depth knob controls the intensity of the modulation. If you’re using a Chorus setting this will make the modulated signal more prominent and trippy sounding.
On Vibrato, turning up the Depth setting will make the overall pitch bending of the signal more intense and warbly, giving more of a detuned sound.
I think one of the reasons the Julia pedals have been so popular is their versatility and the sheer range of tones you can get with just a few control options.
3) Lag

The ‘Lag’ knob controls the delay time of the modulation effect applied by the other control parameters, sometimes known as the ‘center delay’.
This basically means how much of a delay, or lag, there is between hearing the dry signal and the modulated one.
This parameter can give you some really interesting results and is another way in which the Julia V2 gives you a lot of control over your modulation. I haven’t seen this kind of control option with any other chorus pedal.
A) Short Lag
Keeping it on low settings produces a ‘tighter’ sounding modulation, with little time passing between your playing and the signal being affected. This gives a ‘static chorus’ effect which is more subtle and dry-sounding, but still very noticeable.
It sounds like your signal has been doubled, which it has, but with such a short gap between the dry and modulated signals you don’t get such a pronounced sounding ‘chorus’ effect.
B) Long Lag
Cranking the Lag up gives longer, more spacious sweeps by broadening the phase relationship between the dry and modulated signal.
Everything between zero and halfway gradually results in more lush, drawn-out modulations, and a ‘wider’ overall sound.
It’s important to point out that you’ll get dramatically different results from the Lag knob depending on what Speed and Depth settings you have dialled in with their respective controls.
4) Sine & Triangle Wave Switch

Underneath the Rate knob is a small switch which lets you toggle between two different waveforms of the modulating LFO: sine or triangle.
The sine wave setting keeps the modulation sweeps smoother, whereas the triangle wave makes them more chopped and angular. Typically, chorus settings will use a triangle wave and for vibrato, you’ll want to use the sine wave.
Again, I find that what you can get from using this switch can vary quite dramatically depending on the other settings you have dialled in, from barely noticeable to pretty extreme, so have a play around to see what sounds you can achieve.
5) D-C-V Blend

Underneath the Lag knob is another marked D-C-V (Dry – Chorus – Vibrato). This acts as a blend control that you can use to mix in the dry signal with the chorus effect, as well as blending a chorus effect with a vibrato one.
Whereas Chorus mixes your dry input signal with the modulated one (giving you that ‘doubled’ sound), Vibrato modulates the entire dry signal, pitch-bending it up and down.
Obviously, the intensity and speed of these two effects are determined by what Depth and Rate settings you’re using.
What I love about the D-C-V blend knob is that it gives me a lot of control and nuance, letting me intricately shape the dry signal’s relation to the modulated one in a Chorus situation, as well as blending Chorus and Vibrato effects together.

The options are almost endless, and you can get a huge range of results by experimenting with this control in tandem with the other parameters the Julia V2 has to offer.
6) Footswitch

The Julia’s only footswitch is located at the bottom center of the pedal. This is primarily a standard bypass/activate switch which is nice and soft without being too ‘clicky’ sounding.
I heard somewhere that the Julia V1’s bypass footswitch had a really loud click, and it seems that they’ve tamed it a bit here. The positive of this is that it won’t make a sound through your amplifier when you activate the pedal which is a plus for performing guitarists.
Smart Bypass Switching

Another cool feature of the footswitch is that it allows momentary switching. This means you can configure the switch to only activate the Julia while you’re holding your foot down on it.
This can be helpful if you only want to use the Julia for short bursts at a time, for example, if you’re using some extreme settings that you want to deploy only occasionally for effect. Hold your foot down on the footswitch for a few seconds to activate momentary switching.
7) Bypass LED

Just above and to the left of the bypass footswitch is an LED which turns on when the Julia is activated, so you know if you have it switched on or bypassed.
This is helpful as a visual reference, obviously, and also now that the bypass footswitch has less of a click, it helps you be absolutely sure whether you’ve bypassed the pedal or not.
8) Rate LED

To the right of the bypass switch is another LED which flashes according to the rate of modulation you have set. It may look like a Tap/Tempo LED from a delay pedal but is in fact controlled with the Rate knob.
This is another useful visual reference for the Rate setting you’re using and can come in especially handy if you’re using the Julia in sync with time-based effects like delay or tremolo, letting you calibrate these effects according to the speed of the flashing LED.
6 Cool Settings For The Walrus Audio V2
Here are a few cool settings I’ve found with the Julia V2 so far. Like I’ve said, though, this is a versatile pedal, so this list is by no means exhaustive. I recommend diving in and exploring all the sonic landscapes this pedal has to offer.
1) My Personal Favourite

In my opinion, the chorus sounds the best when used sparingly. I like it best with the rate set fairly slow but then the depth increased very high. This gives me the effect I want without the ’70s and ’80s stadium rock vibe which isn’t really my thing.
- Rate to 6:30 pm
- Depth to Max
- Lag to 9:00 pm
- Triangle Wave
- D-C-V set to Chorus

2) Classic Clean Chorus

If I’m going for a shimmering clean chorus sound I like to keep the following settings.
- Rate at around 3 o’clock
- The Depth at around 9 or 10 o’clock
- Lag at noon.
- As this is a chorus effect I keep the D-C-V knob at ‘C’,
- Set the Wave type to Sine.
This is probably the most ‘standard’ or ‘classic’ chorus tone I’ve got from the Julia V2, and it’s a very solid one indeed, however, it’s quite fast and not my favourite because of that.
3) 80’s Rock, Van Halen Style

As I mentioned earlier, chorus units like the Julia V2 can be effective when used after distortion and overdrive.
While some chorus effects in general may have a bad reputation for being linked to 80’s music, if that’s what you going for Julia can give you a great hair/stadium rock style tone when used with distortion.
Keep the control knobs all at noon, or the Rate slightly lower set the D-C-V to Chorus, and drop the Sine/Triangle switch to either. Place the Julia straight after an overdrive with a fair amount of dirt, and you can certainly rock out here with an 80s flavour (think Van Halen, Whitesnake or 80 Kiss).
4) Tape Warmth

The Julia V2 can come in handy even if you don’t want to have a distinct chorus or vibrato effect. You can use it subtly to give more warmth and an analog wobble to your dry signal, without tipping over into a full-blown chorus or vibrato sound.
- Keep the Rate at 7:00 pm
- The Depth at 1:00 pm
- Lag all the way to 4:00 pm.
- Dial the D-C-V knob up to V
- Set the Wave switch to Sine wave.
This will give you an effect that adds a lot of depth and character to your sound, which can work well with your other effects units.
5) Surf’s Up Vibrato

The Julia V2’s Vibrato settings can give you a hazy, 60’s tone, suitable for surf rock or old-school psychedelia.
- Crank the D-C-V knob all the way up to ‘V’
- Keep the Rate high, around 5:00 pm,
- The Depth around 9:00 pm
- Lag around 3 o’clock.
- Set the Wave to Sine
This results in a woozy, vibrato sound but where the melodic definition isn’t lost, perfect for single note lines on a clean tone or slow, psychedelic strumming. Adjust the rate according to the tempo of your song to match the speed.
6) Using Two Julias/Chorus Pedals Together
I came across this video from 60 Cycle Hum where they use two Julias in tandem with each other (in this case a V1 and a V2), and the results are pretty cool.
In this video, Ryan uses the two Julias with a lot of distortion for a fuzzy, psychedelic doom sound.
But you could easily get just as interesting results doing this through a clean channel, having the two pedals set up with different Depths, Rates or Lag settings.
It goes without saying that you can try this method out with any other chorus or vibrato pedal, not just another Julia, so if you have any other units like this in your chain, I recommend giving it a try, as the results can be really out-there and fun.
2 Things You Should Know About the Walrus Audio Julia
1) The Depth and Rate Have an Inverse Relationship
One of the best tips I ever heard for using a Chorus pedal was to establish an inverse relationship between the Rate and Depth. In other words, set the two knobs so they’re the opposite of each other. If you turn the one left, turn the other to the right.
If the Depth is set to Maximum, set the Rate to Minimum. If the Rate is set to 3:00 pm, set the Depth to 9:00 pm, etc. This will allow you to avoid any nasty or unpleasant sounds. Break this guideline to experiment with other sounds.
2) The Julia Adds A Nice Saturation
One of the nice things about this pedal is that it gives your tone a nice juicy sound that’s hard to explain in words. It just has a sound that gives your tone a little something extra, particularly when the Depth is set to 100% and the Rate is set to Slow. Play with it yourself and see how it goes.
Other Articles You May Be Interested In
- 11 (EASY) Tips for Using A Chorus Pedal
- Vibrato vs Chorus – What’s the Difference? [ANSWERED]
- What’s the Difference Between Reverb and Chorus [ANSWERED]
- How to Use A Vibrato Pedal [An Illustrated Tutorial]
- How to Use The TC Electronic Vortex Mini (+ 5 Cool Settings)

