The Behringer SF300, an affordable fuzz pedal with a plastic chassis, is modeled after the discontinued Boss FZ-2 Hyperfuzz and features two fuzz settings based on classic units.
To use the Behringer SF300, set it up in your signal chain before any modulation, time-based, or drive and distortion effects, then connect to the input of an amplifier with a 1/4″ guitar cable. Set the front panel controls to 12 o’clock to start and the Fuzz setting to 2.
The Features & Controls of the Behringer Super Fuzz SF300
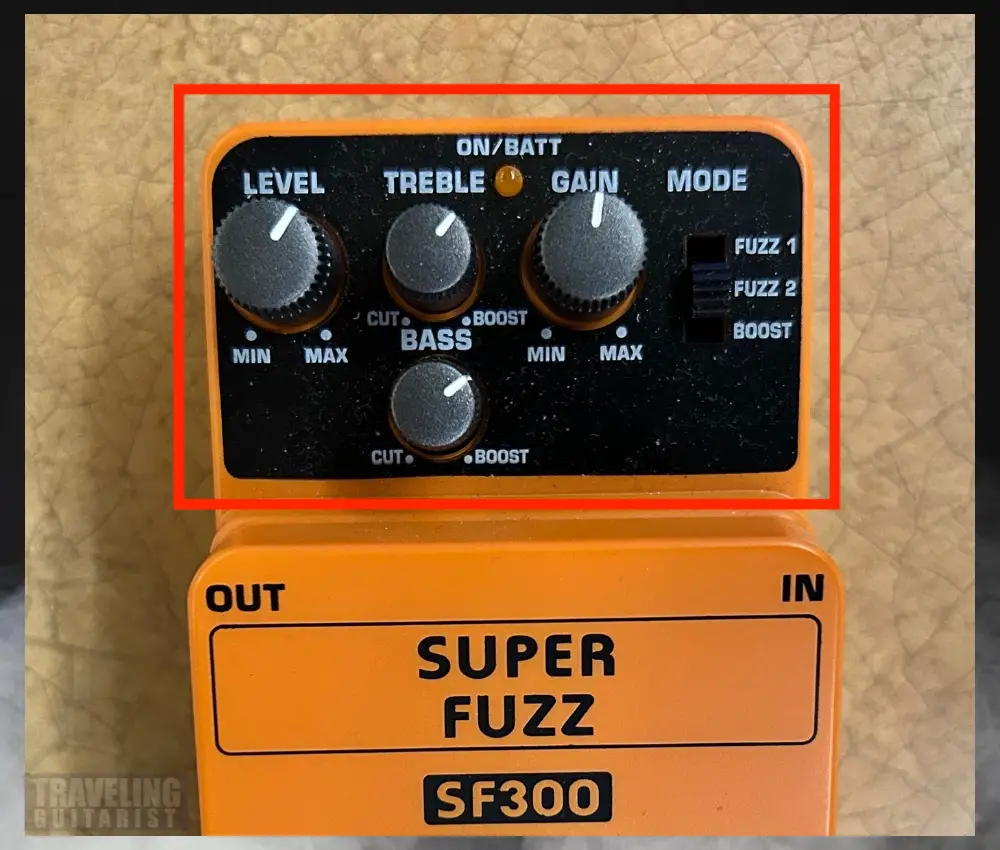
1) Front Panel Control Knobs
The SF300 features four control knobs on the front panel – Level, Gain, Treble, and Bass – along with a toggle switch on the right for selecting fuzz circuits (you can check out the official manual for it here).
A) Level
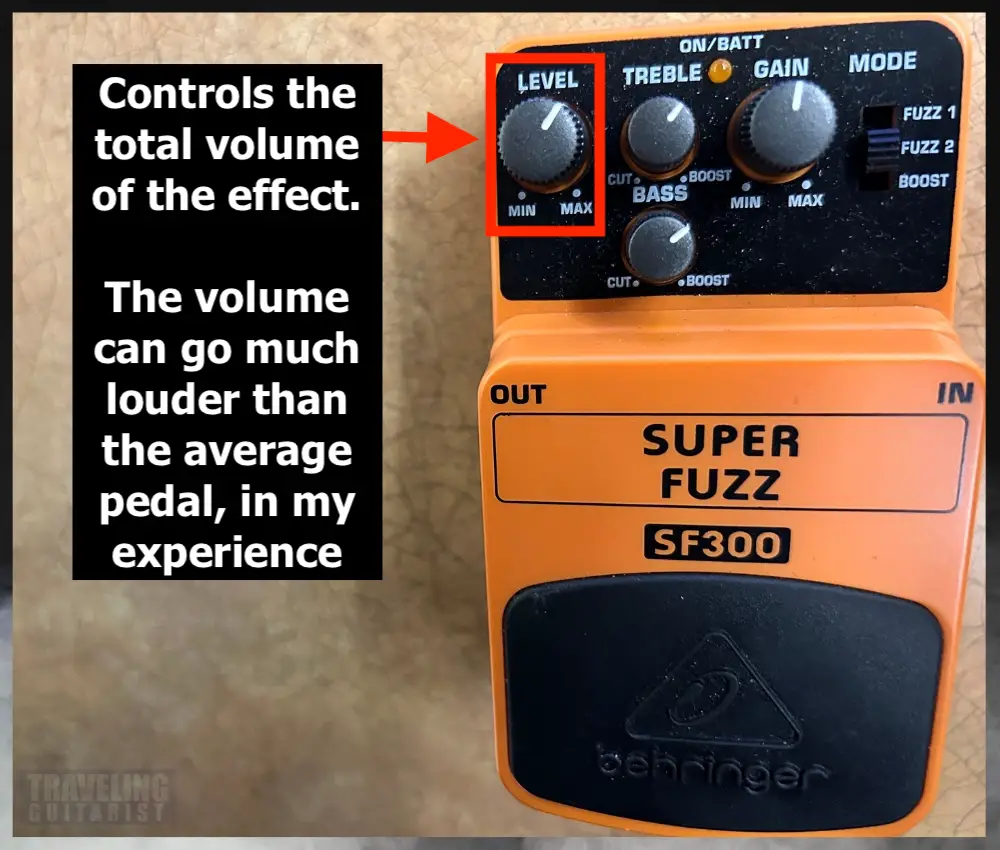
The Level knob simply controls the overall output volume.
The higher the level setting, the louder the pedal will be.
B) Gain
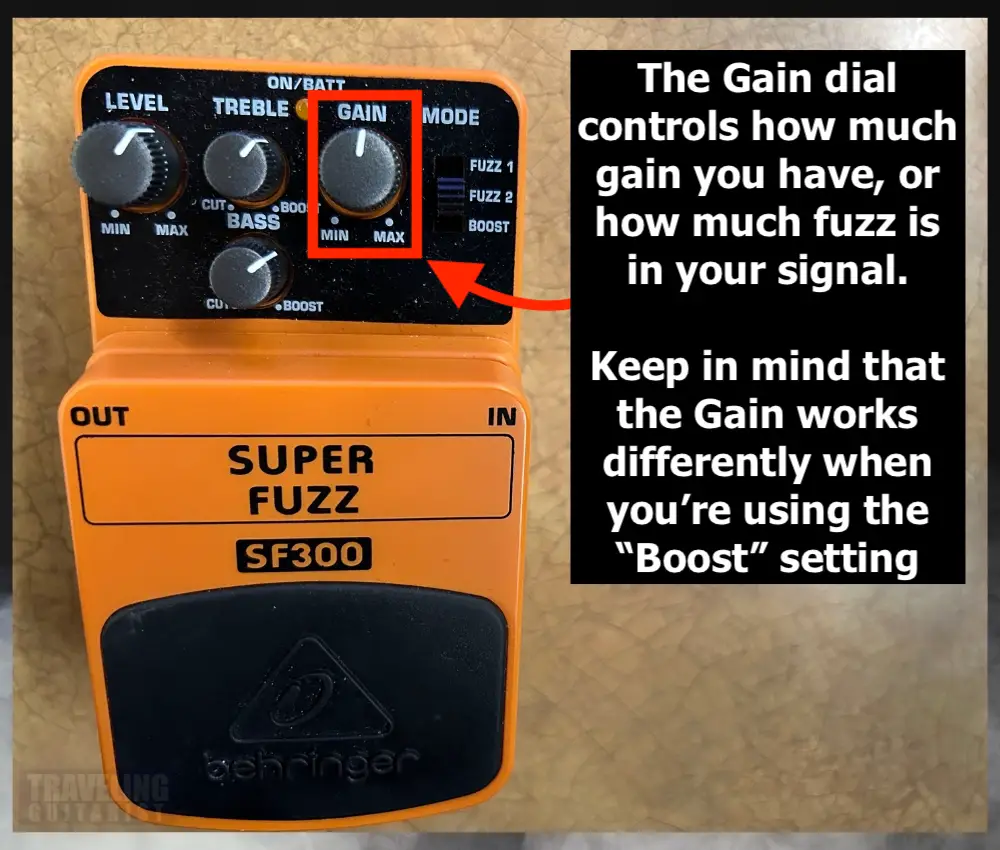
The Gain controls the amount of gain in your signal.
In this case, the gain adds to the fuzz sound you’ve selected. It basically controls the amount of fuzz you want to use.
However, it’s more accurate and scientific to say that it controls the gain. This is why it wont make your “Boost” signal “fuzzier” as I suggested in the image above.
Dial it back to have a more reserved distortion with some breakup on your clean signal, and then crank it up to gradually overload the signal with high-gain fuzz.
C) Treble & Bass
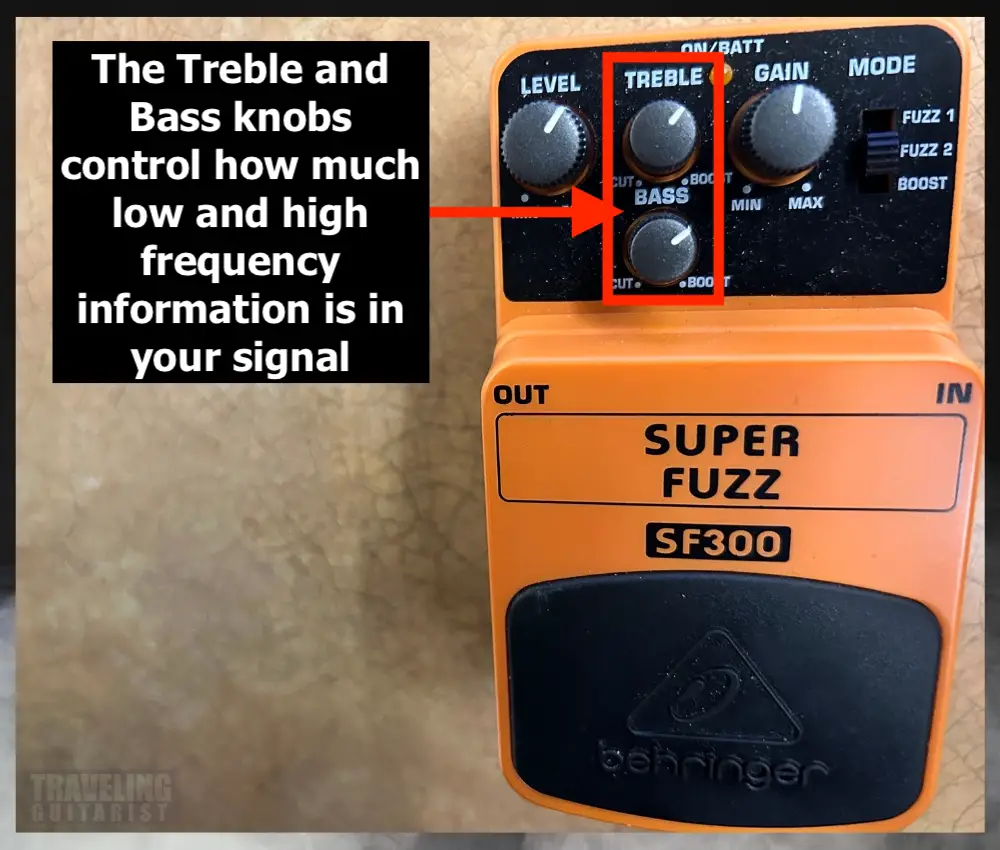
The Bass and Treble control how much low and high frequencies are introduced into your signal. A high treble will sound sharp, like a razor blade, and a high bass setting will sound heavy.
I really like the EQ controls on the SF300, although a mid-range EQ control to go with the bass and treble controls would have been even better due to increased control.
Ultimately, the bass and treble knobs let you sculpt the tone of the fuzz however you want.
These EQ controls aren’t just used in isolation. It’s essential to think about how different EQ settings will sit with your other effects units, and, maybe most importantly, your amp settings.
For example, if you’re going into a high-gain amp stack, you may want to roll off some low end and crank the high end on the pedal to compensate for the ‘boominess’ of the amp.
You may not use such a raspy tone on its own, but when using it alongside certain amp settings, it can help you craft the tone you need.
2) FUZZ SETTINGS Toggle Switch
Fuzz 1, Fuzz 2, and Boost are the primary modes.
With this switch, you can choose between the two main preset fuzz tones, or boost your clean input signal.
A) Fuzz 1
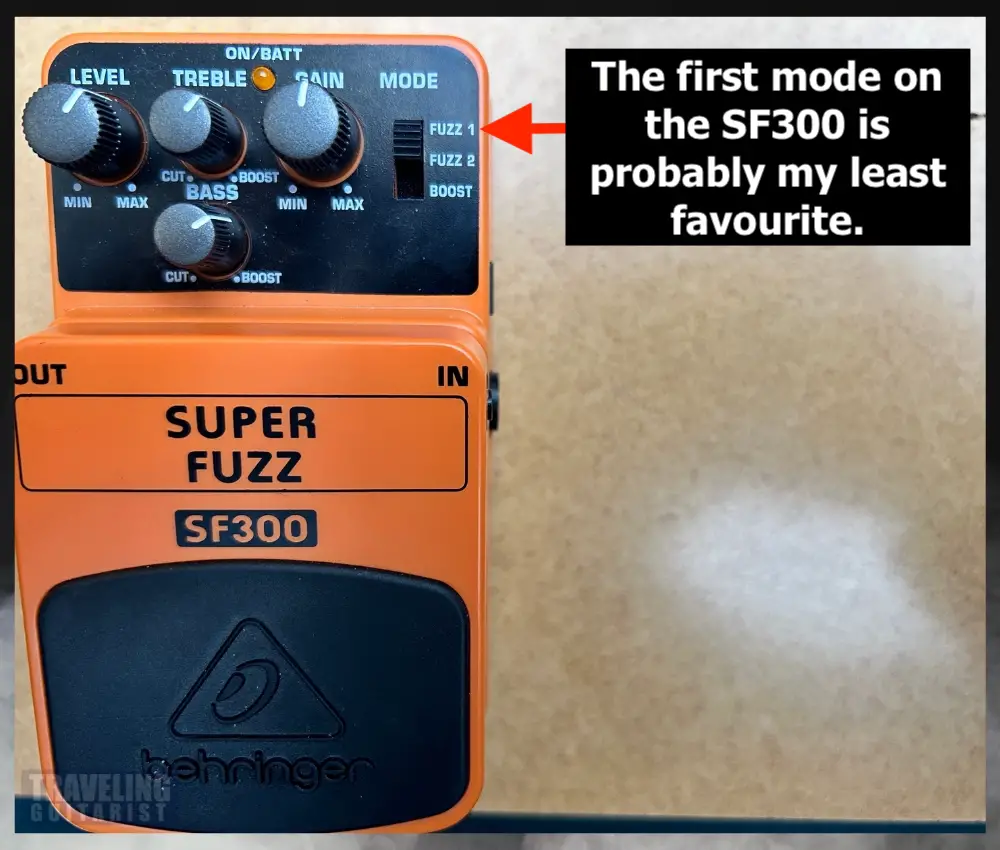
This is great for lead playing as it gives you a harmonically rich tone, especially when you go in with string bends and double stopping.
For chords and rhythm playing, it’s less dynamic sounding but can still give you some good crunch for lower-end power chords.
B) Secret Mode ‘Fuzz Mode 1.5’
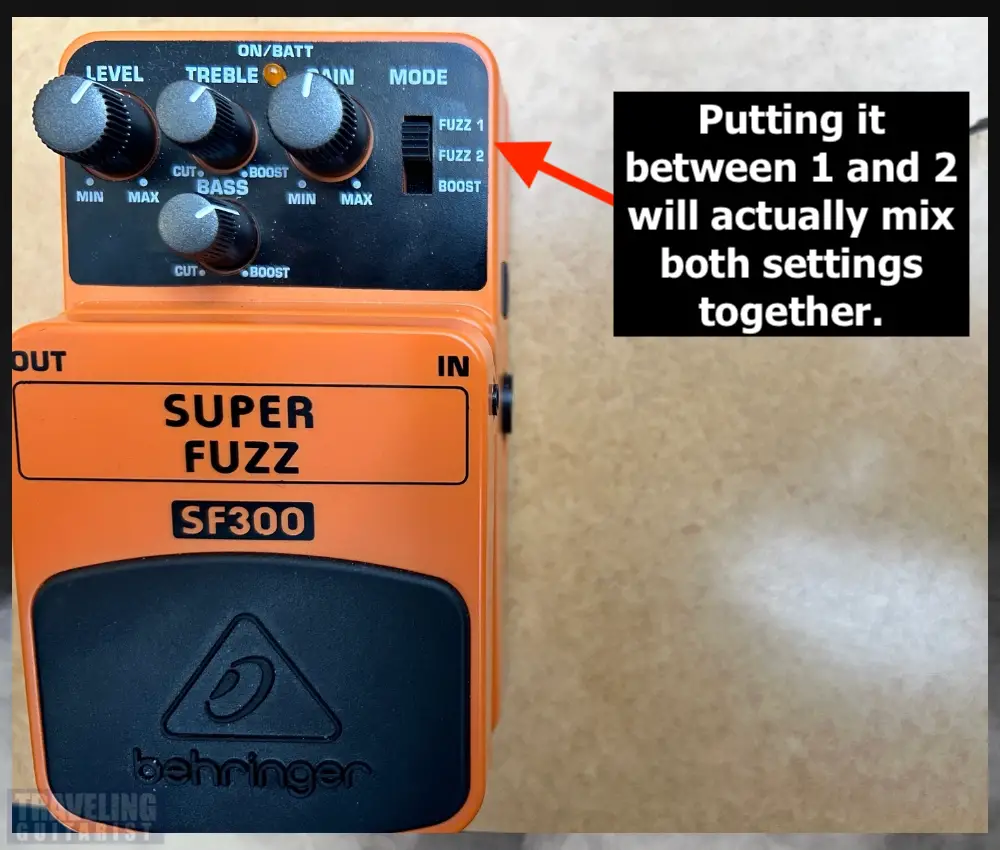
As I showed you earlier, there are Secret Modes which I discovered by watching this video from Eric Merrow.
This is because the setting splits the guitar signal, sending it to both modes simultaneously, giving you less midrange response than mode 1, but more than mode 2.
This is literally a third option that you can then play with using the other control settings, which I think is really cool, especially for a pedal this cheap.
C) Fuzz 2
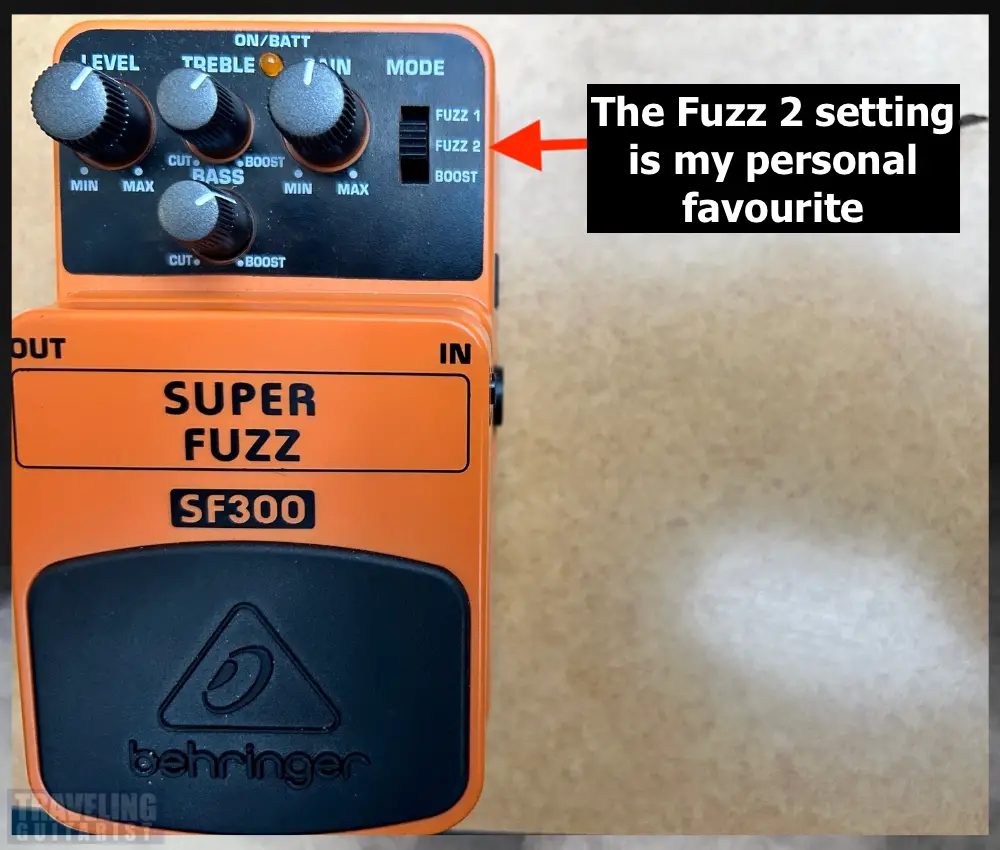
For chugging, and doomy rhythm playing I prefer the Fuzz 2 setting. This is a mid-scooped fuzz tone, purportedly based on the sound of a classic Electro Harmonix Big Muff unit.
This setting is also great for lead-playing, especially single-note, doom or grunge-style melodic riffs, while I prefer Fuzz 1 for more high-end, squealy guitar solos.
D) ‘Fuzz Mode 2.5’
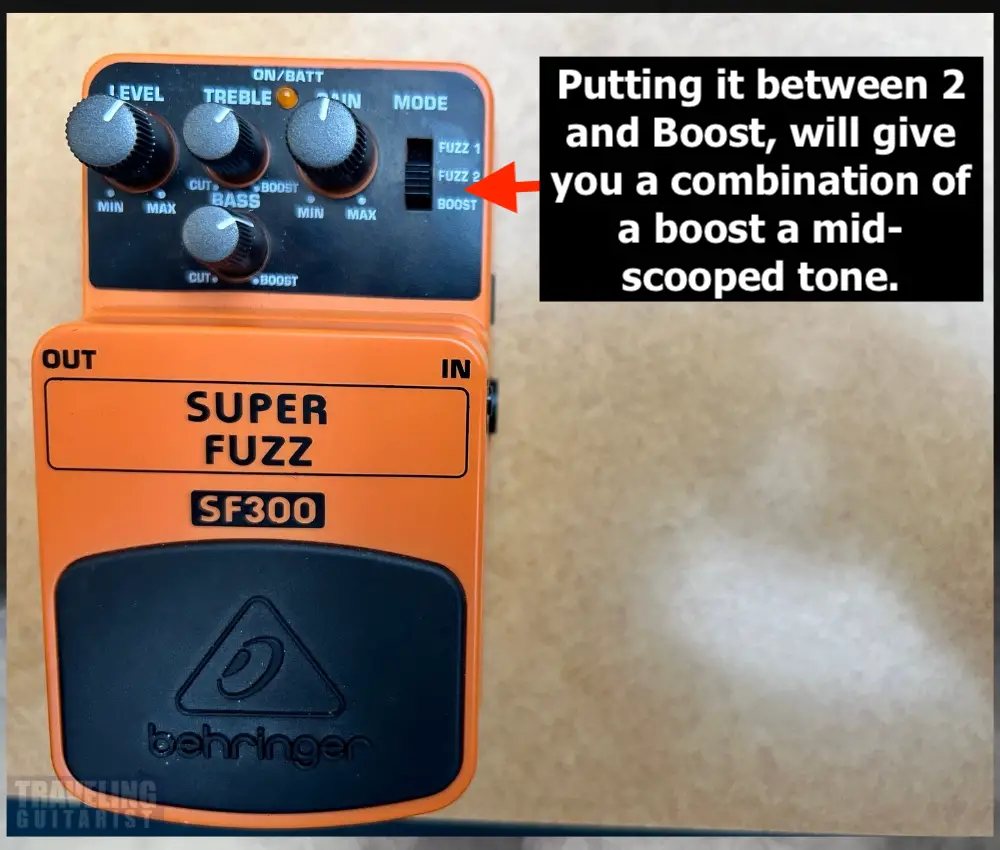
Naturally, discovering a secret setting between settings 1 and 2 made me curious to see what would happen if I tried out setting the switch between Fuzz Mode 2 and the Clean Boost setting.
Sure enough, there’s another secret setting here which blends the mid-scooped Fuzz Tone 2 with the signal booster, which gives a really meaty, classic big muff-style fuzz tone.
There aren’t as many videos online talking about this second secret setting as the first one, but I highly recommend checking it out.
E) Boost
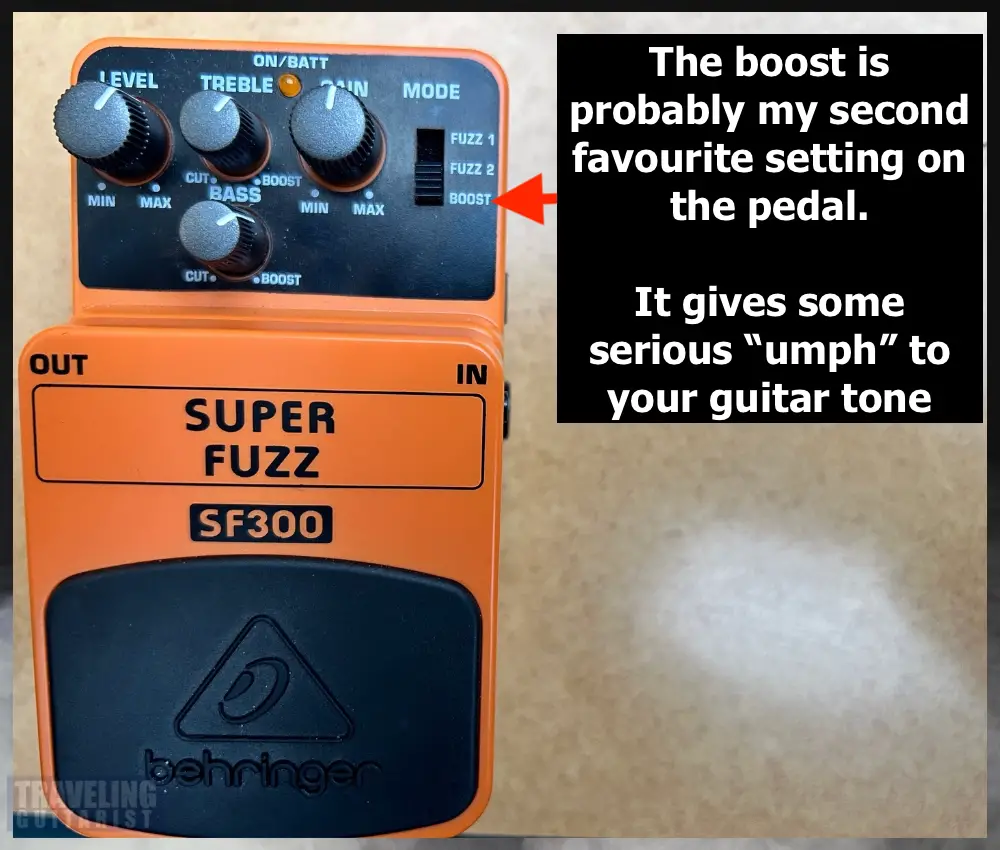
The third and final setting you get from the toggle switch is the ‘Boost’ setting, which boosts the input signal, making it louder, clearer, more up-front, and just…better, in my opinion.
Remember that the boost disengages your Level knob and uses the Gain as the primary output control.
You can play around with the gain level and the EQ settings to craft diverse distortion tones, that don’t necessarily reach the level of distinctly ‘fuzz’ sounds, some of which sound really solid.
How to Power the Behringer Super Fuzz
The SF300 requires 9VDC like most guitar pedals and 30mA.
1) Power Supply
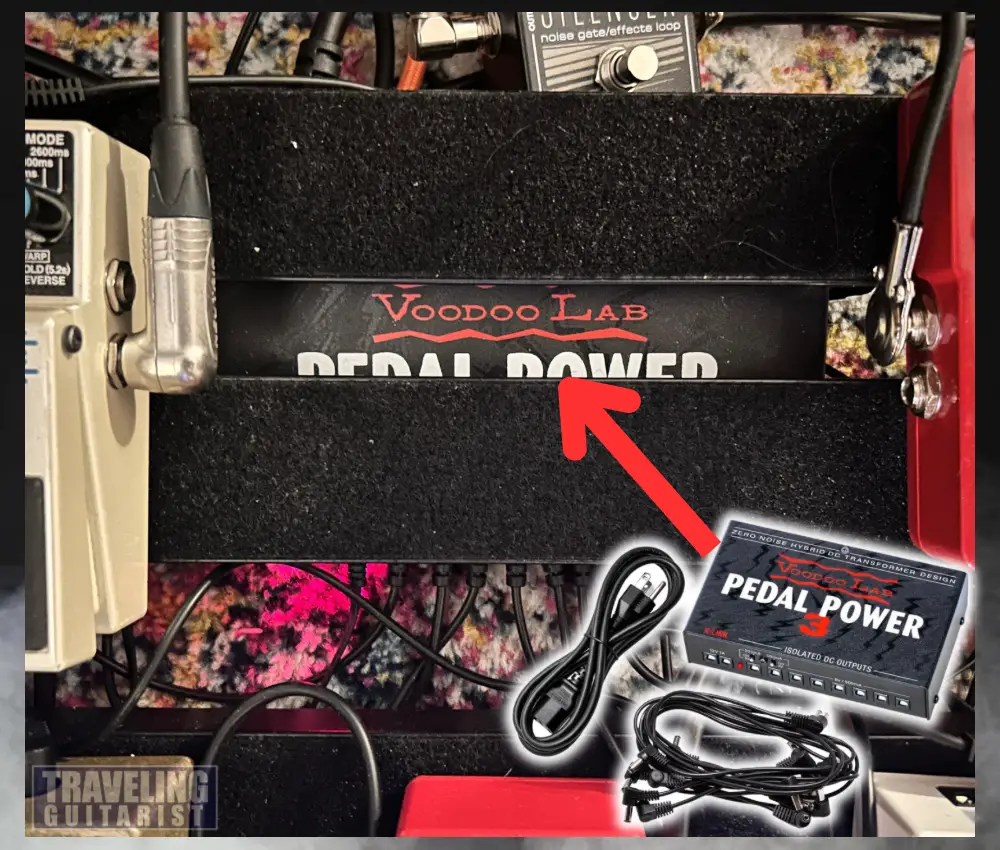
The power port for the pedal is on the right-hand side, just above the input. I prefer to have them on top.
2) Battery
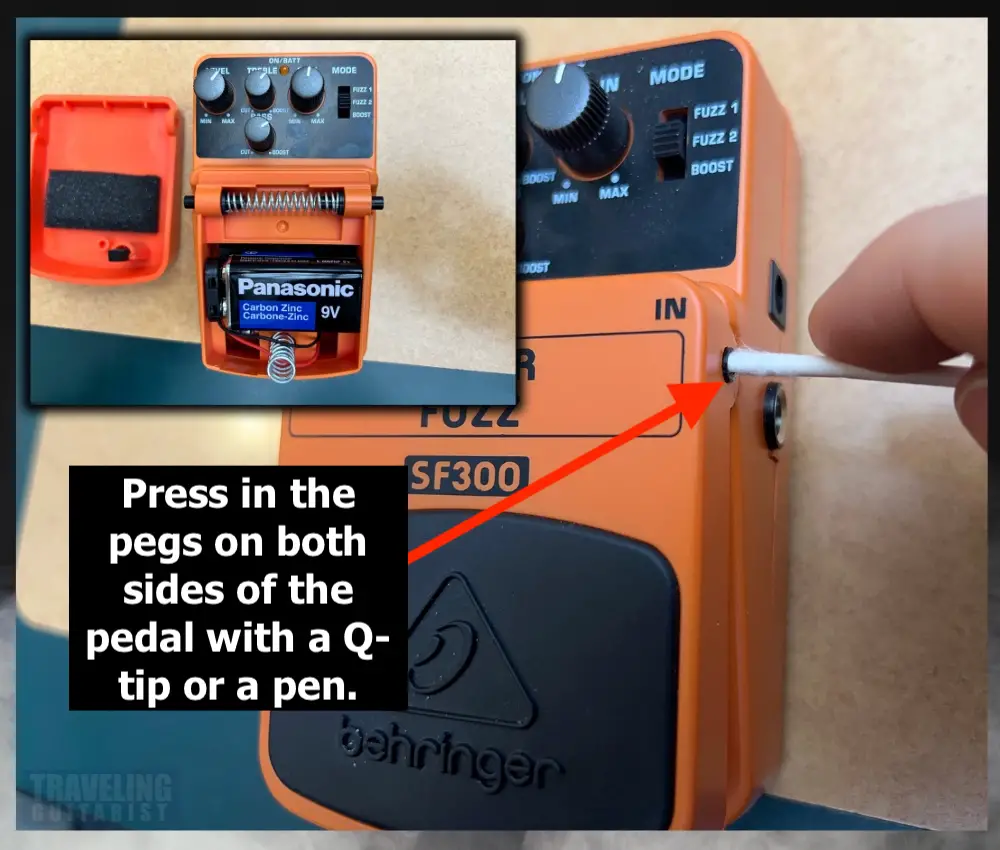
- The video below (at 05:49) at the section where I show you how to take the compartment off.
As I point out in the video above, I couldn’t tell the difference between a power supply and carbon battery. It’s possible though that a dying battery might have a different sound.
Where To Put the Behringer SF300 In Your Signal Chain
This is how I set up the Behringer Super Fuzz in my chain. It’s a good starting point for you as well if you’re new to it.
1) Earliest Part of Your Signal Chain
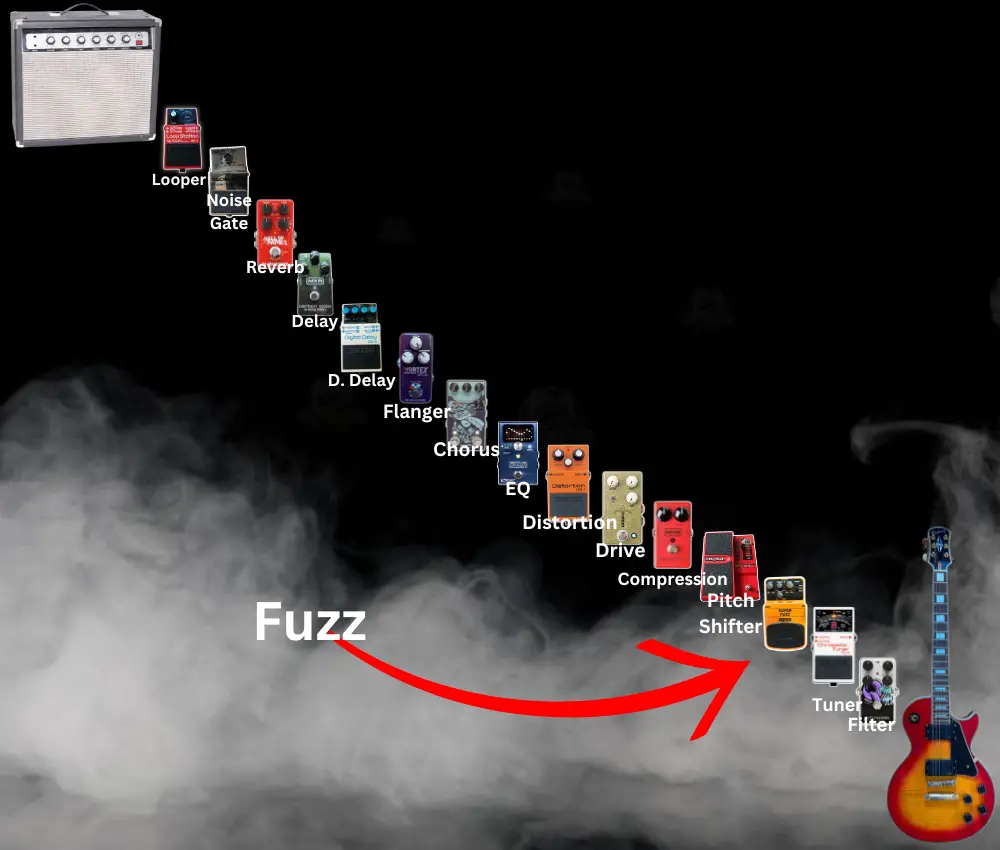
The SF300 works best when placed earliest in your chain
As a general rule, distortion/fuzz units such as the SF300 should go early in your chain, before other effects. If the SF300 is the only pedal of this kind you’re using, I’d recommend putting it first in the chain, straight after your guitar.
This way, any other effects units like modulation pedals such as chorus or flanger, will process the signal that has already been beefed up by the SF300, meaning they have more harmonic content to work on, giving richer results.
Putting the fuzz after flangers and other effects like that could result in a messy and uncontrolled tone.
2) Certainly Before Delay, Reverb and Other Time-Based FX
At the very least, I believe fuzz is best well before reverb, delay, and time-based effects.
You can of course place the SF300 after these effects, but this way the fuzz will be applied to the whole combined signal, and you can lose a lot of definition this way.
If you know a lot about fuzz, I’m curious to know how you set it up in your chain. Let me know in the comments.
4 Tips for Using the Behringer SF300 Super Fuzz
1) Two Note Chords Sound the Best
- The video above at (03:31) shows where I demonstrate why 2-note chords sound best on the SF300.
Some players are able to get the best out of it in a different way, but I find single-note leads and multi-string chords to sound either thin or too thick, respectively.
2) Signal Chain Placement is Doubly Important
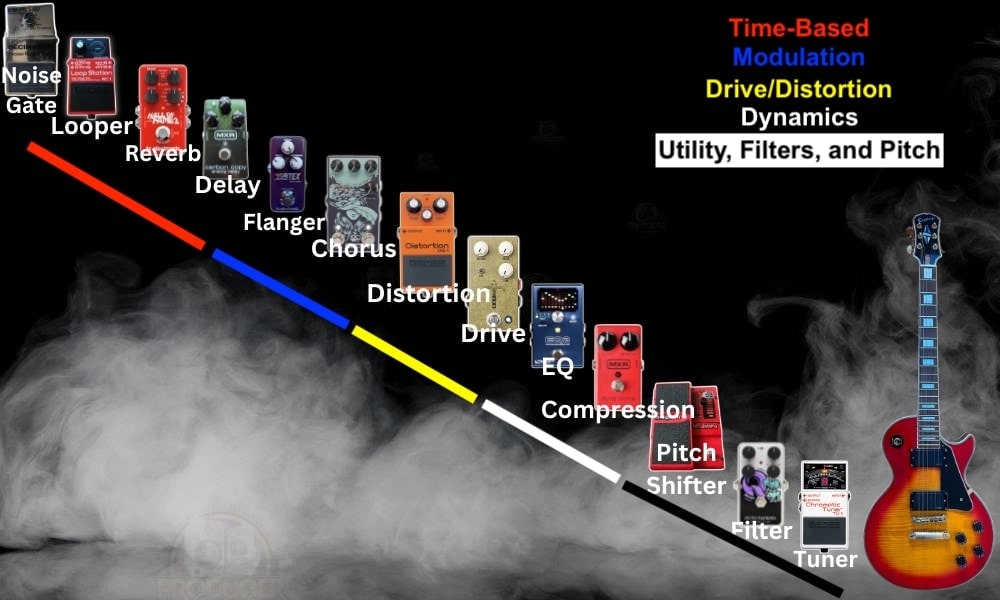
Due to the nature of fuzz, signal chain placement will be important. Of course, it is for every effect, but even more so with fuzz. It can be a real mess if set up weirdly.
3) Try Rolling Off the Tone on Your Guitar Pickups
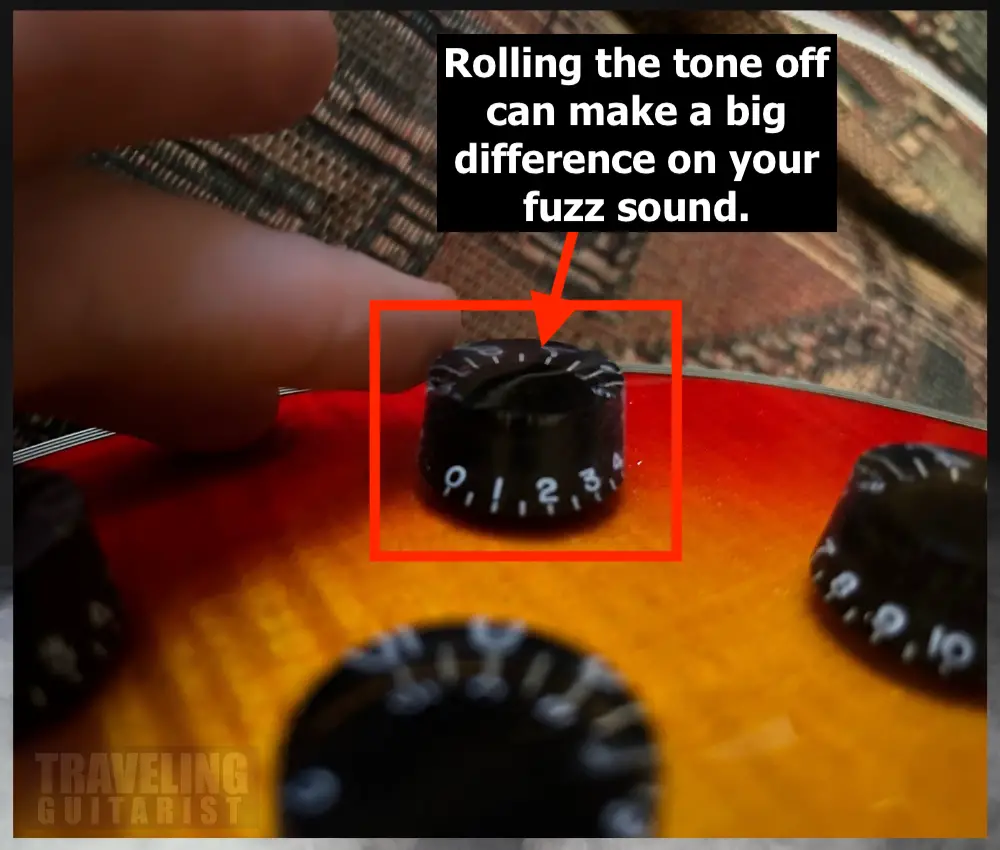
Probably one of the most popular ways to use fuzz is to roll off the tone on your guitar pickups. You could try either your bridge or neck pickup.
Either way, it’s going to give a cool-sounding muffled tone.
4) Consider Your Pickups (Humbucker vs Single-Coil)
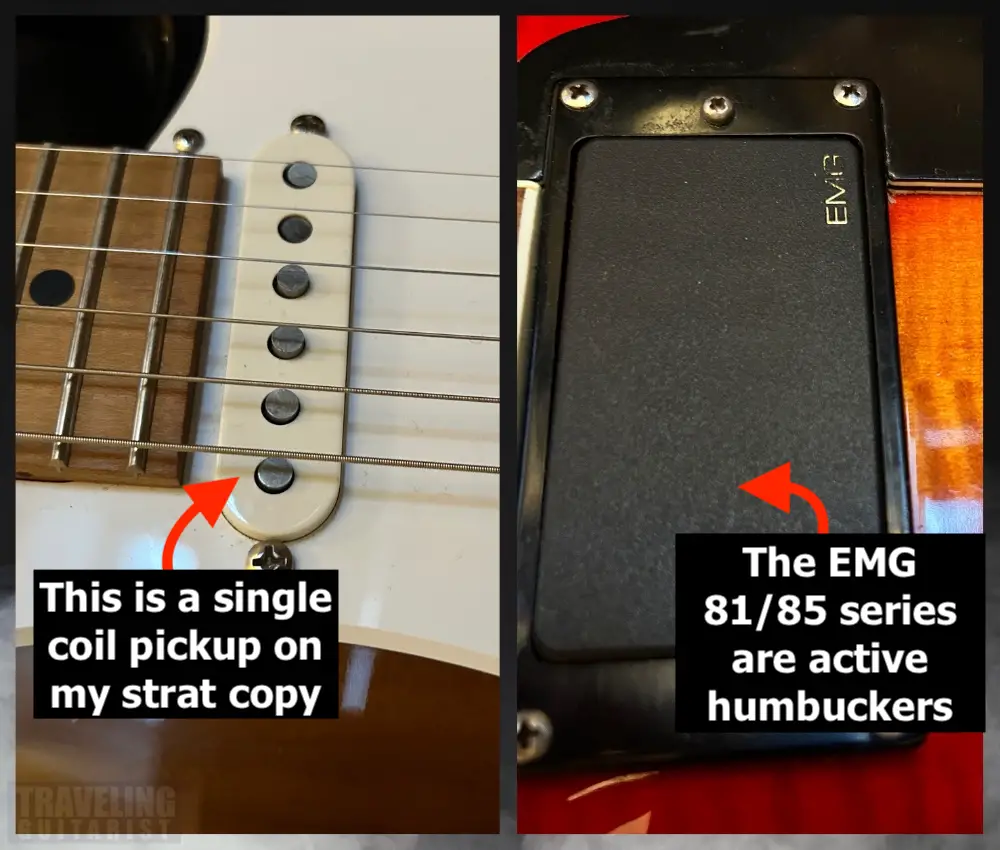
No pedal exists in isolation.
It’s complicated trying to describe what a pedal really sounds like on its own, without taking into consideration things like the guitar you’re using, your amp settings, and your guitar pickups.
Do you have any interesting settings or ways of using the Super Fuzz? Let me know in the comment section below.
Other Articles You May Be Interested In
- Does The Compressor Pedal Go Before Fuzz Pedals? [SIMPLE]
- How to Use The JHS Morning Glory V4 + (7 Quick Tips)
- The EHX Soul Food Rules (A REAL Owner’s Guide)


 Written By :
