 Written By :

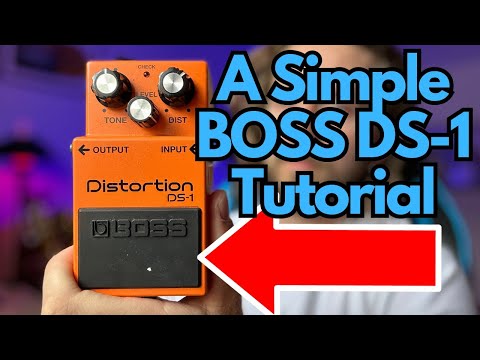
The BOSS DS-1 distortion pedal is a timeless distortion pedal and a staple on the pedalboards of beginners and legends including Steve Vai and Kurt Cobain. Here are the basics of setting up:
To use the BOSS DS-1 pedal, power it on with a 9V alkaline, carbon battery, or a DC power supply. Add it to your signal chain after utility, filters, pitch and dynamics, and start with the knobs at 12:00. Adjust the distortion, tone, and level controls one by one until you get the sound you need.
Everything The BOSS DS-1 Can Do & How to Use It

To get you started on a high note, I’ve compiled 11 actionable settings and 7 tips based on my experience and research.
Keep reading to really get the most out of this pedal.
1) Output Volume

This control adjusts the overall volume of the effect, or how loud your distorted signal will be. It’s best to start this in the middle position (12 O’clock) and adjust from there.
What I prefer to do is balance the volume between my distorted sound when the pedal is active, versus the clean sound when the pedal is bypassed.
To do this, play a chord with the pedal active, and again after disengaging. Listen to the volume change, and adjust the Level knob accordingly. Do this a few times until you’re satisfied with how your guitar sounds with the pedal on and off.
Remember, a high-gain setting can increase the volume a lot and cause feedback, so be careful in live scenarios where you’re plugged into a PA system or multiple amplifiers.
2) Tone

The DS-1’s Tone control is a handy tool for shaping your sound. This knob adjusts the balance of treble frequencies in your distortion. Now, this is quite similar to the tone knob on your guitar, but you can use both together for a prominent effect.
When you turn it to the left (counter-clockwise), it’ll make your tone dark and boost the bass frequencies. To the right, it’ll brighten up your guitar sound and enhance the treble.
As I alluded to a moment ago, the Tone control is how the DS-1 becomes too brittle. I rarely bring it past 1:00 – 2:00 because it gets far too harsh.
As a starting point, try setting the tone knob at 10:00. This is a solid starting point. I recommend you set the tone knob on your distortion only after you’ve set up the rest of your pedals and amp EQ settings, just so you have a better overview of things.
For example, blues and jazz styles tend to benefit from the warmth of a lower-tone setting. But a crunchy rock riff will cut through the mix better if you increase the tone, adding presence to your guitar.
3) Distortion

Time to talk about distortion. On the DS-1, this is controlled by the ‘DIST’ knob. This has an effect on the overall gain of the signal, as well as its sustain.
To get a feel for how this works, start with your DIST knob turned all the way to the left (anticlockwise) for a relatively clean tone. Gradually turn it clockwise while chugging some riffs with your right hand, and you can see how it beefs up the sound, making it crunchy.
While some players like to push the DIST all the way, I prefer keeping it at the minimum to get my desired tone. Increasing it too much can make the guitar noisy and sometimes muddy up my riffs.
Note that if you have active pickups on your guitar, which are higher output, you may need less distortion.
4) Battery Compartment

I wouldn’t recommend using a battery though for reasons that I’ve discussed many times in other articles, including in my guide on power supplies vs batteries.
Batteries just cost too much and don’t last long enough. However, a carbon-based battery could supply more voltage and drive the pedal a bit harder for a different tone. I wrote another article about this.
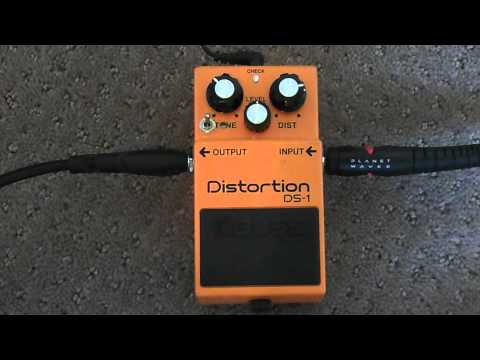
5) Input/Outputs Mono

The DS-1 doesn’t have stereo ports, but frankly, I’m not sure whether stereo ports would even have a purpose on the DS-1.
6) Buffered Bypass Footswitch

The DS-1 is built like a tank. I know people who have had BOSS pedals for 35 years. You can stomp on this thing 10,000 times and not have to worry about it, other than having to replace a spring every 10 years, if that.
How to Power the BOSS DS-1
1) 9VDC Power Supply (4mA)

2) 9V Battery

If you’re planning on just playing some casual jams or short gigs, a 9V battery is your best friend. Boss claims a battery life of about 50-80 hours, depending on the type of battery you use, and I recommend using alkaline ones if you can.
Quick Tip: The CHECK indicator light on the pedal will turn dim when the battery is about to die, so you’ll know when it’s time to replace it. Plus, you’ll probably notice a fuzzier tone at this point.
Also, remember that as soon as you plug your guitar into the INPUT jack, the pedal will turn on. So don’t leave it plugged in on battery power, or else it’ll drain it.
Where to Put the BOSS DS-1 In Your Signal Chain and Why
1) After Utility, Filters, & Dynamics Pedals

For a distortion pedal like this, it’s usually best to place it near the middle, after your tuner, wah and envelope filters, as well as your compression pedal. I usually put it after my drive pedal.
The DS-1 modifies your tone, so having a clean signal helps get the best results here. If you’re planning to place any pedals before the DS-1, make sure they don’t interfere with the tone too much, or you’re likely to get unexpected results (which makes tone-shaping even harder).
For example, you can place a compressor, EQ, or pitch-shifter before the DS-1, but probably not a flanger. If you’re stacking overdrive or distortion pedals, it’s best to start with the least gain and then higher gain ones.
The latter pedal tends to have a bigger influence on your tone. Another way for me to set it up is to put the EQ after the drive and distortion as well. That’s a good way of going about it.
However, these aren’t hard and fast rules. The beauty of creating your guitar tone is that you can experiment with different setups to see what you like. Now that we’ve talked about all of that, let’s discuss real settings.
11 Settings To Use With the BOSS DS-1
I’ve seen a lot of people talk badly about the DS-1 but I think it’s a decent distortion pedal that’s capable of good tones.
Personally, I’m a bigger fan of the JHS Morning Glory and similar drive pedals because distortion doesn’t do it for me anymore. But I digress. I came up with 11 different settings for you to try on the DS-1.

1) Old School Rock Tone

TONE: 12:00
LEVEL: 3:00
DIST: 9:00
Dial the tone to 12:00, the Level to 3:00, and the Distortion to 9:00 to create a rock guitar sound that sounds like something from the 1960s and 1970s. It’s a fairly light distortion.
I find that it sounds best for treble-pickup rhythm playing, like for the rhythm section on “Welcome to the Jungle.”
2) Metal and Hard Rock

TONE: 1:30
LEVEL: 3:00
DIST: 4:30
One of the things that I like about the DS-1 is that I find it’s capable of creating a really saturated distortion which is great for lead guitar solos.
To my ear, it sounds great, especially when you ad d a lot of distortion. Be careful with the Tone knob though for reasons I mentioned earlier.

Either treble pickups or bass pickups will sound good. Bass pickup will sound good if you’re doing some Petrucci-style shred.
3) Light and Warm Overdrive

TONE: 11:00
LEVEL: 3:00
DIST: 7:30
This is a really light distortion setting that’s closest to a drive pedal, although, it’s still in the official “distortion” range. With this setting, you can create some more bluesy and classic rock vibes.
4) Alternative Rock and Indie Tone

TONE: 11:00
LEVEL: 2:00
DIST: 1:00
This setting will sound good for Nirvana’s “Smells Like Teen Spirit” and similar tunes of that era, particularly for the section after the opening twangy power chords in F Minor.
As a matter of fact, Kurt Cobain did use the BOSS DS-1 although I can’t say for sure whether he used it on the record.
5) Saturated “Shoegaze” Tone

TONE: 1:00
LEVEL: 2:00
DIST: 2:00
For this setting, I turned up the chorus, reverb, and delay to a reasonable amount and it sounded cool for introspective and pretty open chords (I’ve got some of these if you’re interested).
Use your bridge dual-humbucker pick-up. I don’t think I would like this one for single coils although I never tried it.
6) 90s Punk Distortion

TONE: 1:30
LEVEL: 3:00
DIST: 4:00
This is a good distortion setting for imitating some of the great guitar riffs of the 1990s. Green Day’s first 1-2 albums are a good example, but you could really use it for any of those vibes. You could use it for a Tool song probably too.
7) Warm and Distorted Lead Tone

TONE: 10:00
LEVEL: 2:00
DIST: 12:00
Use this setting with your neck pickup and have the tone turned up on your guitar about halfway. This will give you a really warm vibe. If you need some leads in your song without introducing too much higher frequencies, this may be the way to do it.
8) More Vintage Rock

TONE: 11:30
LEVEL: 2:00
DIST: 8:00
Another classic rock-style riff which is meant to imitate a slightly more aggressive version of an overdriven amp.
As I said earlier, the DS-1 isn’t for an overdrive tone, but you can get just a bit over that vibe.
If you are looking for a drive sound, I would recommend the JHS Morning Glory V4 which I also have a tutorial on. Awesome overdrive pedal.
9) Dirty Boost

TONE: 12:30
LEVEL: 3:00
DIST: 7:00
Even if you have the distortion set right at the lowest amount, you still get quite a bit of drive. This is probably my least favourite setting because If I want a clean drive, I’d rather use my actual drive pedals.
Again, I recommend something like the Morning Glory V4 or the EHX Soulfood if you’re trying to get a clean boost.
10) Grunge Tone

TONE: 11:00
LEVEL: 2:00
DIST: 3:00
This is a cool setting for grunge tones. You could use this one for the Nirvana song I mentioned earlier. Really anything from the Nirvana catalogue. Especially Bleach.
Dropping back the tone like that will keep a warmer and darker vibe. Turn it up and you get more of that higher-end saturation. Setting the Distortion at 3:00 will also be a lot of distortion.
11) BIG Boost

Distortion: 0
Level: Max
Tone: 12:30
To use it as a high volume boost, set the ‘Dist’ knob to zero, and crank up the ‘Level’. You can keep the Tone at 12:30, or set it as per your preference.
This is good for elevating your solos or for sections where you need a lot more volume but don’t want a ton of distortion.
If you’re stacking pedals, you can use another pedal, like like the Morning Glory, Soulfood, or TS9 Tube Screamer, to shape your gain and add flavour to your tone.
Then, use the DS-1 to boost it and cut through the mix. You can get some crazy pinch harmonics if you use two pedals like this.
7 Tips for Using the BOSS DS-1
1) Use A Different Power Type in the DS-1

I did an experiment with my wah pedal and a carbon-based battery vs alkaline and an isolated power supply, and I didn’t hear a difference between any of them.
However, it’s (somewhat) common knowledge that carbon batteries will sound better in certain pedals. And the DS-1 is purportedly one of them.
2) Try It On Other Instruments

I’ve never tried this, but you could always try putting the DS-1 on something like a violin or even your piano.
There’s nothing stopping you from doing so, assuming you’re using an instrument with a 1/4″ instrument jack. There’s a YouTube harp player that does this sort of thing all of the time.
3) Experimenting with Pick Attack for Dynamics

One of the most effective ways you can alter the tone of your DS-1 pedal is by changing the way you strike your strings. This is called the ‘pick attack’. It refers to the intensity, speed, and dynamics of your picking.
When you hit the strings harder, the DS-1 responds with a stronger, more aggressive distortion. If you play softly, the pedal gives you a smoother, more mellow tone.
It’s all about the dynamics – the DS-1 is highly responsive to your touch, and it reacts differently to your technique.
Try playing a simple riff (even chugging on an open string) repeatedly, but each time, alter the strength of your pick attack. You’ll notice how the tone changes. Even using different picks, like a thicker one or another material, has an impact.
4) Gain Stage Properly By Decreasing the Output Level Of Previous Pedals

Gain staging refers to the process of managing the levels of your signal at each point in your signal chain to avoid unwanted noise or distortion. Proper gain staging with the DS-1 pedal and across your pedalboard can lead to a clearer, more articulate tone.
For instance, if you’re running the DS-1 in a chain with other pedals, be mindful of how the output level of one pedal affects the input level of the next. You want to maintain a consistent signal level throughout to prevent any unexpected spikes in volume or tone.
Consider all your pedals one by one. For example, if your signal is too hot going into the DS-1, start by lowering the output level of the previous pedal. This Stringjoy video clears up the basics of gain staging pretty well.
Because of how overwhelming gain staging can be, I prefer keeping my setups simple as far as possible. The more pedals you stack, the more potential issues crop up.
5) Using the DS-1 for Advanced Guitar Techniques
The way the DS-1 adds sustain, gain, and natural compression to your sound, it’s the perfect companion for practicing a variety of advanced guitar techniques like:
Palm Muting: This involves lightly resting your palm on the strings at the bridge and then picking the strings. With a high-gain setting, you’ll get a tight, chunky sound that’s perfect for riffing in rock or metal.
Harmonics and Pinch Harmonics: Both natural harmonics and pinch harmonics can shine with the DS-1.
You can bring out the bell-like tones and screaming squeals that this pedal is known for. This is great with the wah pedal which I’ve shown in the video above.
Legato: The DS-1 works well with Legato, especially if you’re aiming for a smooth and fluid solo sound. Even left-handed tapping works very well on a high-gain tone.
The DS-1 is a great expressive tool when used right, and you can really make your guitar sing and scream.
6) Mod Your DS-1 By Changing Diodes, Capacitors & Resistors, or by Adding A Switch
Now if you’re fairly good with electronics and circuitry, you can consider modding the DS-1 to change its sound signature or just add more tonal variety.
The most famous is the Keeley mod which I’ve linked to in the video above. But there are a few others. Here are a few other popular mods:
Changing the diodes: The diodes in the DS-1 are responsible for their clipping characteristics. By changing them, you can alter the pedal’s distortion character. For example, you could swap the stock diodes for LEDs for a more open and dynamic sound.
Changing the capacitors and resistors: The capacitors and resistors in the DS-1 affect its frequency response. By changing these, you can alter the pedal’s EQ.
Adding a switch: Some modders add a switch to the DS-1 that allows you to toggle between different diode configurations, so you get a wider range of tones.
There are several guides to modding the DS-1 with exact component specifications to help you out. Note that this will void the warranty on your pedal, and can damage it if you’re not careful.
7) Start at Mid-Way With Both Knobs

When using the DS-1, one of the most satisfying things is discovering that sweet spot where the tone and distortion harmoniously combine to give your sound an unforgettable edge.
Start with both knobs set at the midway point. Then, tweak them in small increments and listen to the changes in your tone. If the sound is too bright or harsh, turn the Tone control down a bit. If the distortion seems too intense, ease back on the Dist dial.
And remember to make changes to the amp’s EQ based on what you hear: try a scooped V sound with the Mids rolled down.
Other Articles You May Be Interested In
- How to Use The JHS Morning Glory V4 + (7 Quick Tips)
- How to Use The Ibanez TS-9 Tube Screamer + (5 Cool Settings)
- What’s the Difference Between Gain and Drive? [ANSWERED]
- Where to Put The Flanger In Your Signal Chain? (Quick Tip)
- Where To Put The Looper Pedal In Your Signal Chain [SIMPLE]
Important Things To Note About the DS-1
1) The DS-1 is BOSS’ First Distortion Pedal (1978)
According to their website, the DS-1 is the company’s first distortion pedal and it’s one of their first pedals as well. This thing has been around for a long time and a lot of famous people have used it.

