 Written By :

Something I talked about in my Trident demo is how I struggled to set it up initially. I tried connecting the Trident directly to my PC and it didn’t work properly. I figured it out though.
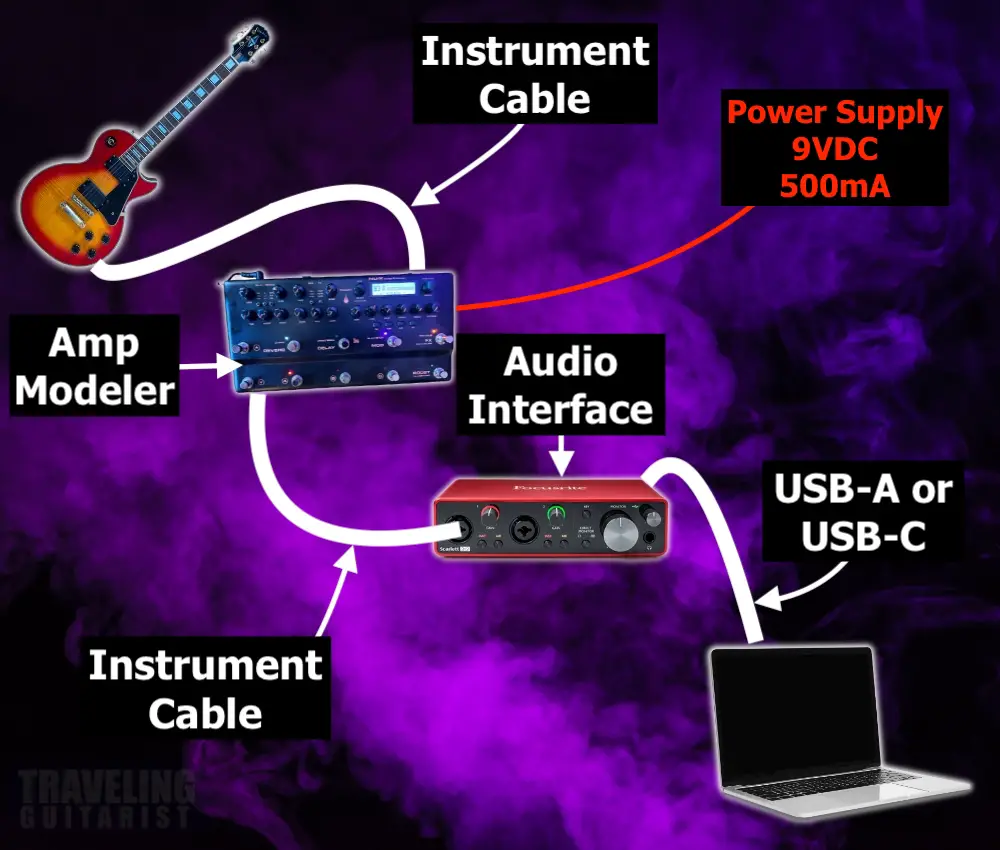
To connect an amp modeler to your PC, connect an audio interface to your computer using the appropriate USB cable (USB-A to USB-C or USB-C to USB-C, as needed). Then, run a cable from the modeler’s output to the audio interface’s input, and from your guitar to the modeler’s input.
How to Connect A Modeler to a PC With an Audio Interface
There are additional ways to set it up too.
For instance, in my other article, I showed how to use the FX Loop/Return method.
This utilizes your amplifier’s power amp and bypasses the pre-amplifier.
1) Connect Your PC to an Audio Interface (with USB-C)
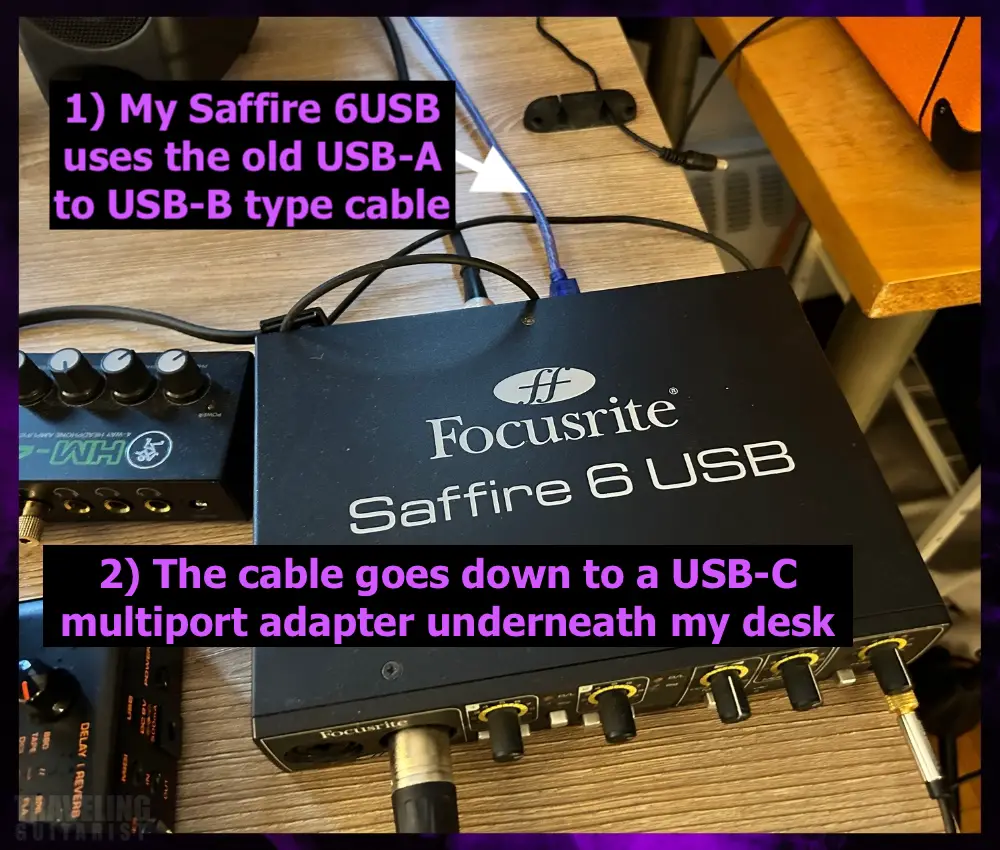
I’d recommend an Amazon Basics braided cable if you want a really solid cable that lasts. You also want to make sure that it’s super long, because it’s better to be too long than too short.
2) Run A Cable from the Audio Interface’s Input to the Modeler’s Output
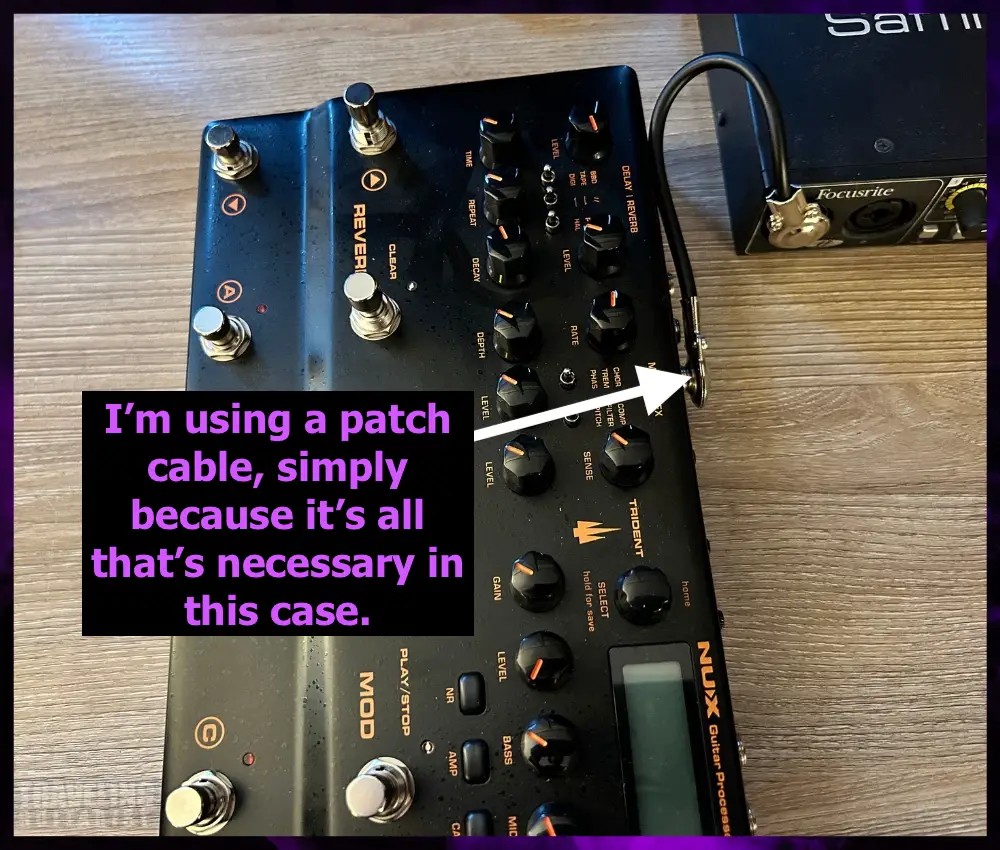
I only used a patch cable because it was what I had handy. It would make more sense to have a bit longer cable for this so you can move the processor around.
Pancake patch cables aren’t the best for this either because they’re hard to pull out of the port when it’s time to remove it.
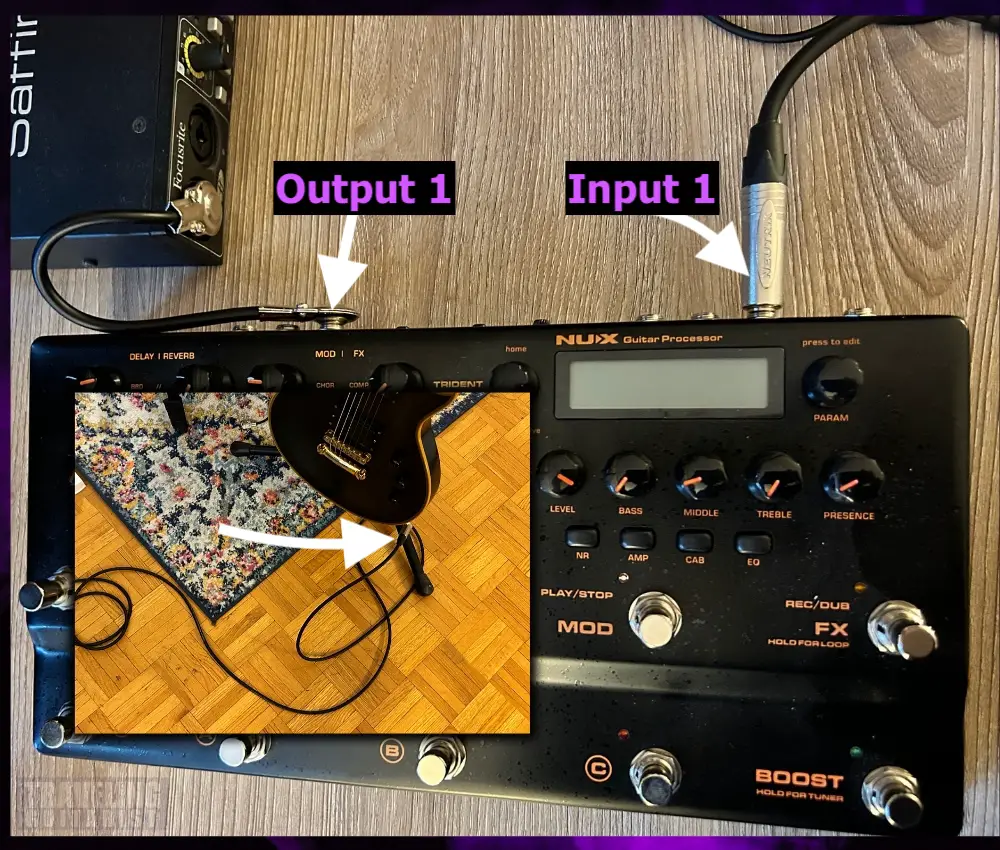
3) Run Another Cable From the Modeler’s Input to Your Guitar
4) Connect Your Power Supply & Turn On the Modeler
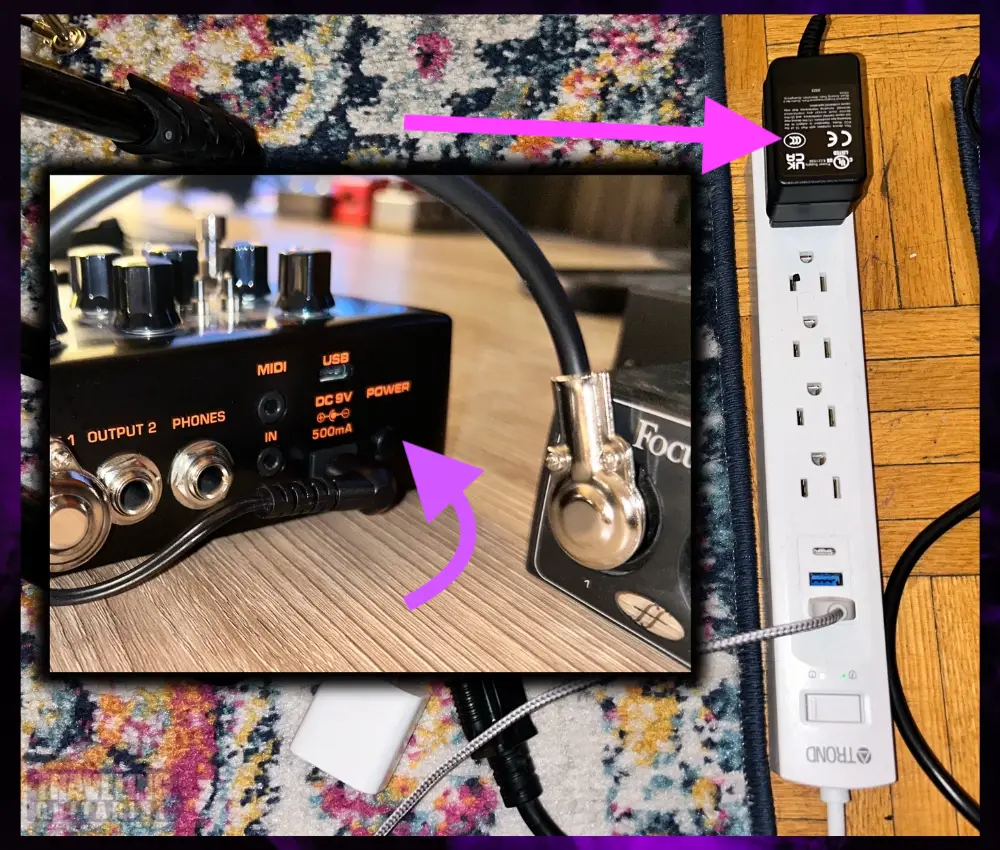
Once you’re connected and your power supply/surge protector are ready to go, turn it on with the ON switch.
5) Open Your DAW and Set the Input & Output Devices
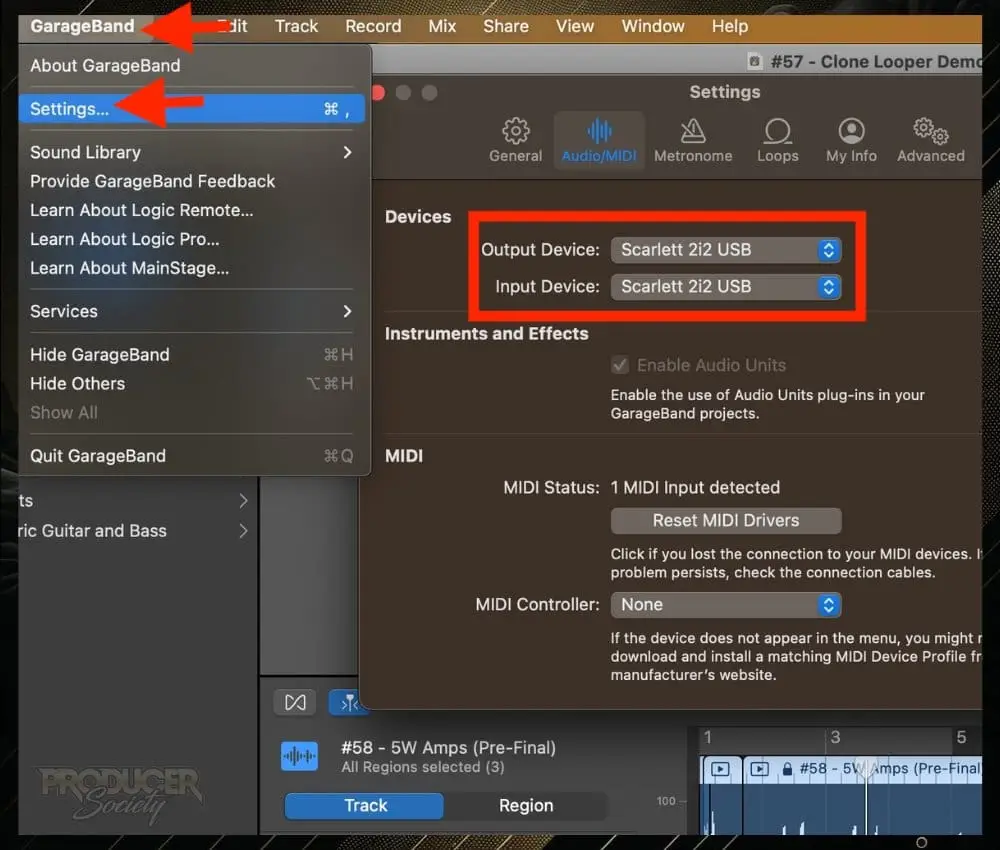
How you set up your output device depends on what you’re using, but you’ll definitely want your input device to be the audio interface in question.
6) Set Your Audio Interface to Instrument Level
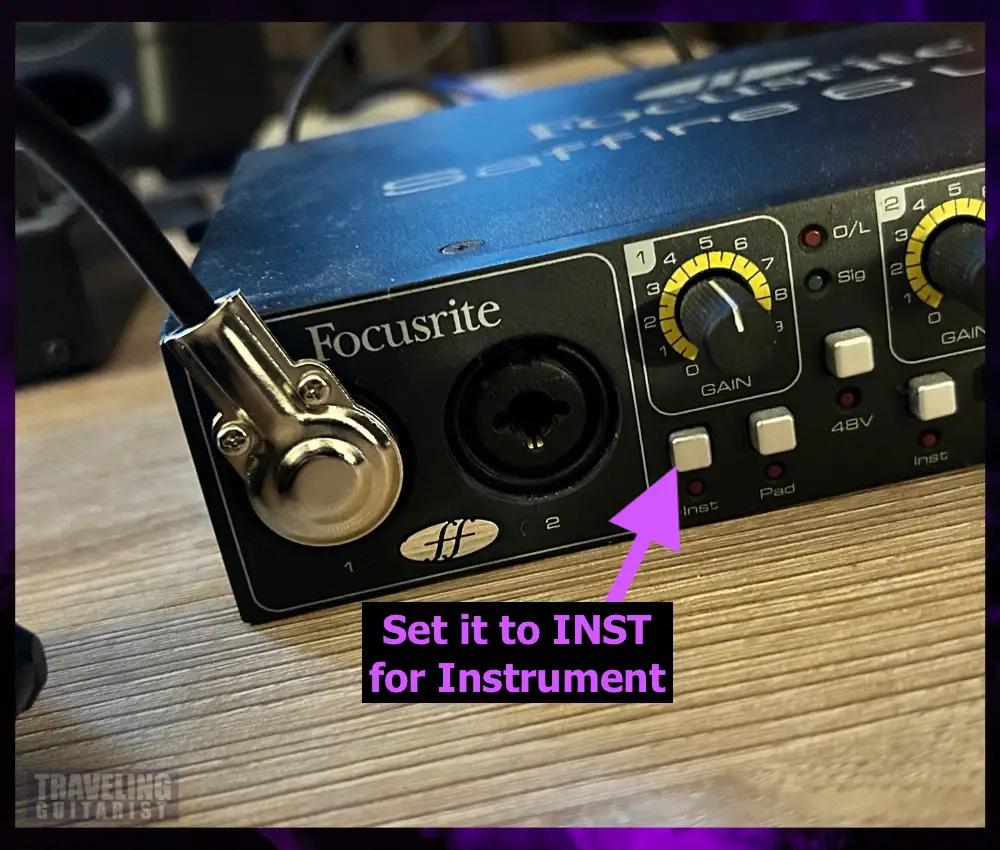
It’s possible to get away with a line level setting; but you’ll probably have to increase the gain on the audio interface by quite a lot which will increase the chance of noise and hiss.
In other words, a line level setting just isn’t the optimal setting for your guitar/bass because these are not line level signals.
When you use the INST switch, it’ll boost your guitar signal up to line level. Guitars and similar instruments have to be boosted in this way.
It could be possible for the Trident to be configured in such a way where it’ll output a line level signal into the audio interface.
Hence, removing the need for the INST setting. However, I’m unaware of a way of doing this.
7) Set Your Audio Interface Gain Low to Medium

It’s best to keep your audio interface gain fairly low otherwise you’ll get a lot of noise, hiss, and other unpleasant digital noise.
8) Adjust the Level & Master Volume on Your Processor
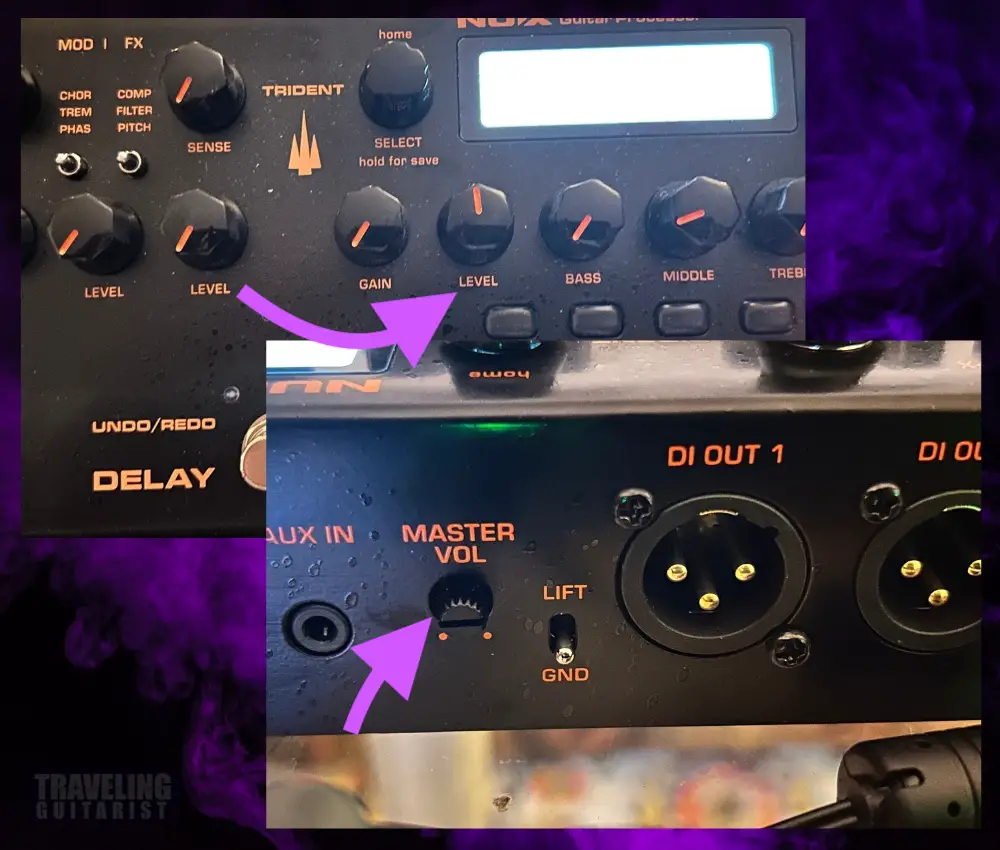
The setting that I had here was perfect. It ended with a really nice sounding tone and a good-looking waveform.
9) Record & Observe the Waveform To Find the Proper Level
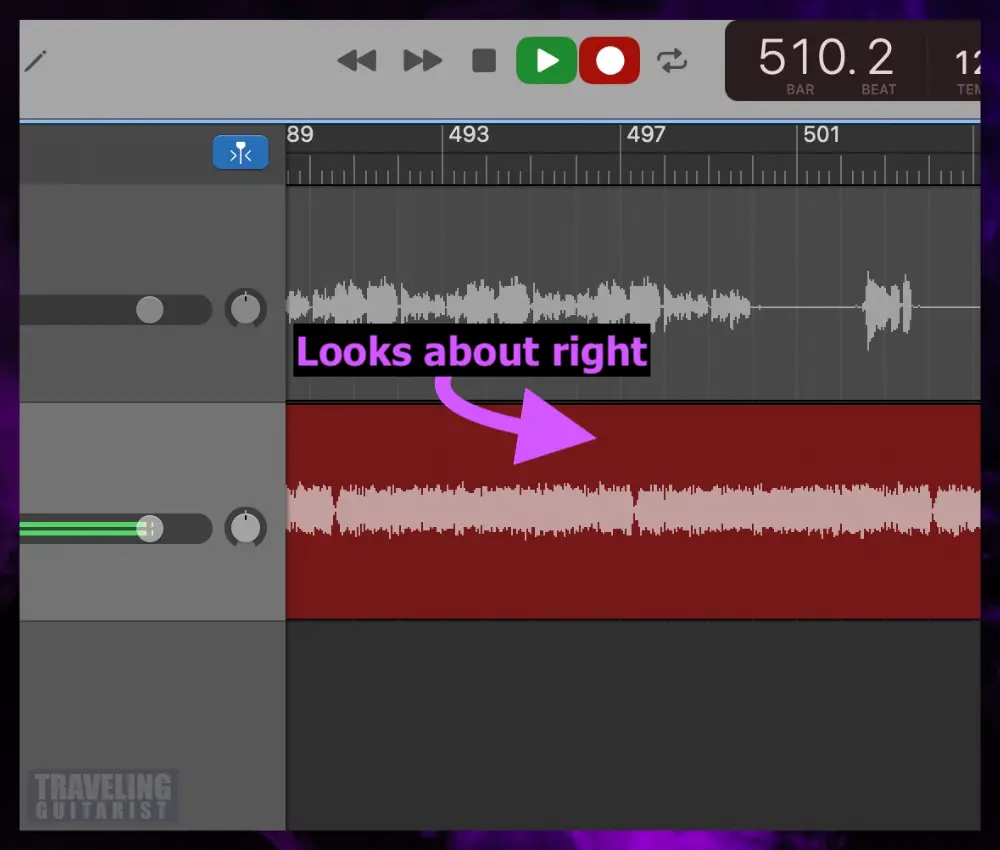
It’s important to listen closely with decent monitors to see if you actually like the sound. Don’t just look at the waveform.
Any thoughts, questions, or criticisms? Let me know how you’ve set up your modeler with your PC in the comments below.
I’m all ears for better ways of doing things.
Other Articles You May Be Interested In

